
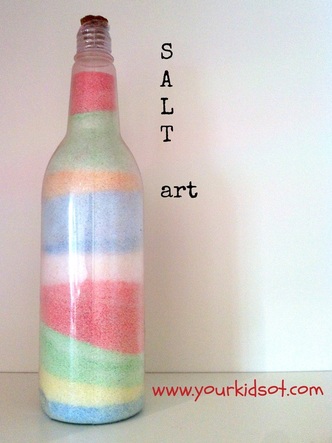
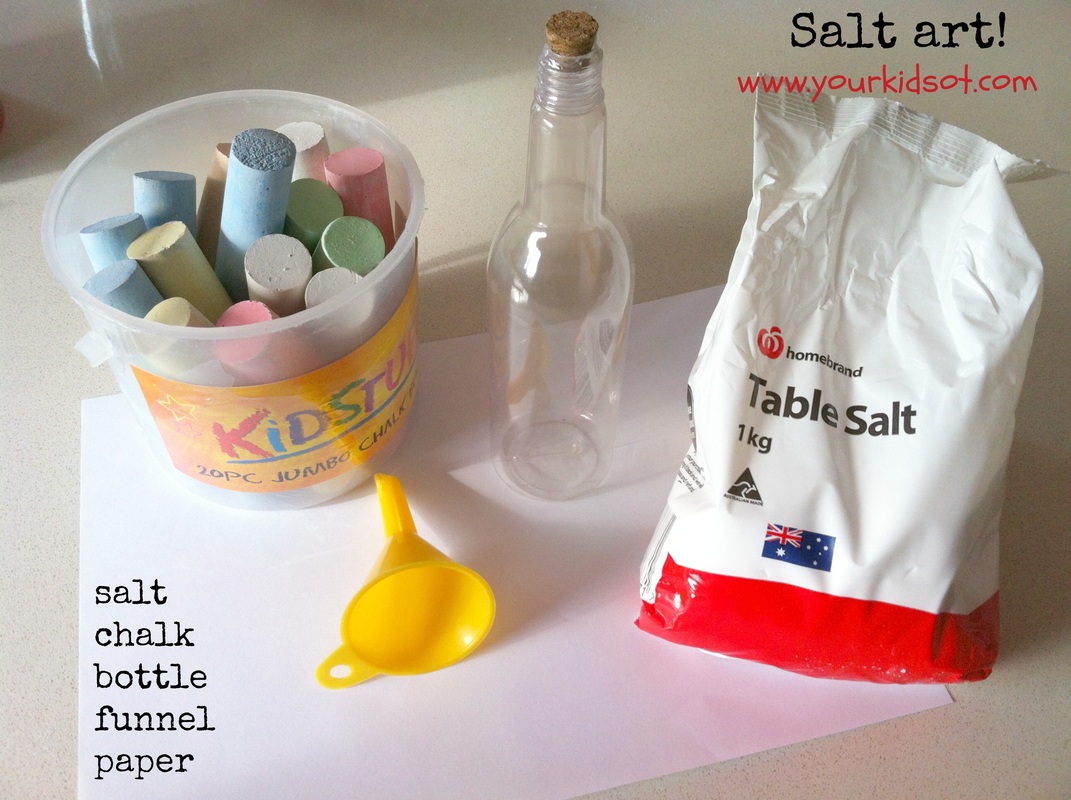
  Beautiful coloured salt art ... the perfect homemade craft for your kids these school holidays! You probably have what you need to create this in your house already!
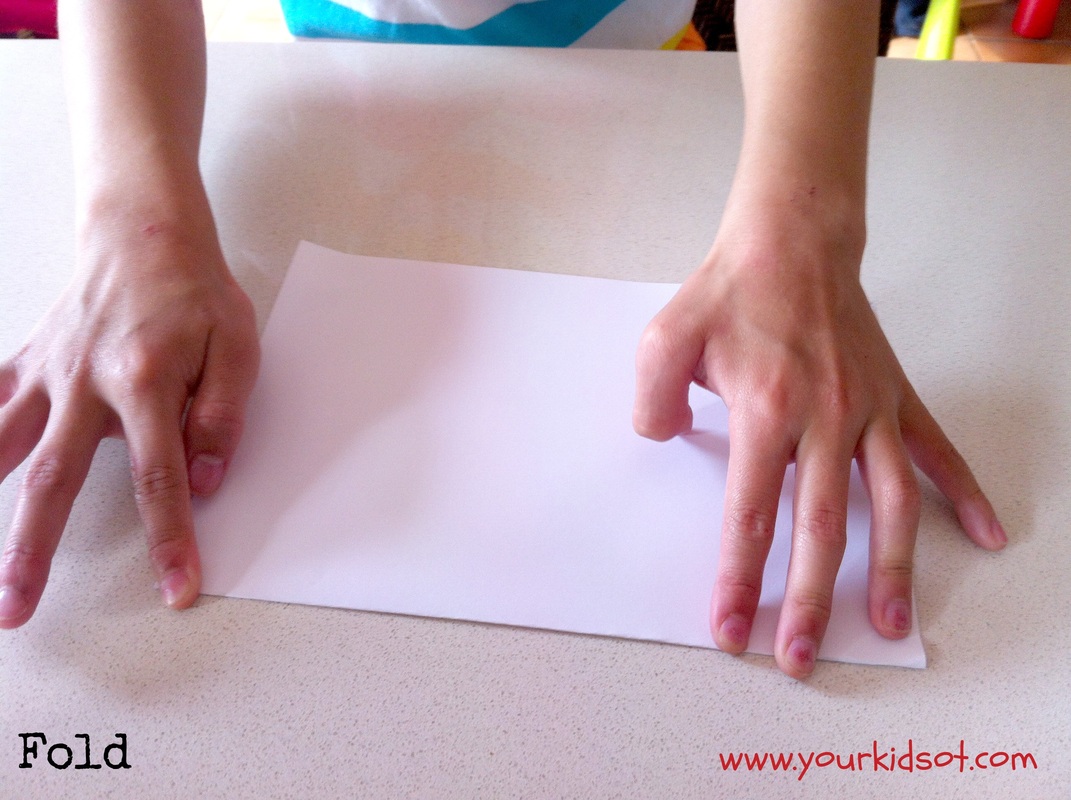
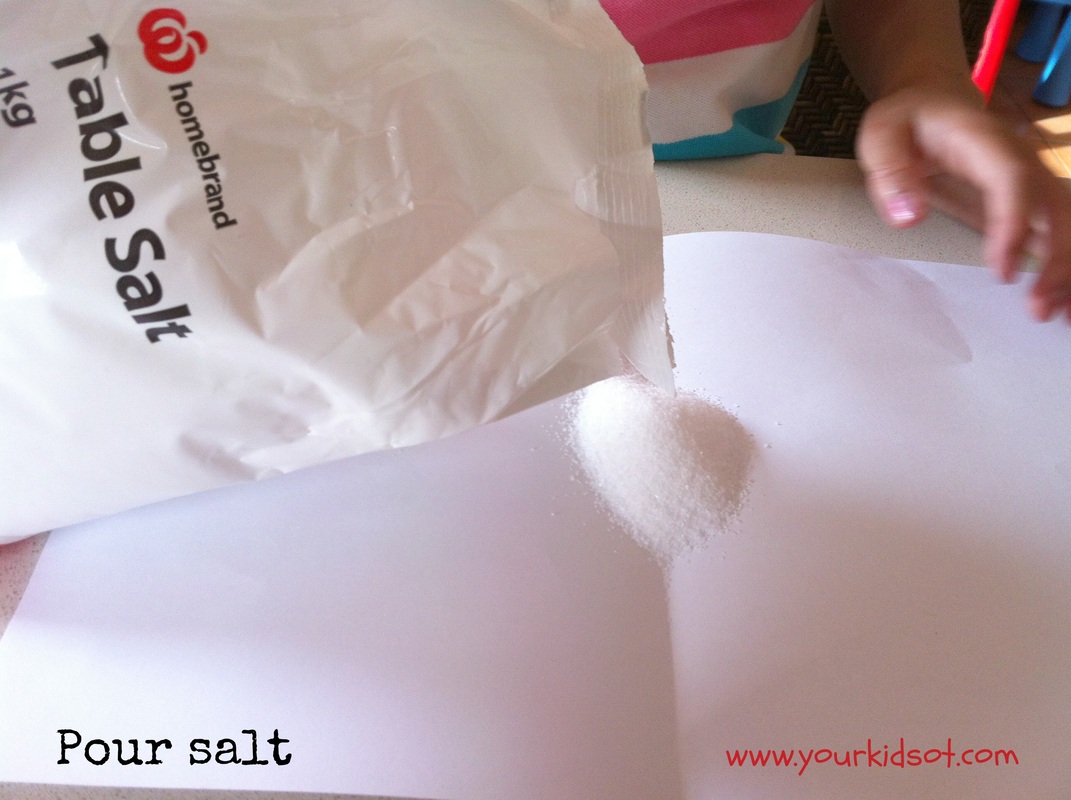
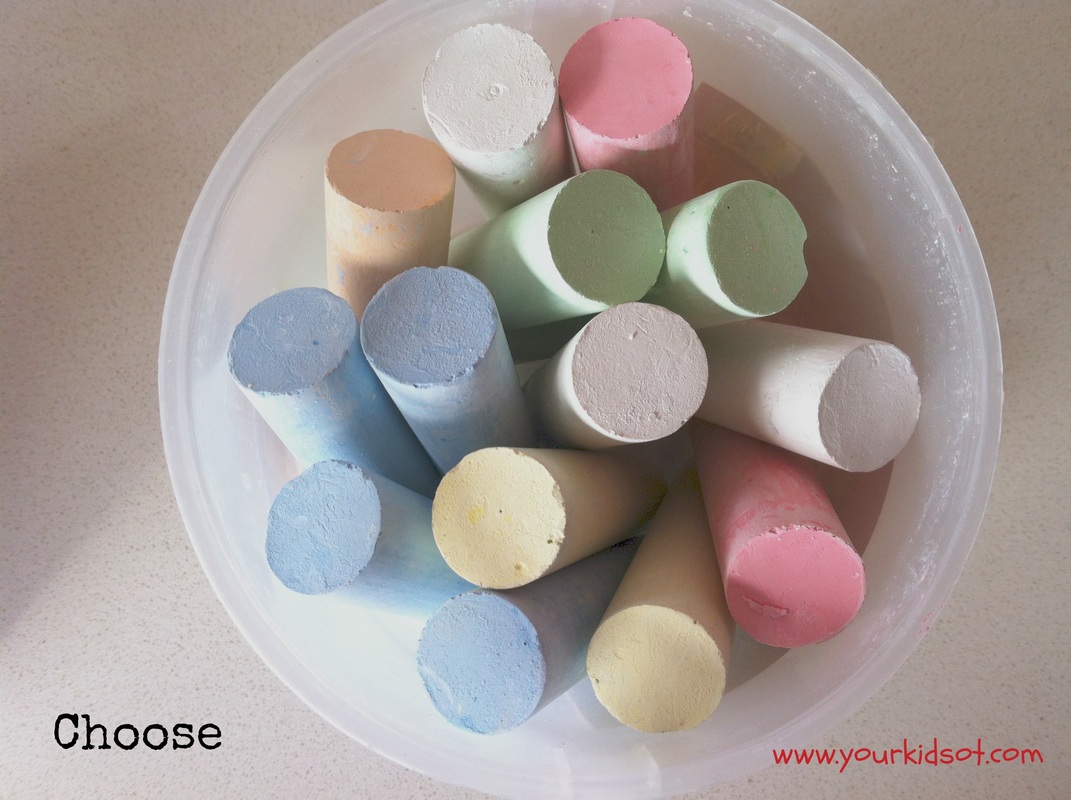
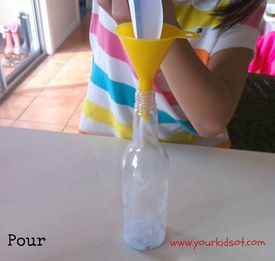
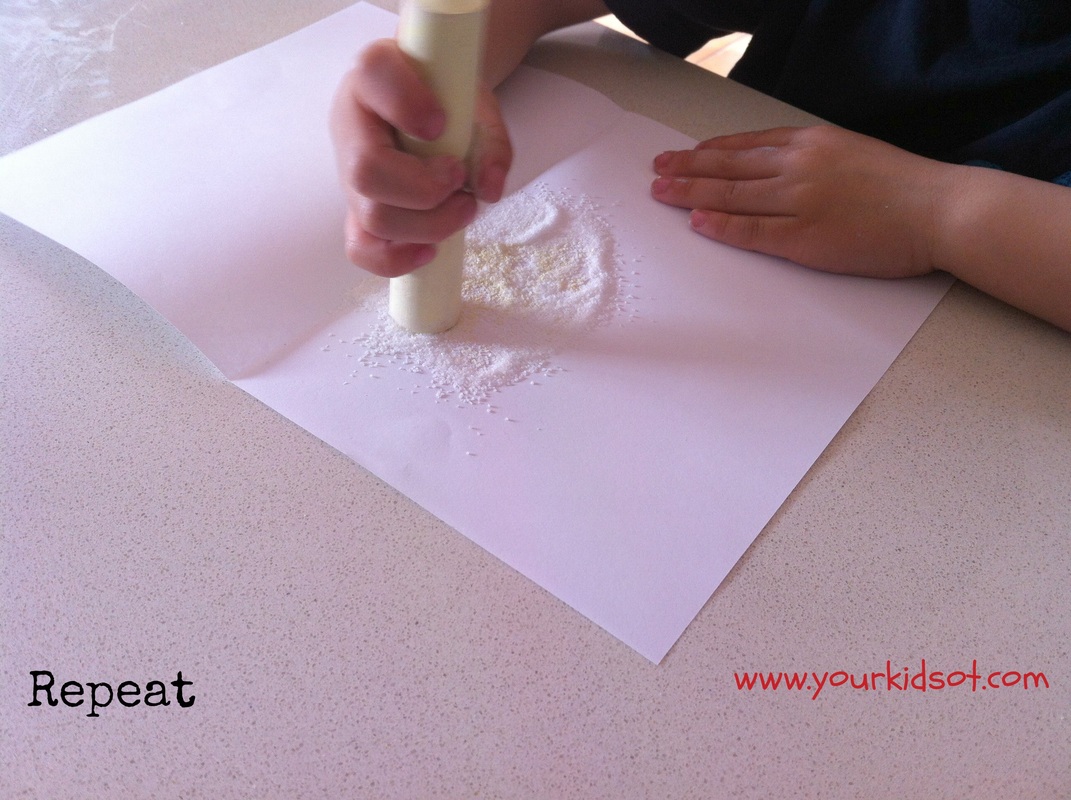
What do you need to do?
This was a fun activity that produced a lovely result. Mr 4 and Miss 7 worked together to do this activity (as I only had one bottle). They both admire it now each time that walk by and are proud of what they have made together. I gave Mr 4 smaller quantities of the salt than Miss 7. They both did well to keep the salt on the kitchen bench top but you may want to consider using a tray during colouring if you are concerned about more salt ending up on the floor than in the bottle. Here are some of the fine motor benefits of this activity:- * bilateral coordination with folding and pressing the paper, * hand strength with colouring in, * eye/hand coordination with colouring in and pouring the salt, and * grasp and manipulation of the chalk. This was a really easy activity to set up and do together (appealing to both my school-age child and my preschool-age child). Of course you don't have to put your salt into a bottle. You could pour it into a tray for rainbow sensory play... although I would recommend it for kids over 3 years of age as you wouldn't want your kids to consume this salt! Have you tried salt art?  Special Note: Thank you for your support of Your Kids OT since I began just 8 months ago in February 2014! I have been producing new content three times a week during these 8 months. I use my own photographs and write/produce/edit all the work done on this website. I have decided to reduce the number of articles I produce to twice a week and will review this again in the coming months.
Please continue to follow Your Kids OT on Facebook and Pinterest as I love to share content by other fantastic bloggers as well as other insights I find along the way. I also love to hear from you! So comment below or on FB and let me know what you like about Your Kids OT! Which days of the week do you like to read this blog? Thanks again! 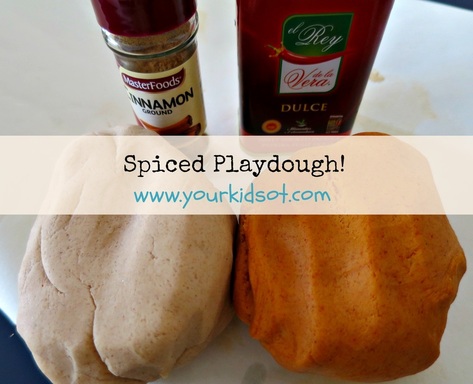 Have you tried adding spices to your playdough? Our sense of smell can be so strong, guiding whether you like something or not. Adding spices to your playdough can really create a great multi-sensory experience for you and your child. My original {FREE} playdough recipe that I published here a few months ago has been downloaded more than 100 times on "Teachers Pay Teachers". You can also get it from the YKOT Shop here. It uses boiling water rather than cooking the playdough and it works!  Instead of adding food colouring this time we added spices (add a generous amount). Mr 4 and I chose smoked praprika and cinnamon. Mr Potato Head came to play when the playdough was made. Mr 4 loves this activity and it is a fun way to use your spiced playdough. For more playdough activity ideas refer to this article. 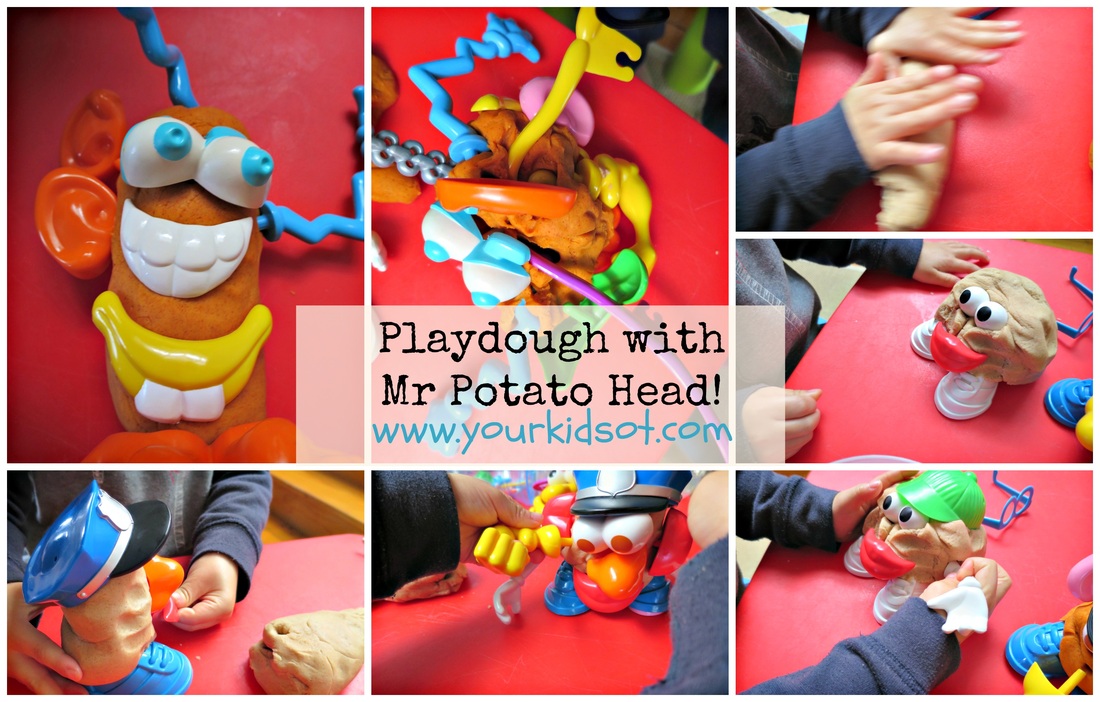 Have you made spiced playdough? Let me know if you do! 
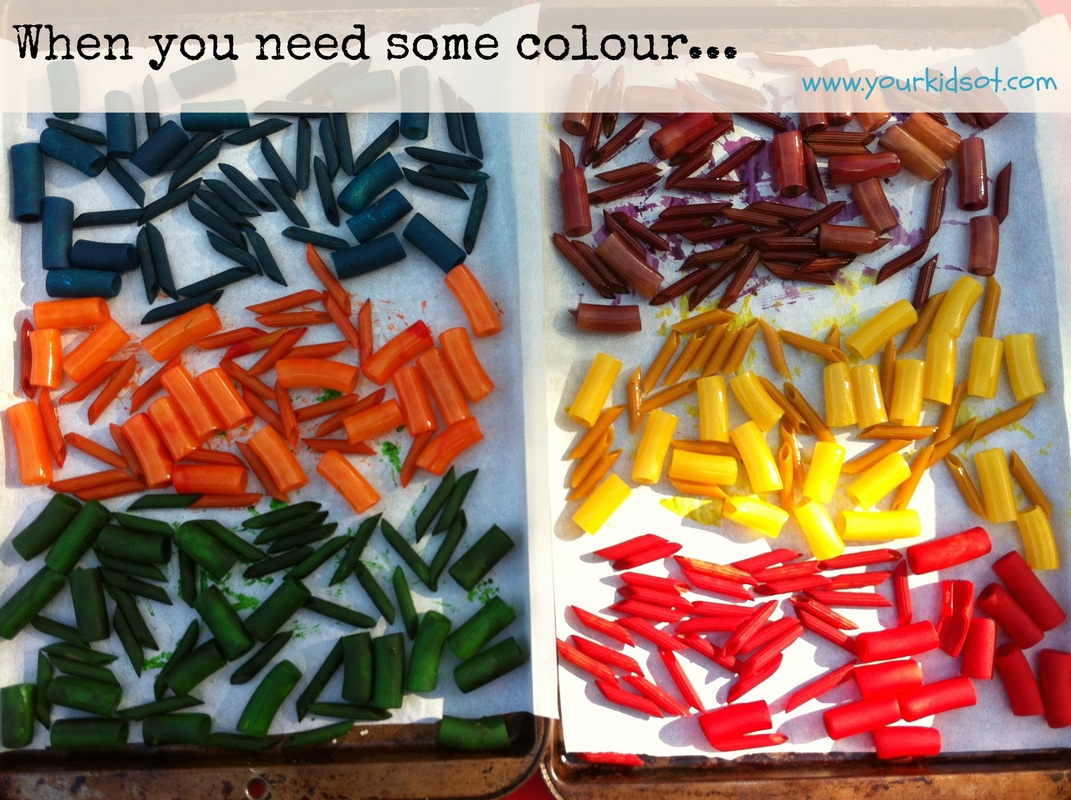
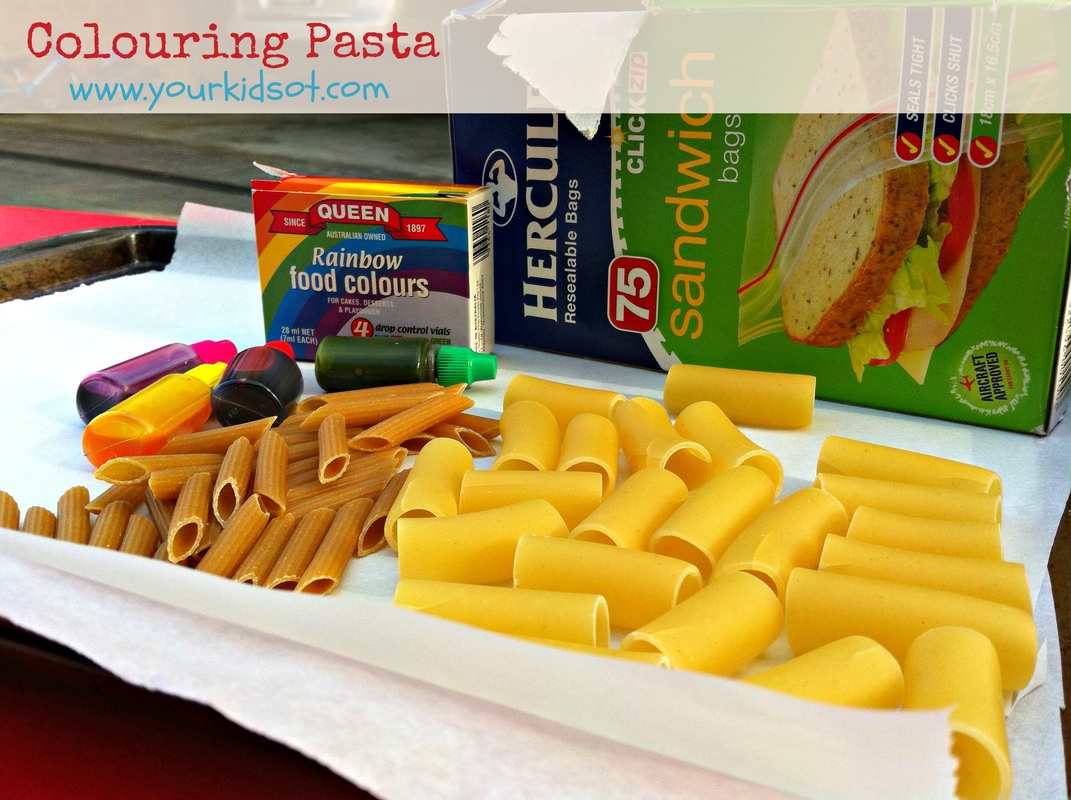
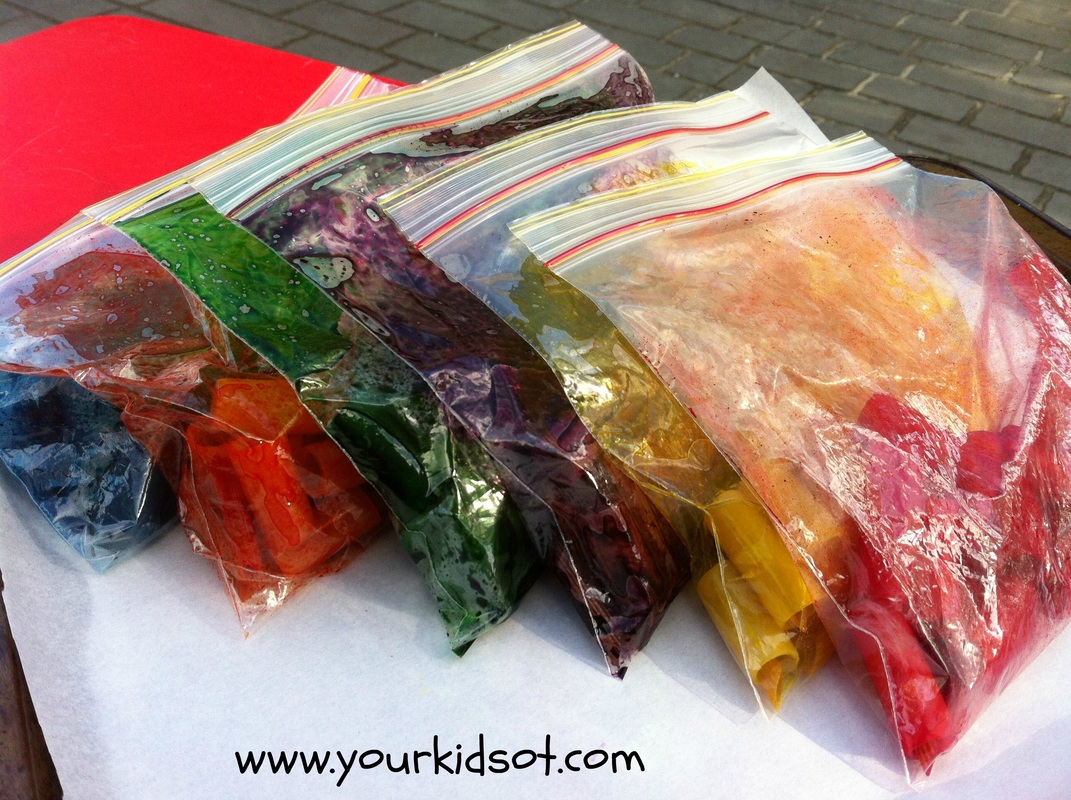
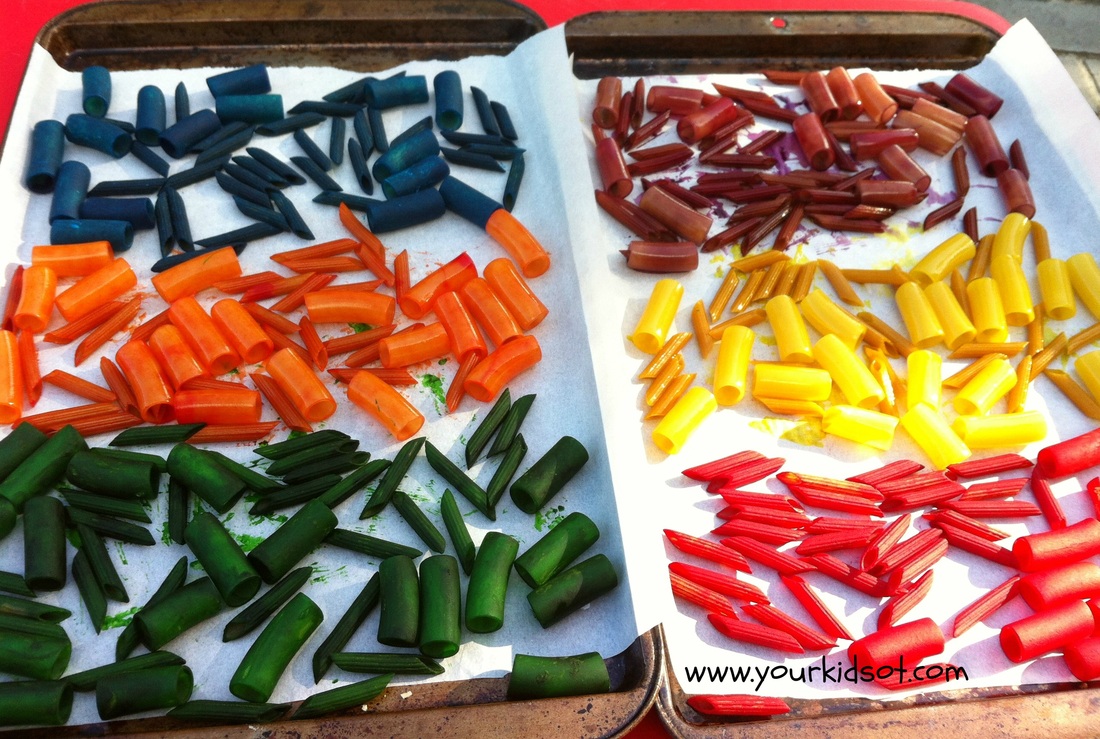
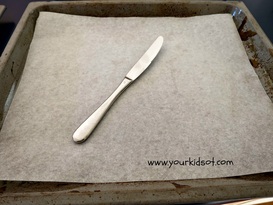
SO...when you need some colour in your life it is time to colour pasta {do you think someone could turn that into a song?}. It wasn't as difficult or time consuming as I thought it might be. Start by picking a warm day...it helps the pasta to dry faster!
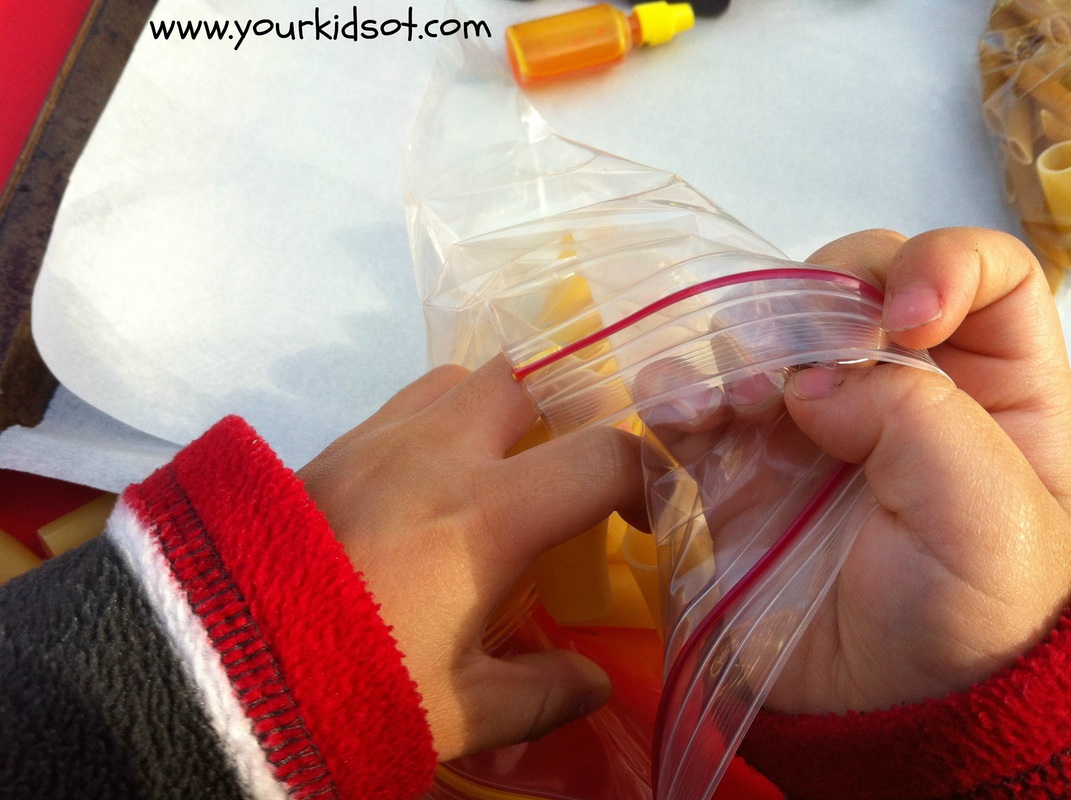
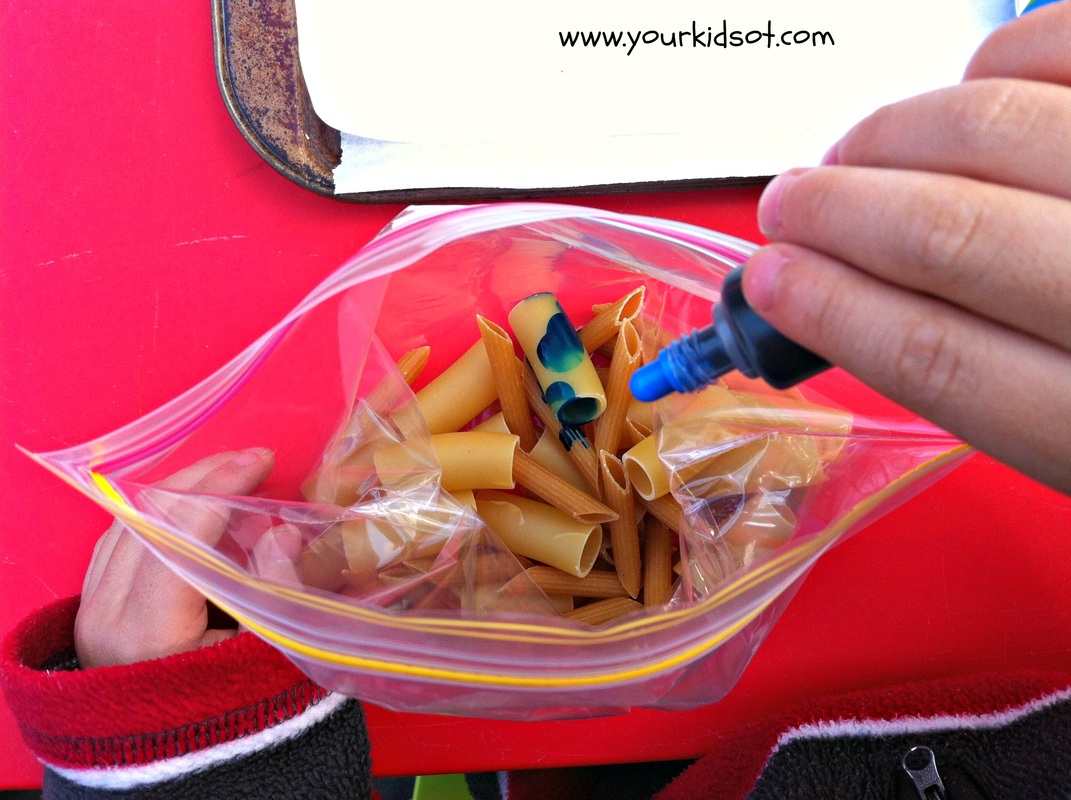
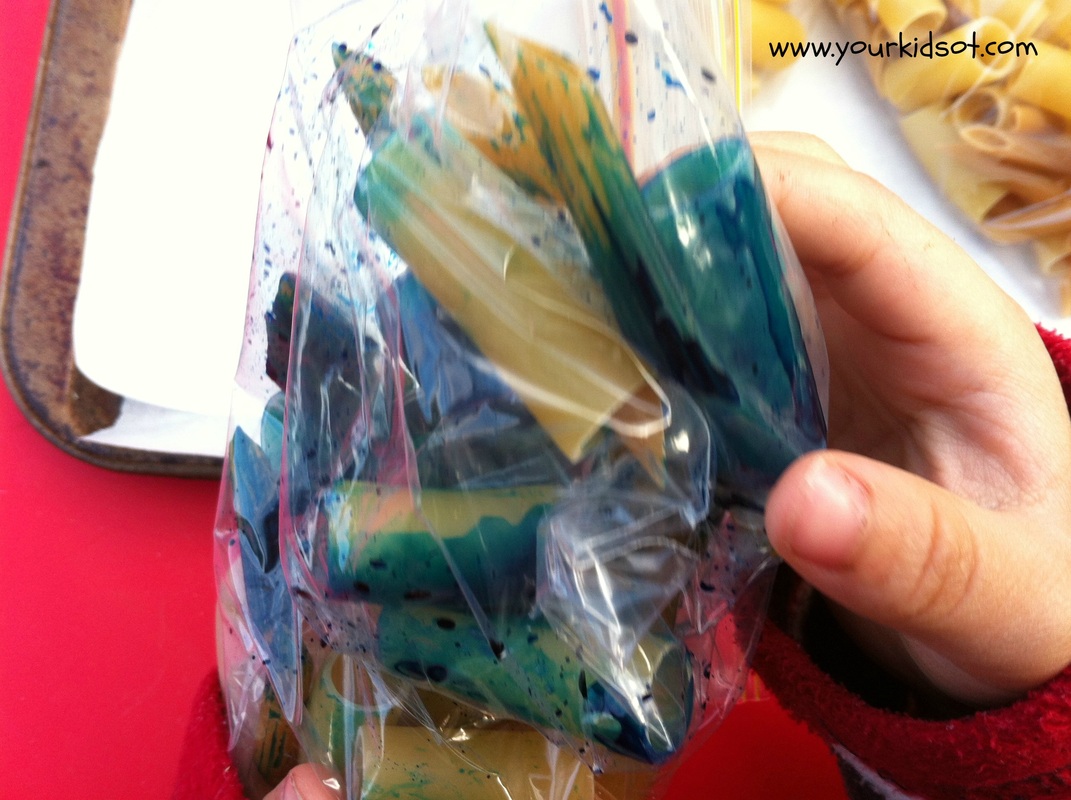
What do you need to do?
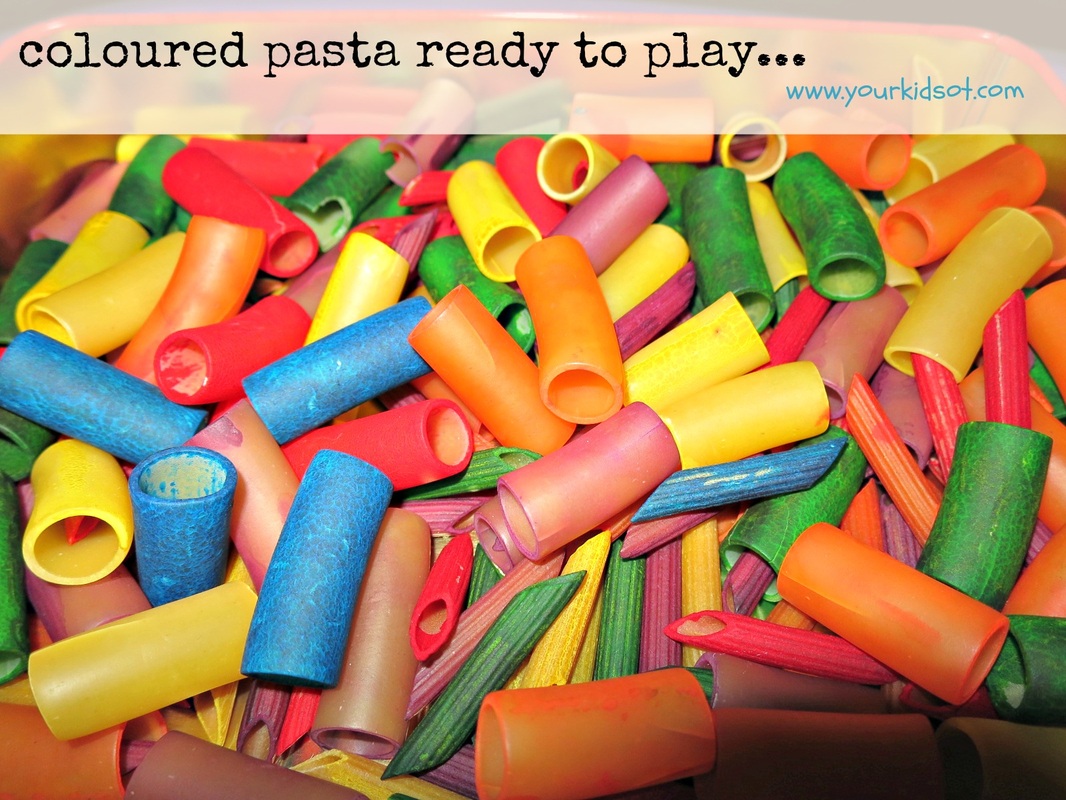
How do you use this?
WARNING - any necklaces or bracelets made must be worn by parent or therapist (or other) of child who has taken the trouble to make it! 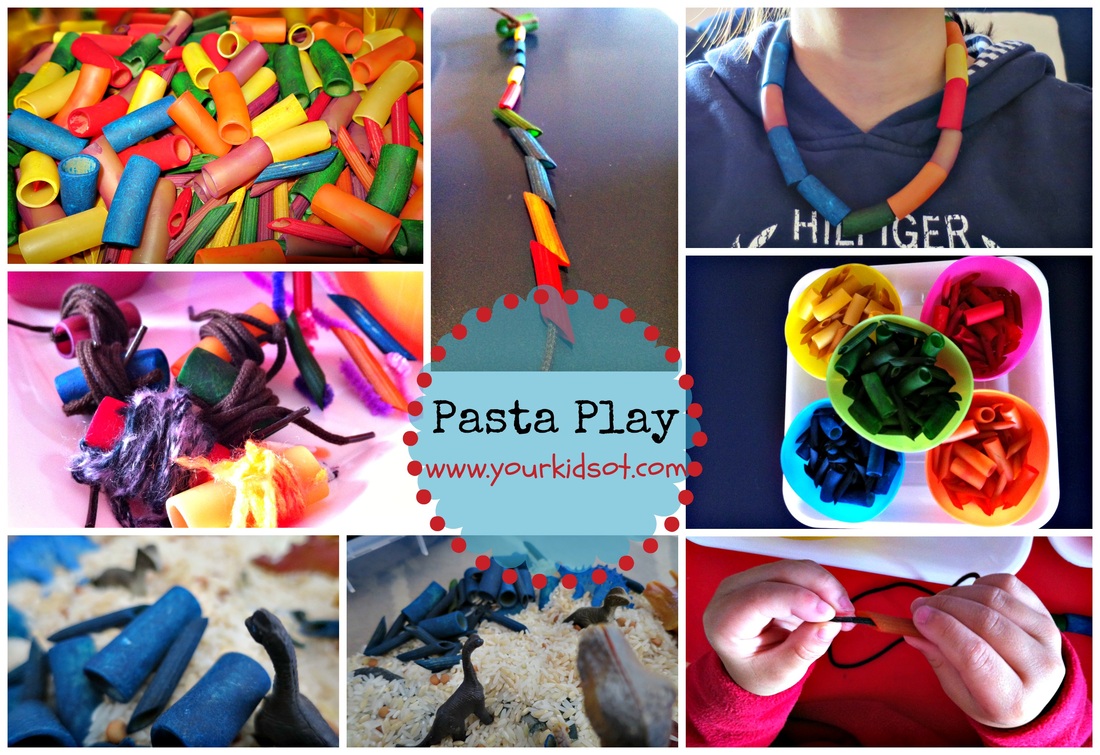 Have you coloured pasta before? How do your kids like to play with coloured pasta?  Note: I am now on holidays and may be slow to respond to emails. I'm hoping to post articles whilst I'm away but sometimes these things don't always work. Thanks for your patience. Don't forget to check out the archives at www.yourkidsot.com. You can find articles grouped into categories for easy access! Thanks for your support!

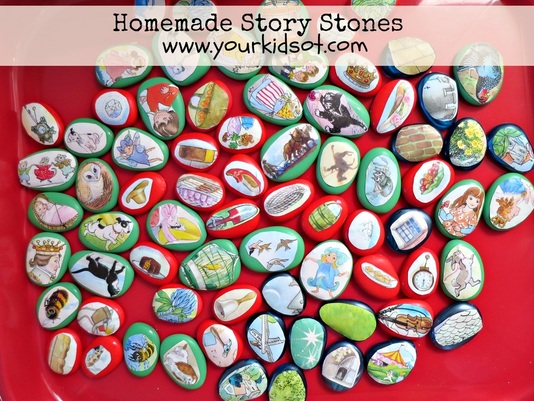
Story stones are a beautiful way for kids (and grownups) to tell a story. The stones act as little visual prompts and can be used in a variety of ways.
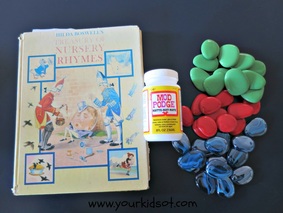
WARNING!! Making these stones does involve cutting up a book. Gasp! This is the first book that I have ever cut up but I think it was worth it. I bought this lovely nursery rhyme book from a charity (thrift) store for $1 and it already had some tears and missing bits {which made me feel better at the thought of slicing it up even further}.
What do you do?
I selected pictures and organised them according to colour. Characters and animals were cut and stuck to green stones (they were the largest), objects were stuck to red stones and background pictures were stuck to the blue stones. 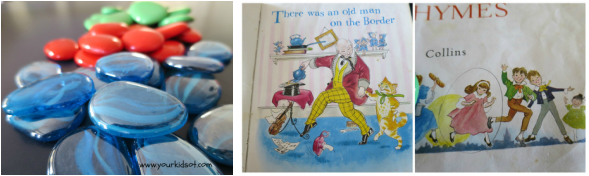

How do you use these stones?

I made these story stones one evening whilst I was watching TV. I found it relaxing doing this type of craft. You could easily include your children in making these stones as they may enjoy selecting, cutting and pasting.
When I first lay out the stones, Mr 4 needed some modelling in picking stones and telling a story. Miss 7 instantly picked all the animals and embarked on her story about an animal shelter. I was apprehensive about Mr 4 taking to the stones as there are not a lot of "stereotypical boy pictures" such as trains, diggers, dinosaurs, cars, etc. I was pleasantly surprised that the story stones held his interest and he returns repeatedly to tell a story. The stones are beautifully smooth and there is something nice about holding (and stroking) the stone as you talk about the picture. These are stones that will keep on giving as your children use their imaginations. Do your kids enjoy telling stories? Will you do this homemade activity with your kids or without them? 
If you enjoyed this article, you may also like...
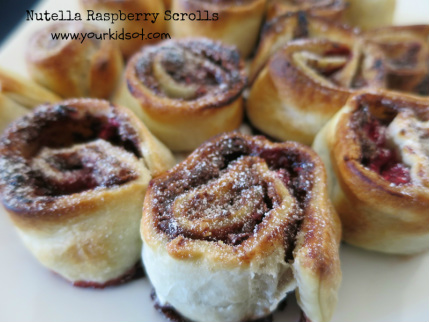
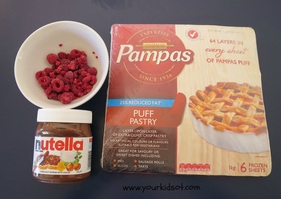
Method 1. Preheat the oven to 210°C or 410°F. 2. Put out the sheets of puff pastry on the bench top for 5 minutes (ie. thaw). 3. Spread a layer of Nutella onto the puff pastry. 4. Sprinkle the raspberries over the Nutella. 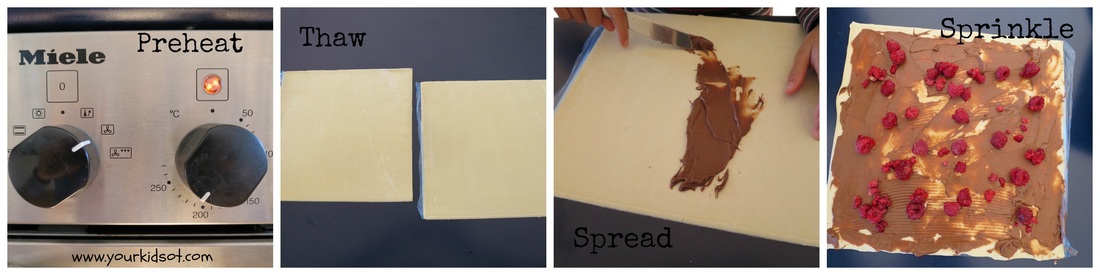 5. Roll up the puff pastry using the plastic sheet to help you (lift and push forward). 6. Cut up the puff pastry into 3cm scrolls. 7. Lay out the scrolls onto the baking tray so the scrolls face up. 8. Bake in the oven for 10 minutes until golden. 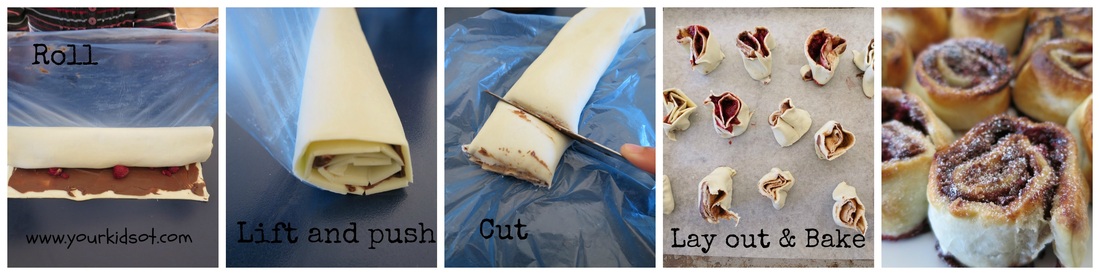 Mr 4 and Miss 7 loved helping to make this recipe! Miss 7 especially loved the rolling with the help of the plastic sheet. Everyone loved eating them {even Mr YKOT}. You will find an extended version of this recipe at the Your Kids OT shop. All recipes here have been designed for kids to do as independently as they can or for children who have a disability. Here is a preview of how the full recipe looks with bigger photographs for each step. Enjoy making and eating these delightful scrolls... Happy Baking!  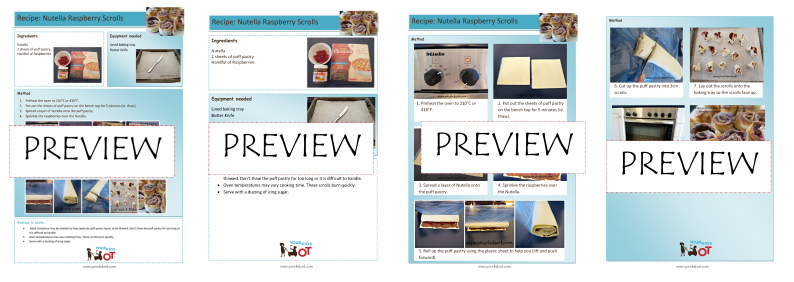 Preview of Nutella Raspberry Scroll Recipe
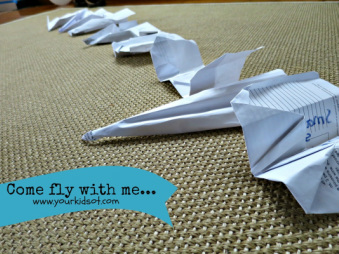
In the Miller Function and Participation Scales there is an "origami" subtest that measures this against age appropriate norms. Miller describes the skills needed for this activity to be similar to participation in home activities (eg. folding towels, napkins, clothes or the newspaper) or school activities (eg. turning pages in books or folding paper for art projects). 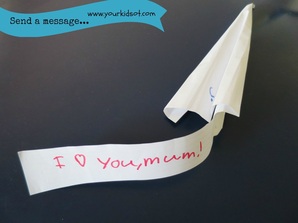 Mr 4 received a terrific book for his birthday recently with over 50 examples for folding paper planes. Whilst he needs lots of help to complete the simple ones, Miss 7 has taken over the book and has loved following the instructions to build a variety of planes. Miss 7 and Mr 4 have spent hours flying the planes {outside, inside, down the stairwell}, decorating them and turning them into characters for stories (mostly Miss 7 with that one). Miss 7 has also attached messages to some of her planes (see the photo). Best of all it is something despite their different interests and abilities that they can do together. Here are instructions for one of Miss 7's favourite planes ... the "acrobatic". Make sure you press down after each step. 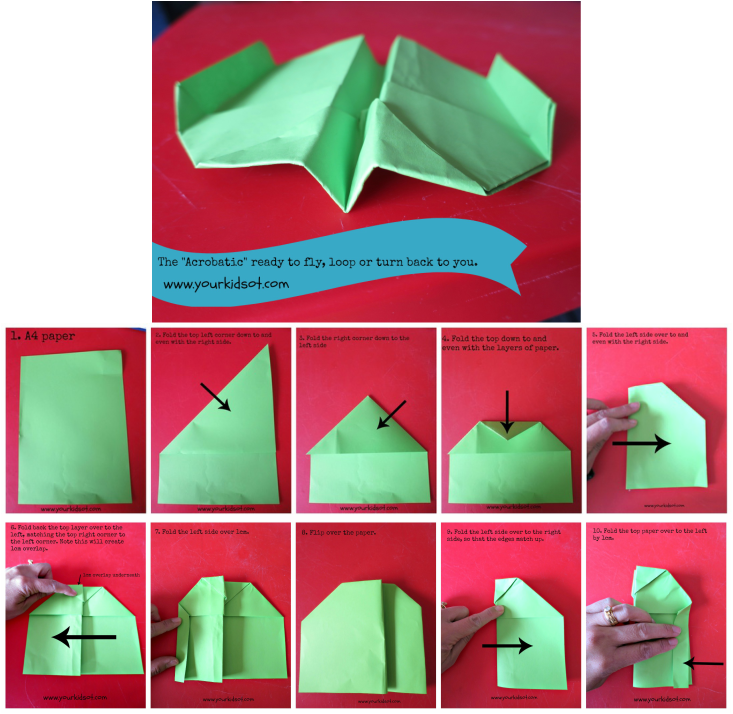 Do your kids enjoy making paper planes? What is their favourite? Send me a photo of your creations, I would love to see them!  Note: This post may contain affiliate links. All photos and comments made here are my own.

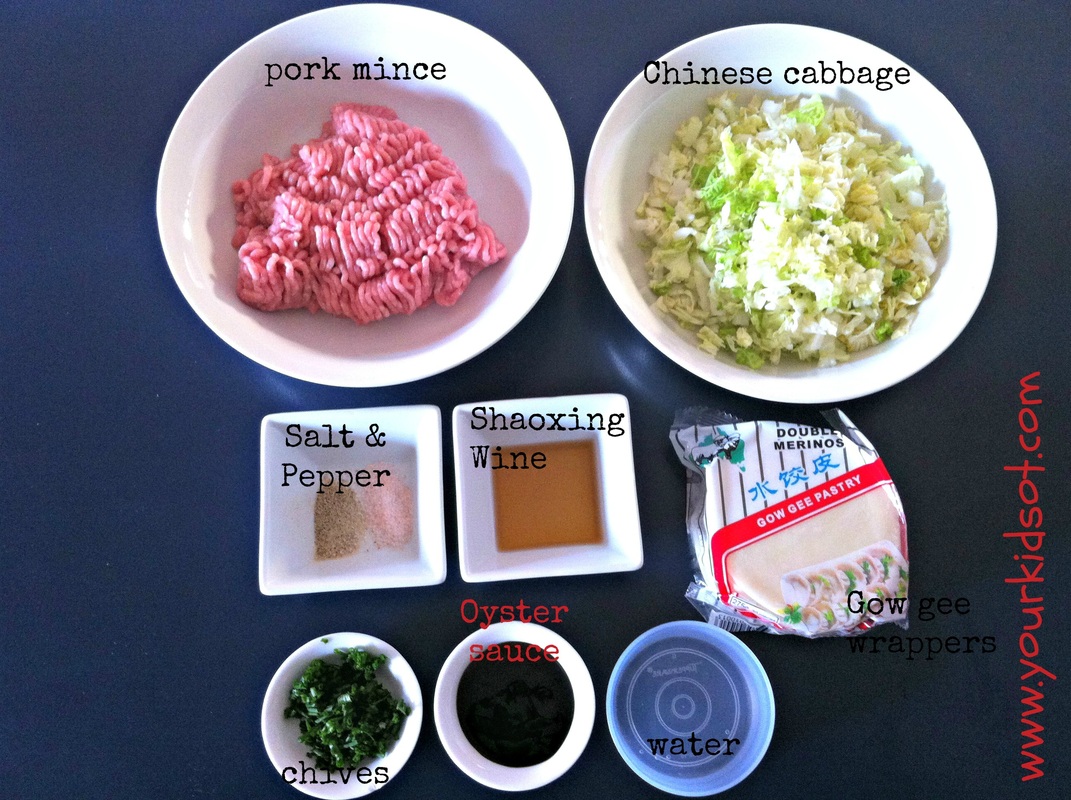
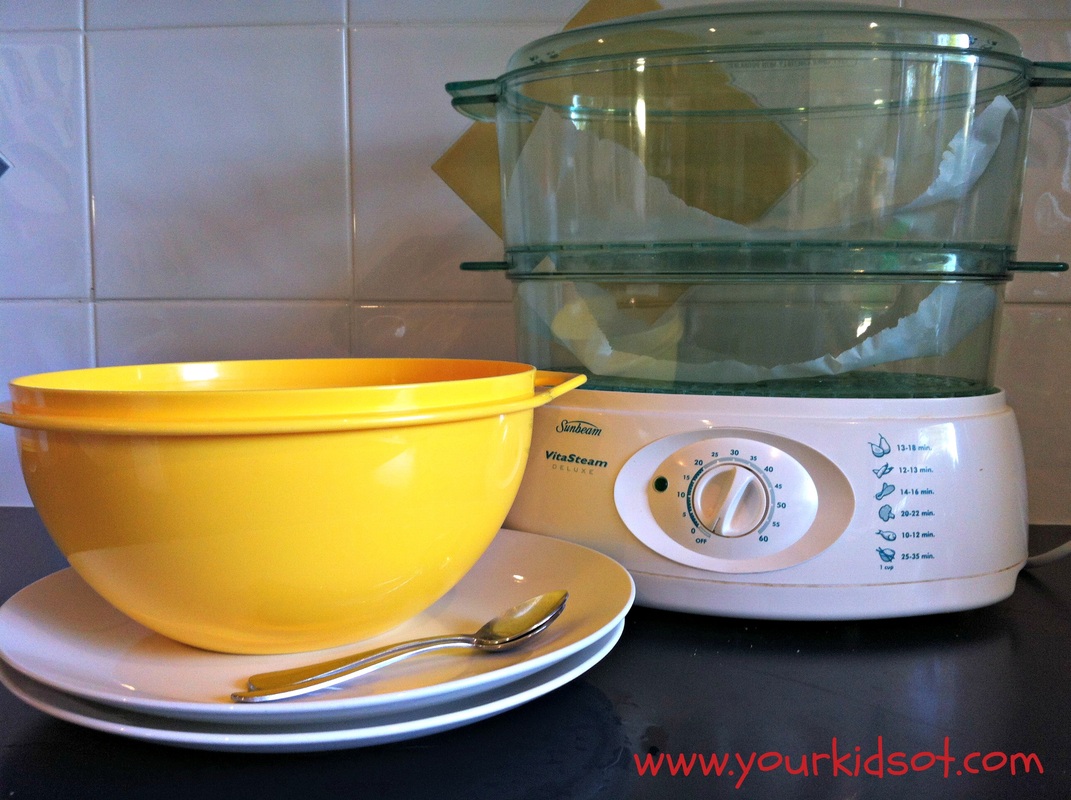
There is a little bit of preparation before starting this recipe - measuring out the ingredients and finely slicing the cabbage and chives. You will be the best judge whether your kids can help with this or not. If you can't find Shaoxing wine, just leave it out. Kids will need supervision during the "steaming" part of this recipe depending on whether you steam on a stove top, steam over or electric steamer like I did. Tongs might be helpful to remove the dumplings after cooking.
Method 1. Place pork mince, Chinese cabbage, oyster sauce, chives and Shaoxing rice wine, salt and pepper into the mixing bowl. 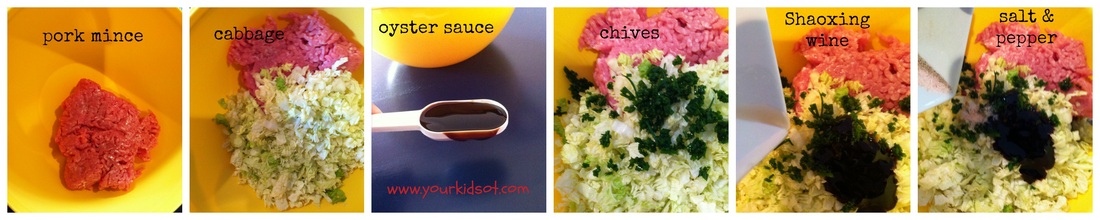 2. Mix with your hands until all ingredients are combined. Wash and dry your hands. 3. Spread out a layer of Gow gee wrappers onto a plate. 4. Place a heaped teaspoon of meat onto a wrapper. 5. Using your finger spread some water on the edge of one wrapper. 6. Fold the wrapper over covering the meat and press down. 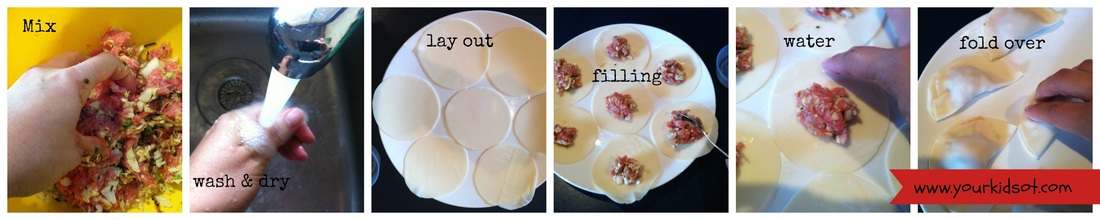 7. Press the wrapper together and pleat. (To pleat pinch the wrapper and fold over, repeat). 8. Repeat steps 3-7 until all of the filling mixture is used. 9. Steam the dumplings in a single layer for approximately 12 minutes. 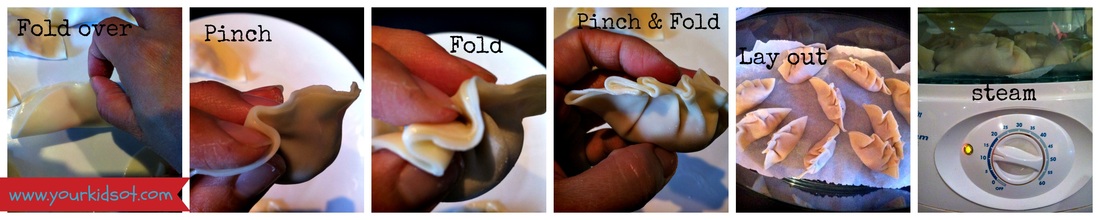 10. Serve dumplings with a dipping sauce or with a noodle soup. 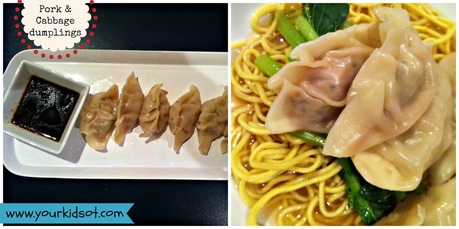 Hmmm... I'm not sure why I said 2 plates but I suppose it means you can lay out more wrappers or maybe it was for the finished dumplings... You can buy ready made dumpling dipping sauce from your local Asian grocery store or supermarket. Grownups might want some chilli sauce too! You can find an extended version of this recipe with photographs for each step at the Your Kids OT shop. All recipes have been designed for kids (with adult supervision) or for children with a disability. Have you made dumplings before? Enjoy!  Looking for more recipes to get your Kids in the Kitchen? Try these...
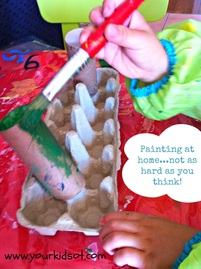 Congratulations for getting past the title...are you someone who says "I leave painting for preschool!" or "I don't let my child paint at home"? There is nothing wrong with this. I don't think that I ever painted at home as a young child... However, painting can be great fun and a way for your child to express themselves. Some of the concerns that parents have are "my child is impulsive", "my child has poor attention", "my child will paint a few scribbles and then has had enough", "there is so much effort in setting up and clearing away", "my child doesn't like it".... Any of these ring true for you? Painting at home does not need to be a daunting thing with young kids. The key is preparation and organisation (from the grown up). It may be "saved up" a rainy day activity or for the school holidays when there is less rushing around. Here is a simple painting project for toddlers and preschoolers with a few tips to make it successful for you and your child.
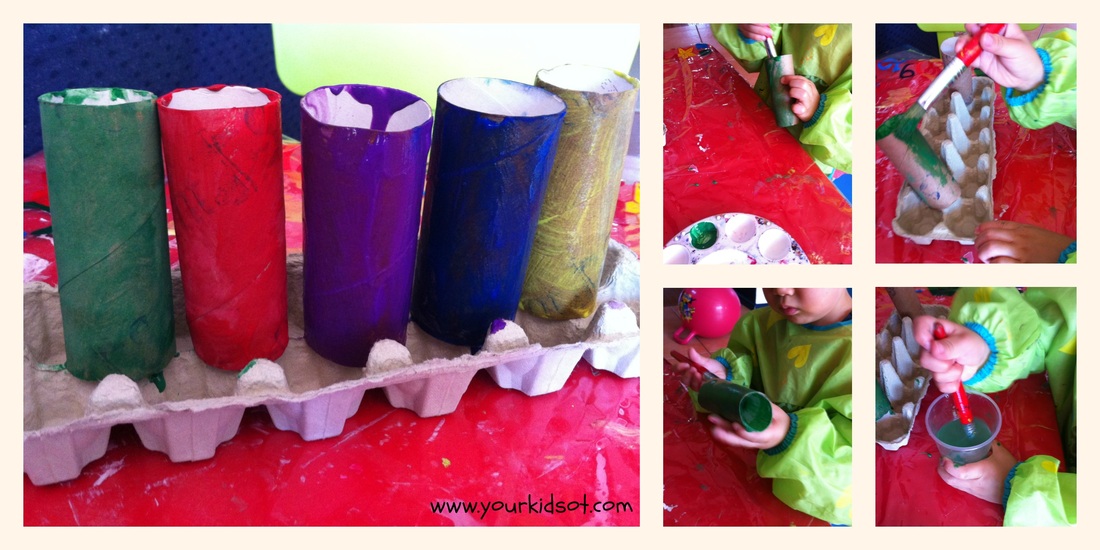 #Otlifehack: using egg cartons to support painting. Presenting one colour and one cardboard roll at a time reduces impulsive behaviour. It helps a child with poor attention skills to focus on the one activity. It also helps to provide a clear "finish" point when the roll is covered in paint. The egg carton provides some stability during painting and reduces the amount of "touching" for those with tactile defensive reactions to paint.
So hands up if you shudder at the thought of painting with your kids? I hope these simple tips make it a less daunting activity to consider. It may not be an every day activity for your household but it is possible! Let me know if you step out of your comfort zone for this one.... If you enjoyed this article you may also like...
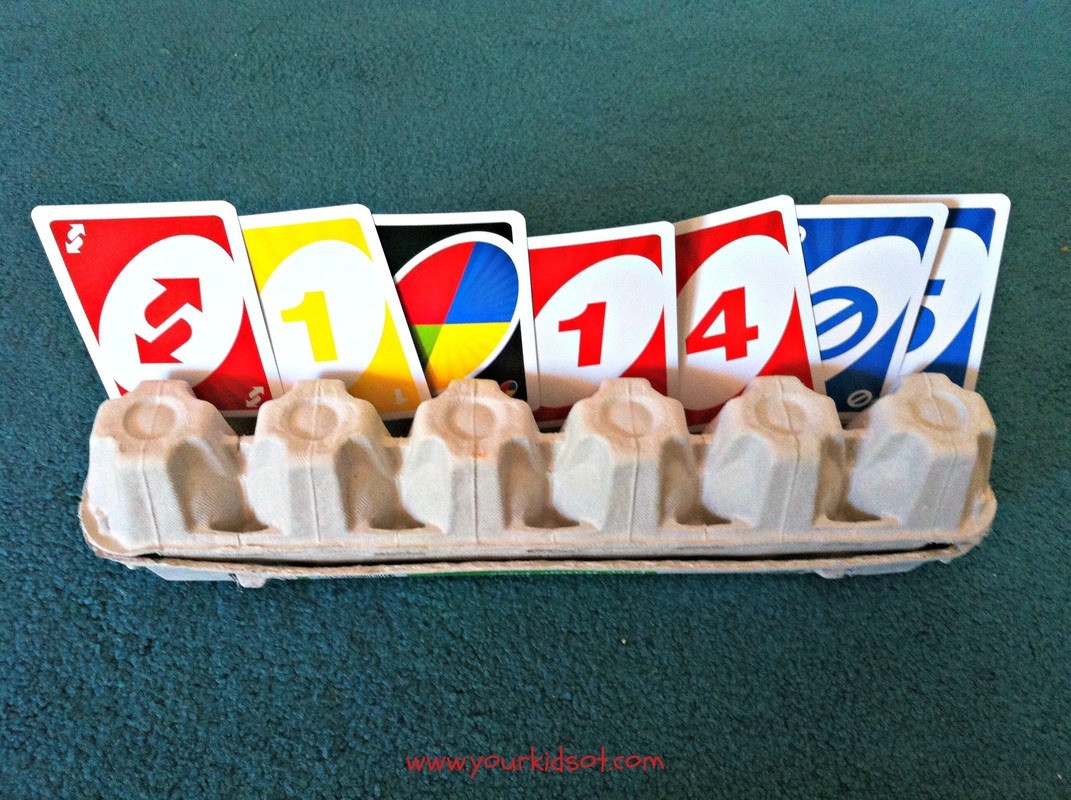
The #OTLifeHack campaign (during the month of July) is an international collaboration between occupational therapy associations from Canada, the US, Britain, Ireland, Spain, New Zealand and Australia. A life hack is any trick, shortcut, or new method that solves an everyday problem, and the #OTLifeHack campaign aims to share these simple, bite-sized, consumer-friendly tips for easier daily living by using the power of social media. The campaign is taking place on Twitter, Facebook, Instagram and Google+ right now. What’s your best OT Life Hack? Search the hashtag, follow OT Australia on Twitter or Instagram, or on Facebook and join in the fun! I'm just learning about hastags but if you follow on FB... you can search #OTlifeHack on FB to find lots of brilliant ideas too. Here is one my #OTLifeHack ...playdough unstuck. 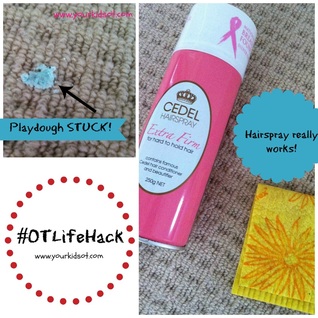 Have you ever had this problem? Playdough stuck to carpet. Dried playdough. The solution for removing it was relatively simple. I took out my hairspray. Yes, it worked! You have to trust that the after photo is the same patch of carpet but it is just a few sprays of hairspray and a damp cloth. Done. Back to original state~ reasonably clean carpet. Simple solution to an everyday problem. 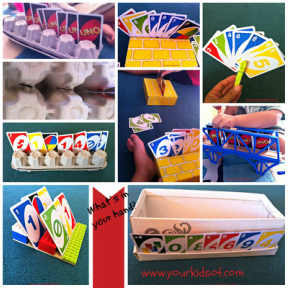 You may have also read a previous post I wrote about various ways for little ones to "hold" their cards. Read it here. Simple solutions to an everyday problem, that is what OT's are dubbing an #OTlifehack. Today I am also linking up with some other OT bloggers. Make sure you check out their #OTlifehacks too! Note that these links will be live approximately 7pm Sydney time tonight so please come back again to check these out if you are reading it earlier. What's your favourite #OTlife hack? Have you tried hairspray on stuck playdough?  Disclosure: This is not a sponsored post for hairspray!  School holidays are a great time for kids to get into the kitchen. They can measure things, pour, stir, melt, shake, sift .... and eat!! Here are two simple recipes that I have written about previously that will get your kids into the kitchen (click on the photo or title). I would love to see any photos of your kids in the kitchen or their kitchen creations! Send me a photo.
P.S. I have been asking my FB followers to send in photos of their babies doing tummy time this week. I have loved seeing all the gorgeous babies. Remember tummy time can be on the floor, on a gym ball, on your arm, on your chest, on your shoulder....If you would like to contribute a "tummy time" photo please email your photo to [email protected]
Thanks for your support of Your Kids OT! I really appreciate it! |
AuthorHi, I'm Cindy and I am an Occupational Therapist. I enjoy working creatively with children to see them reach their potential. Read more about me here. 
SEARCH THIS SITE

Archives
June 2024
Categories
All
Popular Posts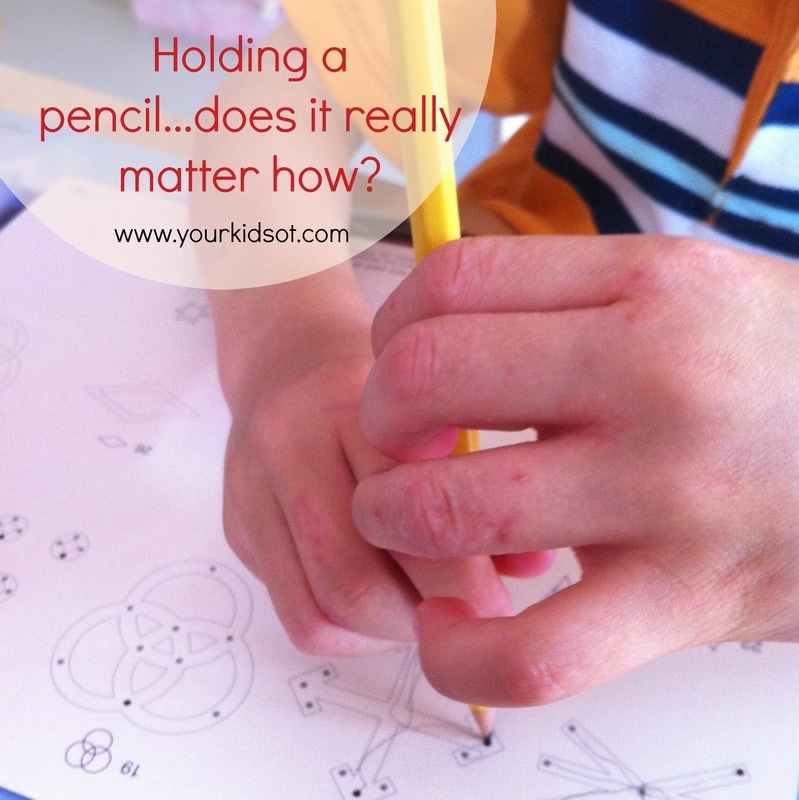

 |


 RSS Feed
Join the YKOT e-newsletter!
Subscribe to get our latest content by email and receive
the SHAPE ROADS PRINTABLE NOW!

Success! Now check your email to confirm your subscription and receive your free printable!
Join our Mailing List!
Subscribe to get our latest content by email and receive
the SHAPE ROADS PRINTABLE NOW as a thankyou!
Success! Now check your email to confirm your subscription and receive your free printable!
Disclaimer: The information on this site is general in nature and should be used for educational and entertainment purposes. The activities are safe for most children, however, you should consult an Occupational Therapist or health professional to address specific movement, sensory or other medical conditions. This blog does not replace formal therapeutic professional advice given by a health professional or medical practitioner. Reviews and endorsements of products will only be made based on my expertise and personal opinion; and deemed worthy of such endorsement. The opinions shared in sponsored content will always be my own and not that of the advertising company or brand. Content, advertising space or posts will be clearly identified if paid, affiliated or sponsored. Affiliate links may be found throughout this website in advertising. This means that if you follow through with a purchase from these links, Your Kids OT will receive a percentage of the sale. Your Kids OT undertakes to meet the requirements of the "Social Media Policy" as published by Australian Health Practitioner Regulation Agency (AHPRA). Further information about this policy can be found here.
Find meFollow me |

|
About me
AuthorHi, I'm Cindy and I am an Occupational Therapist. I enjoy working creatively with children to see them reach their potential. Read more about me here. 
|
Copyright © 2017 Your Kid OT