Method 1. Preheat the oven to 180°C (350°F). 2. Cream (beat) the butter and sugar until light and fluffy. Add the flour. 3. Add the ginger, nutmeg and cinnamon. Mix together. 4. Place the golden syrup in the microwave and heat for 1 minute. 5. With the beaters mixing slowly, add the warmed golden syrup until dough forms a ball. 6. Press mixture into a lined baking tin. 7. Press 24 freckles into the wet mixture and bake for 45 minutes. Cover with foil if needed. 8. Allow to cool in the tin and then slice with one freckle in each piece. Enjoy!! 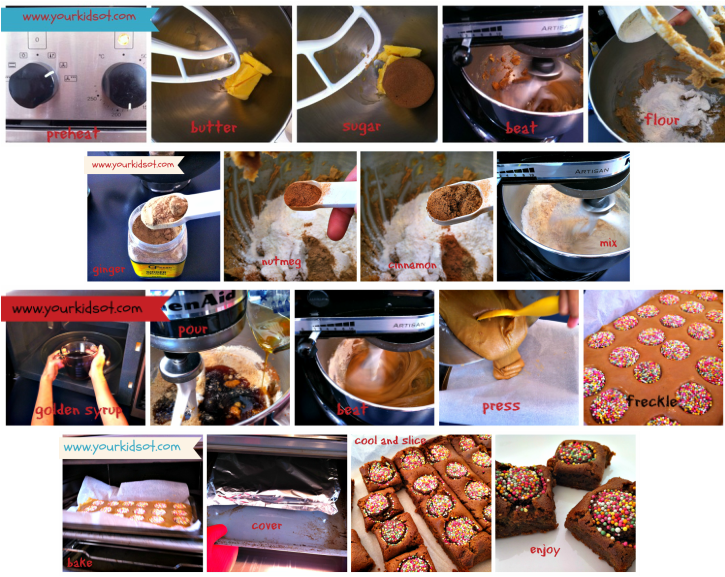 Adult supervision may be (most probably) required with use of the mixer, microwave and oven. Additional help will be needed to monitor the bake and adding the foil during the cooking time if the slice browns too quickly. It will be worth it! It is delicious. Try it today. Happy Baking!
You may also like:
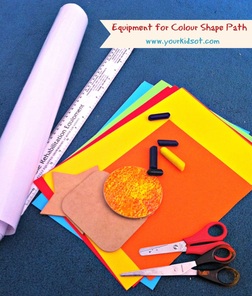
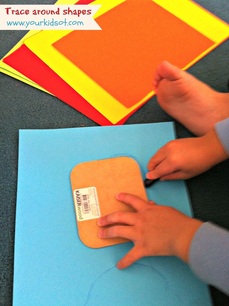
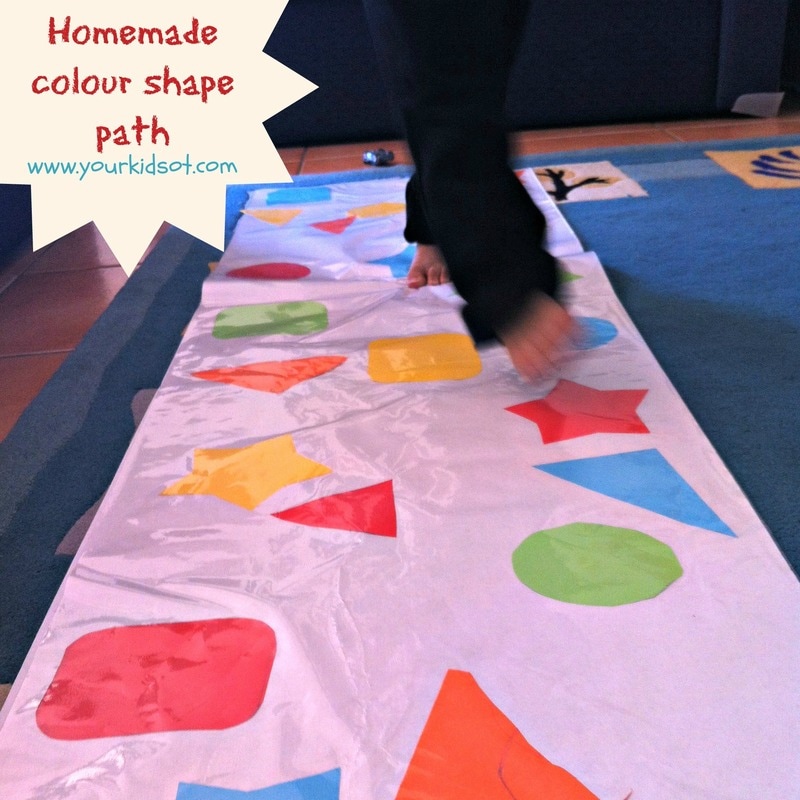 Fun with colours and shapes! Using both hands together can be tricky for some kids! Bilateral coordination is so important in helping children to establish a dominant hand and in working on more complicated skills as your child develops. This simple homemade path of coloured shapes is a great activity for your toddler or preschooler. They can help you to make it {using bilateral coordination of their hands and fine motor skills} and then use it to identify shapes and colours {using their gross motor skills and learning concepts}.
What do you need to do?
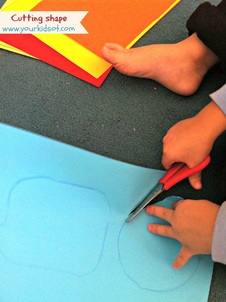
Tracing and cutting are both activities that encourage bilateral coordination of hands. One hand (usually the non-dominant) needs to stabilise the paper and the other hand (usually the dominant) needs to use the implement (ie. crayon or scissors). Your preschooler may need help to trace around the shapes without moving the crayon to the other hand. They may need help stabilising the shape they are holding so it doesn't move whilst it is being traced. Your preschooler will need time to practise and become confident with manipulating the paper to turn as they cut around the shape. They may require some assistance to turn the paper and encouragement to stay on the line during cutting. 3. Lay out your contact paper. Peel back the paper (I did half at a time) and stick down the shapes varying the colours and shapes along the path. 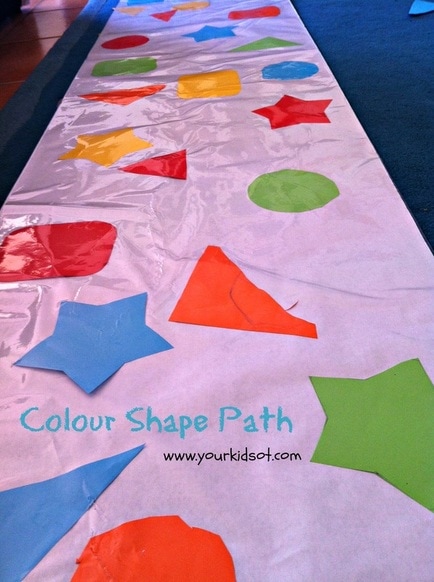 How do you use this? This path may be used with an individual child or several children together in a setting. It would work really well in a family day care setting where there are several children in a small group. Great for turn taking, waiting and other social skills. There are many ways to encourage your child with the concepts of shapes and colours. Depending on the chosen activity, it may also promote bilateral coordination of the legs (used for walking, jumping, hopping) and eye/hand coordination.
Although the weather is cooling down here, my northern hemisphere readers might want to get out some water bombs and throw them at the appropriate shapes or colours! 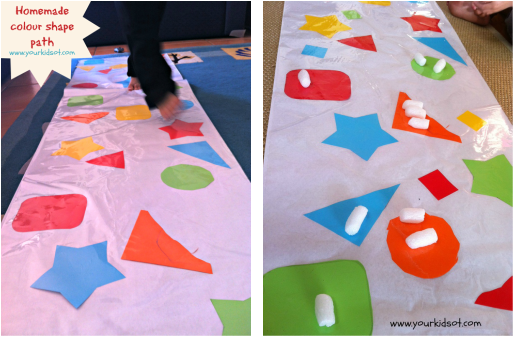 Try making this colour shape path with your toddler or preschooler. They will love to see that their tracing and cutting is put to use and can be "played" with. Let me know if you try it out!  Generally I do not attempt to be "cool". There is too much pressure. I do try to make therapy sessions fun and engaging. I try to help my own kids to learn creatively...but "cool"...a tough title to earn....until now! This homemade rewards project will have you as the coolest mum/OT/teacher/dad/grandparent in town. The elements of "winning", of "surprise", of "fun", of "uniqueness" {is that word?}, of "motivating" ... all rolled into one. The best thing is that it is really easy to prepare. 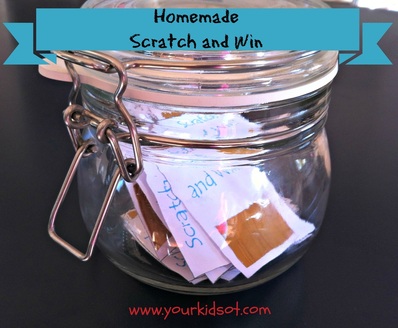
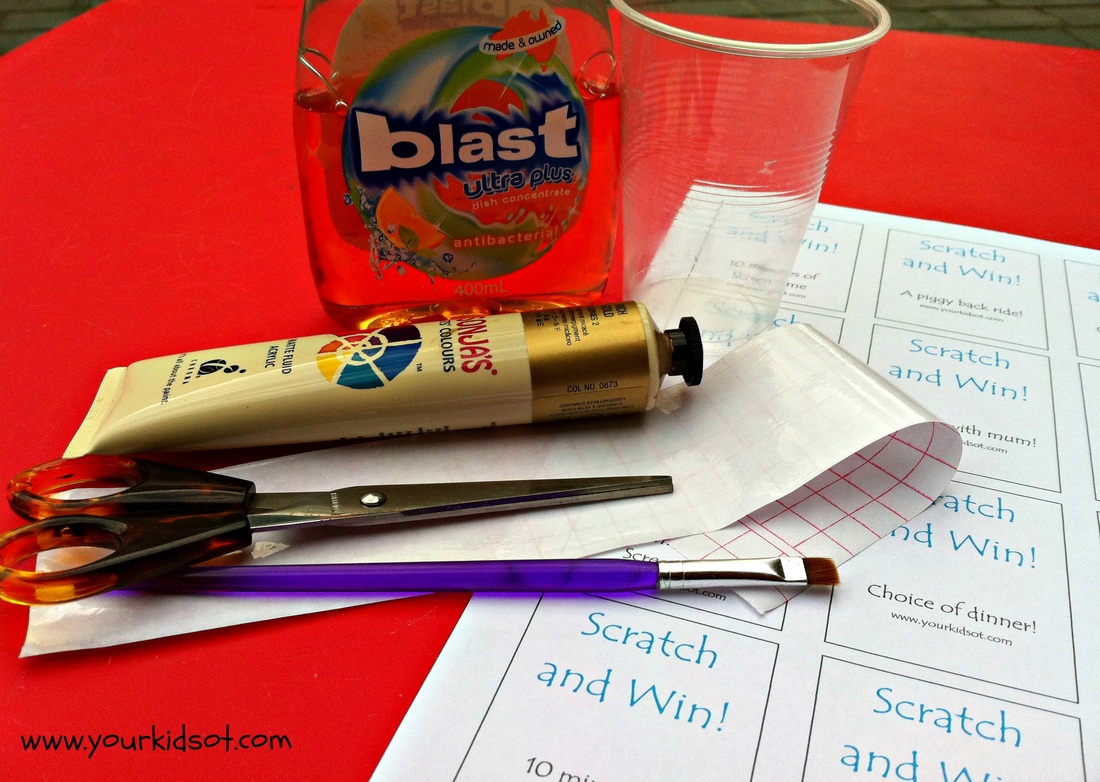
What do you need to do? 1. Mix 1 part dishwashing liquid with 2 parts paints {my measurements were very approximate} in a plastic cup. 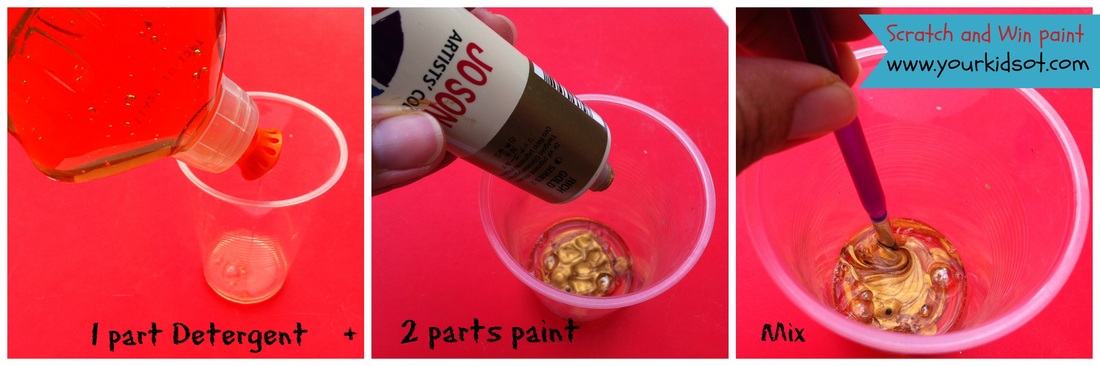 2. Paint the paint mixture onto the contact paper {on the clear side not the paper back}. Wait for it to dry. Paint another layer and allow to dry. {Note: You can use a hairdryer if you are impatient. I also found that the paint in the cup didn't dry out - must have been because of the detergent.} 3. Print the Scratch and Win printable (print here) and cut out the tokens. 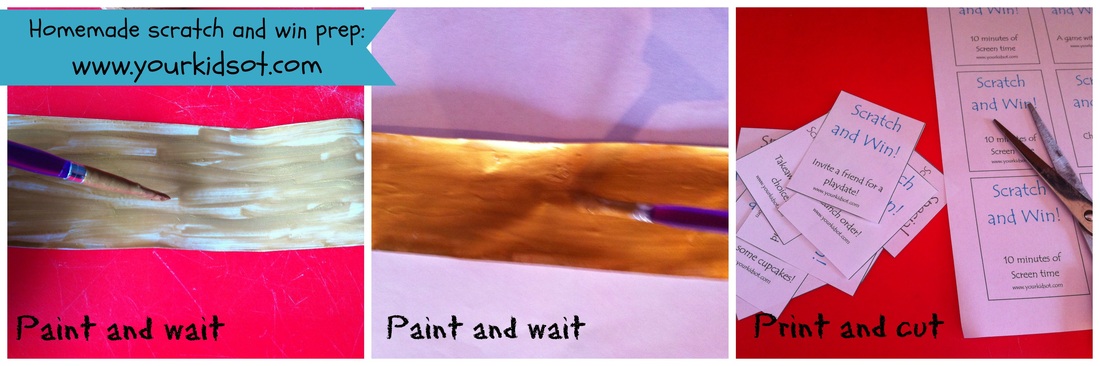 4. Cut out a small piece of painted contact paper {enough to cover up "reward" on Scratch and Win paper}. 5. Peel off the paper back from the contact paper. 6. Stick the painted contact paper onto the "Scratch and Win printable". Repeat on all paper tokens. 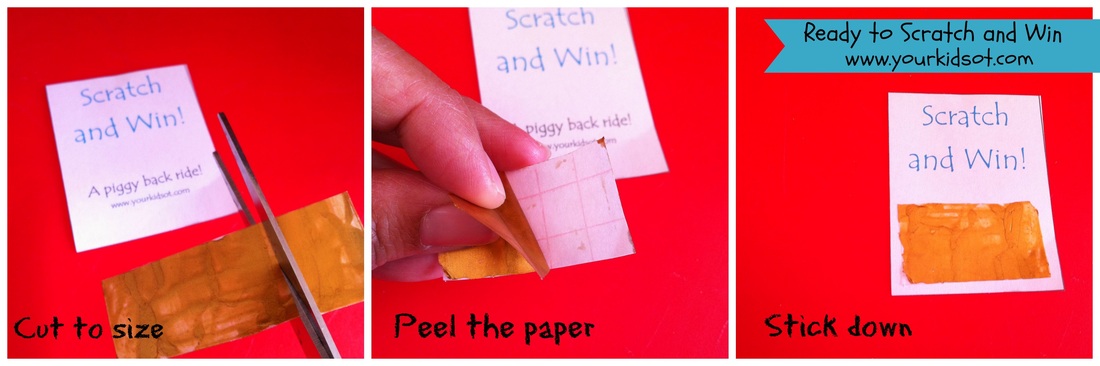 You are ready to play! How to use? Well this is really up to you. The printable includes blanks so that you can edit your "prizes" according to your child. I tried to find "non-food" item rewards for my own kids. I also included a few "Special Scratch and Win" tokens. These included activities that we planned for the school holidays. It is also helpful if you choose prizes that your child will not receive at other times or elsewhere. (Eg. If you give your child a piggy back ride everyday then this won't be very rewarding as a prize that is revealed). I suggest that you have a system for gaining your "Scratch and Win" tokens. This will vary according to your child and what you are trying to motivate them to achieve. For Miss 7, she gains a stamp on the calendar for every time she practices the piano. When she achieves 20 stamps she gets a "Scratch and Win". You may want a quicker time frame for your child. Mr 3 is working on eating his dinner unassisted. He gets his "Scratch and Win" after doing this 5 times. We have also agreed that the prizes can be accumulated and don't have to be claimed instantly {useful when planning weekend or holiday prizes}. I plan to incorporate this into therapy sessions. I think this token based system will be really motivating. The "rewards" I choose for therapy are usually a part of the program that I would have already planned to do, however it may involve some choice by my student. For example, choice between "Writer's Hat" or "Imagistory" ipad apps, choice between scooter board or therapy ball activity, choice of multi-coloured pencil or vibrating pen for writing. It may also include a different posture, for example: on your tummy {on the floor}, sitting on a therapy ball at the table, etc. 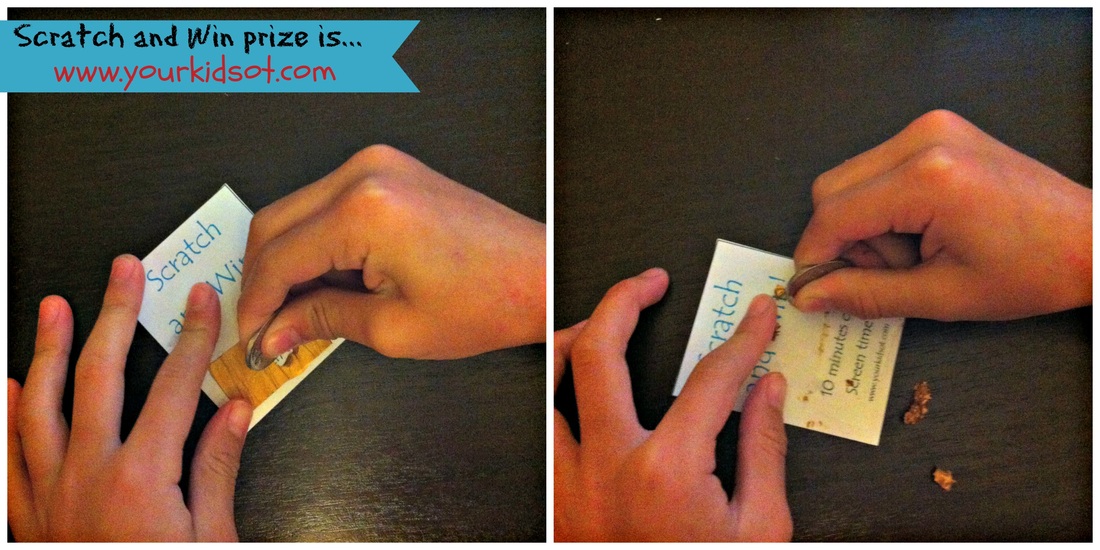 As an added bonus, the actual act of rubbing off the gold paint with a coin is a fantastic fine motor activity. It encourages a pinch grip of the coin and an open webspace (the circle created by the thumb and index finger). See how Miss 7 self corrected in the two photos above to a more open webspace which she found easier to hold the coin and rub out the paint. So are your ready to be "cool". Despite this long explanation, it is very easy to achieve and one small strip of painted contact paper covers heaps of prizes. Have you thought of another way to use this scratch paint? Share your ideas in the comments below!
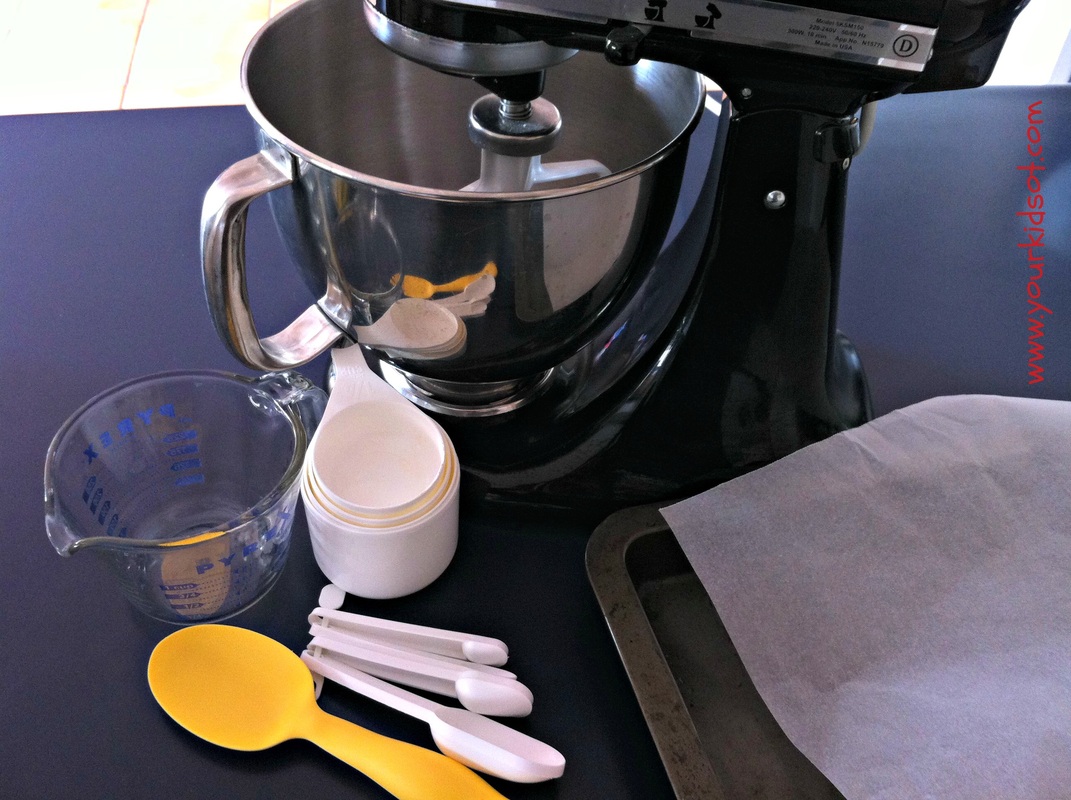
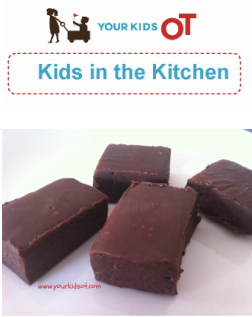
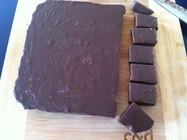
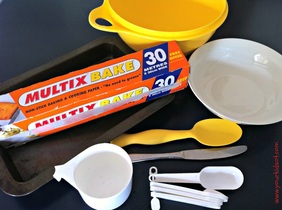
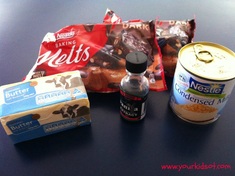 Ingredients 50g butter 1 tin condensed milk 500g dark chocolate Vanilla extract  Equipment needed Knife Kitchen scales Spatula Can opener Microwave safe bowl Foil lined tray (approx 20cm square) Method 1. Place the butter, condensed milk and dark chocolate in a bowl. 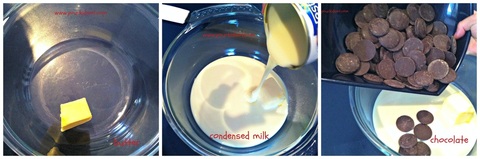 2. Heat in the microwave on high for 1 minute. Remove from the microwave and stir. 3. Heat in the microwave for 30 seconds.. 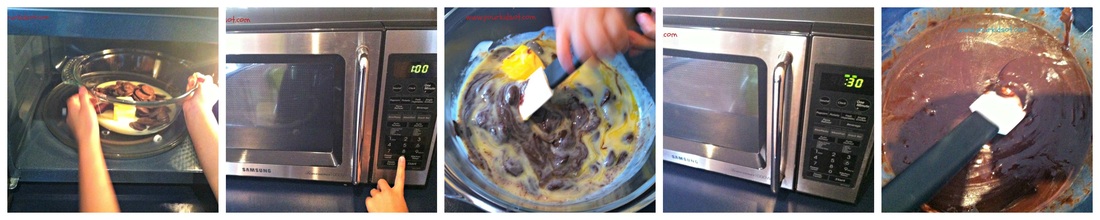 4. Add a few drops of vanilla extract to the mixture.. 5. Stir and pour the mixture into the foil lined tray. 6. Place in the fridge and allow it to set for 1 hour. 7. Cut and serve.
Note: For new followers to Your Kids OT, you may have missed the post about why I have a "Kids in the Kitchen" section on this blog and website. Here is a summary from the original post below. We had a fantastic holiday with lots of lovely memories and even pleasant experiences on the plane. One of the best things about returning home from a holiday is "rediscovering" toys that haven't been seen for a while. Both kids loved playing with kinetic sand today (click here for more on Kinetic Sand) and Mr 3 couldn't wait to pull out his road mat.
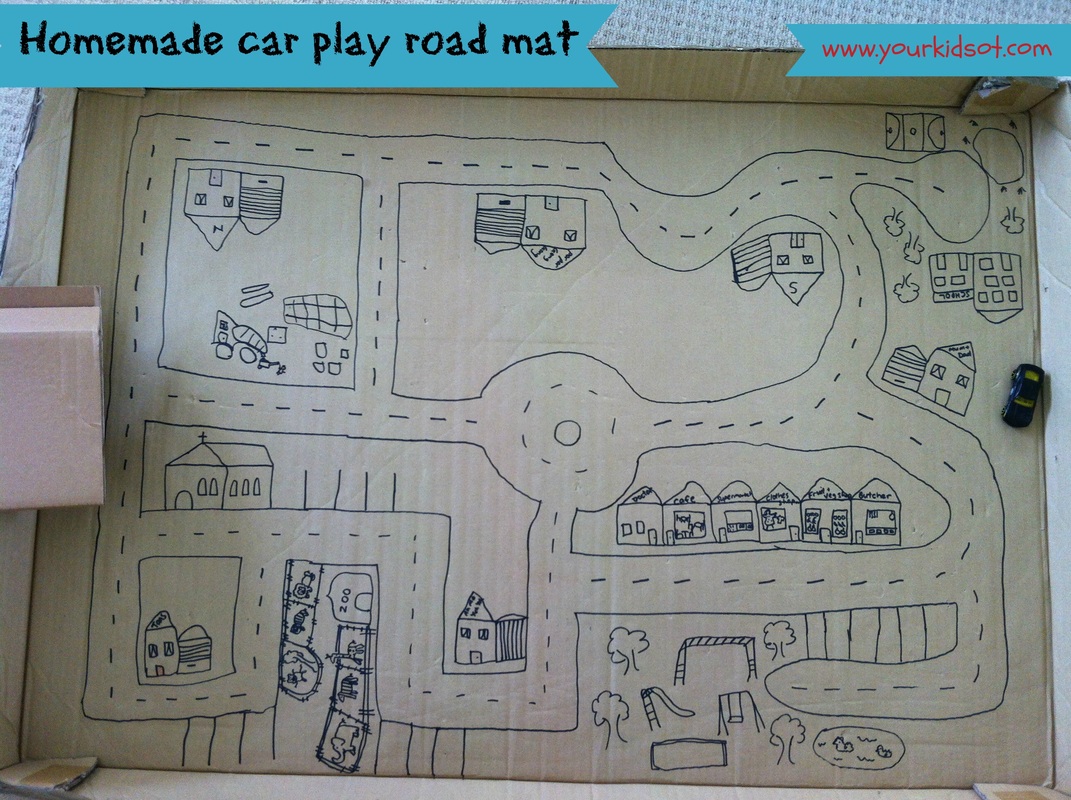
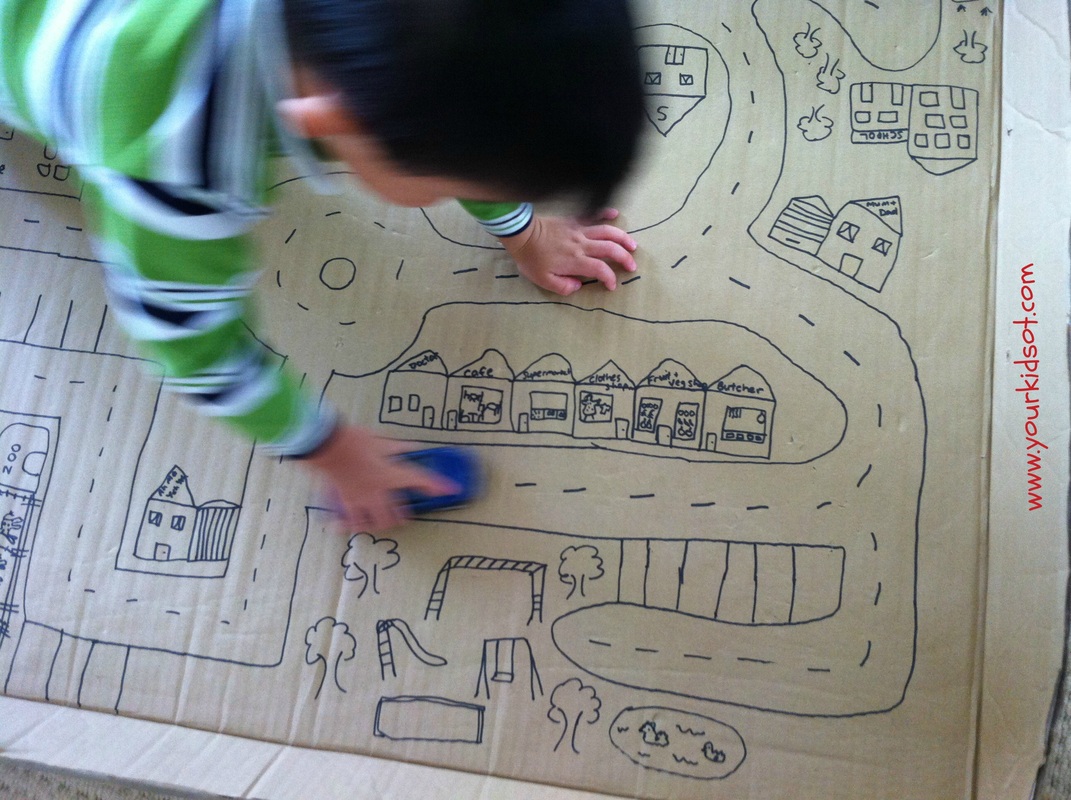
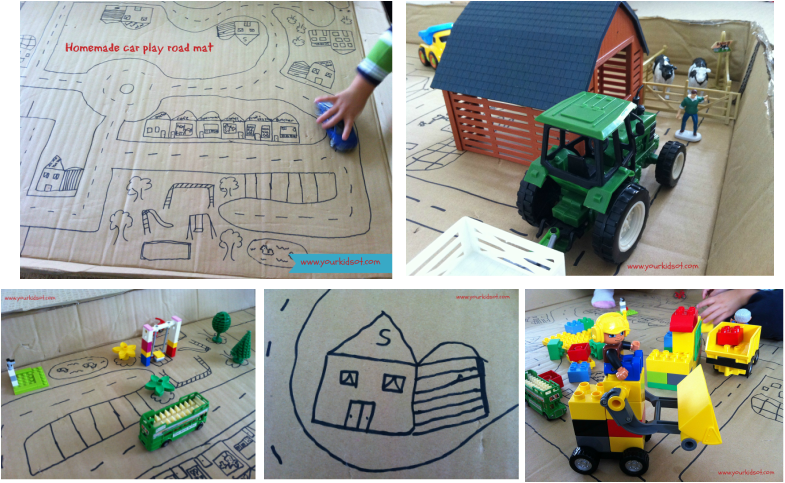 Homemade car play road mat. Mr 3 loves driving and creating stories with his road mat. Every now and again we will add an extra feature that he comes up with. Today we added a petrol station as one his cars had run out of petrol. You don't need great drawing skills (my pictures are very simple) to create this fun road mat. Many boys (and girls) love to play with toy cars. Driving along a road is a simple way for children to develop eye-hand coordination. Through pretend play, children can create stories and use their imaginations. This road mat is large enough for Mr 3 to play with a friend (or a beloved cousin) and this is great for the development of social skills. Our road mat stores neatly under Mr 3's bed so there is no problem with storage for us. This is usually the first toy Mr 3 pulls out when he wakes up in the morning to have "quiet" play before waking up mummy! Win-Win! Do you have a little one who would love a homemade car mat? It is so easy to make, give it a try and let me know if you do. Safe driving...
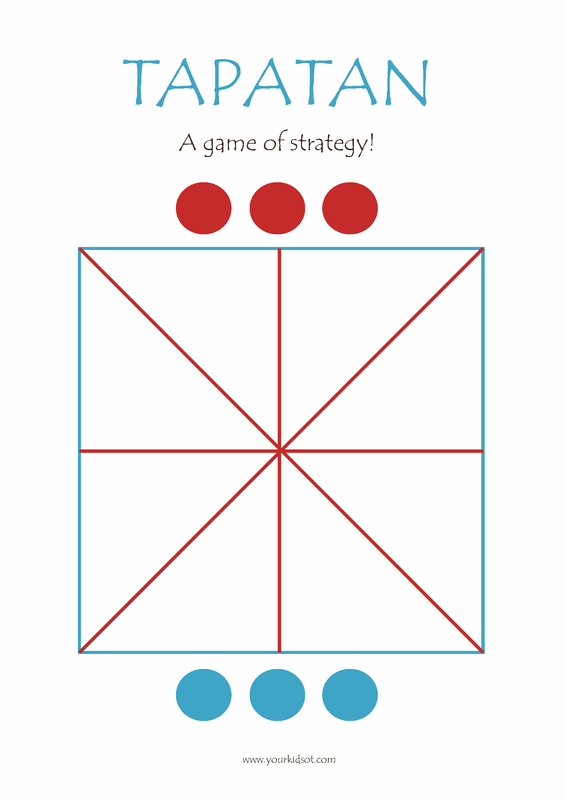
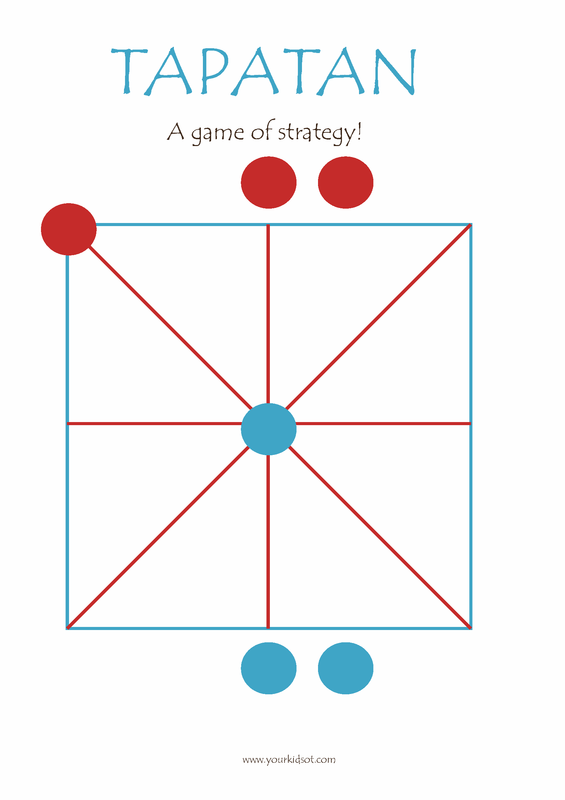
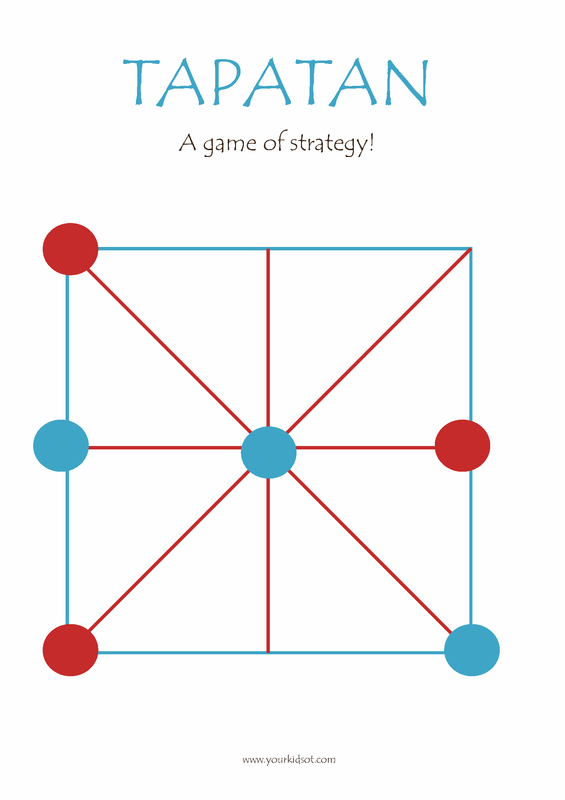
Tapatan is a fun three in a row game originally from the Philippines. It is closely related to "Tic Tac Toe" (also known as noughts and crosses). It is a new alternative "fine motor" activity for me to use in therapy and fun for kids as an alternative to "Tic Tac Toe".
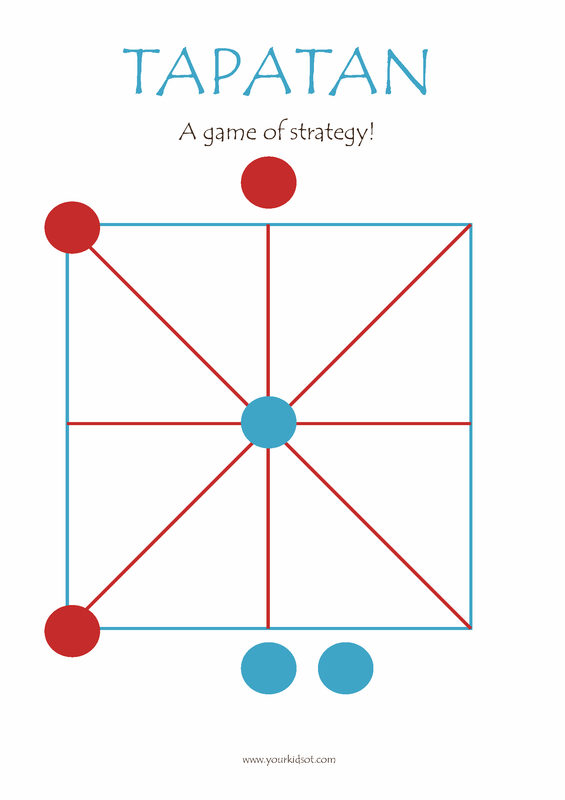
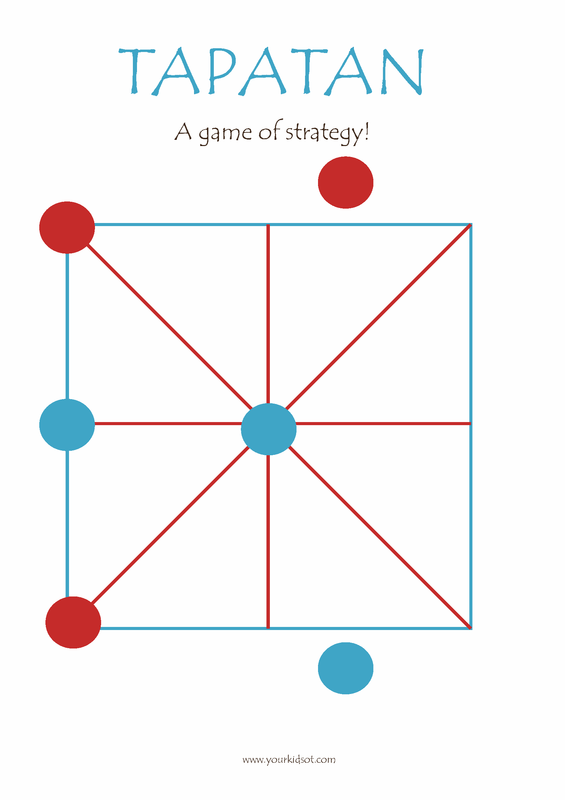
Game objective First player to get three checkers in a row (horizontal, vertical or diagonal line) is the winner. How to play 1. Players begin with 3 checker pieces each. 2. Players take turns to place their checker pieces onto the board until all checker pieces have been played (unless the first player wins). 3. After all the checker pieces have been player, players may move one of their checkers to an adjacent unoccupied space on the board. 4. Play continues until one player achieves three checkers in a row or a stalemate is declared when one player cannot move their checkers or a position is repeated three times.
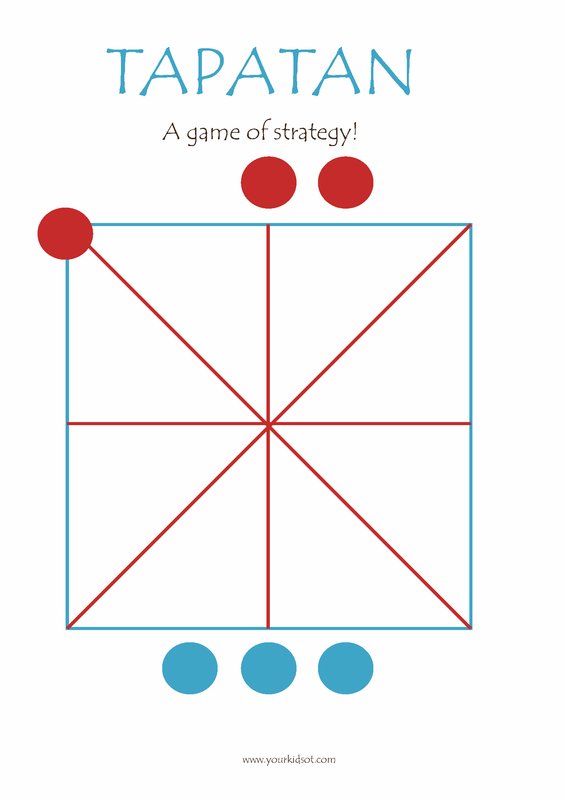
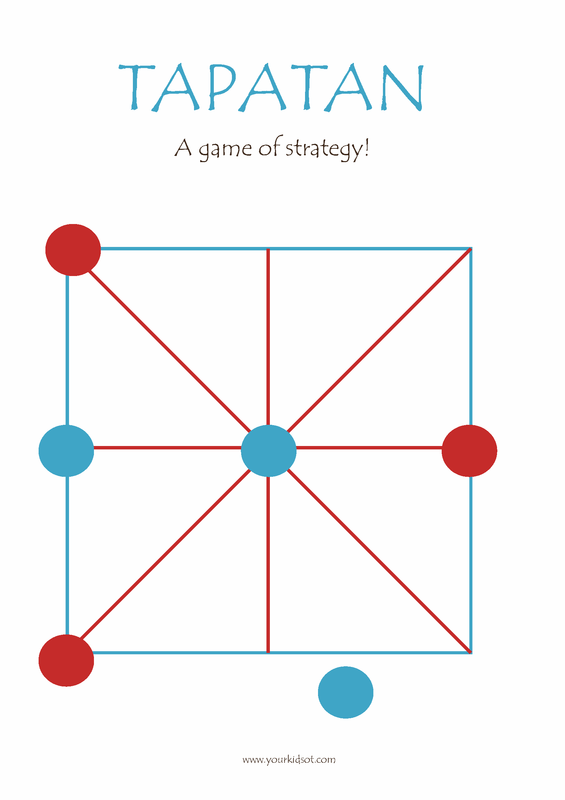
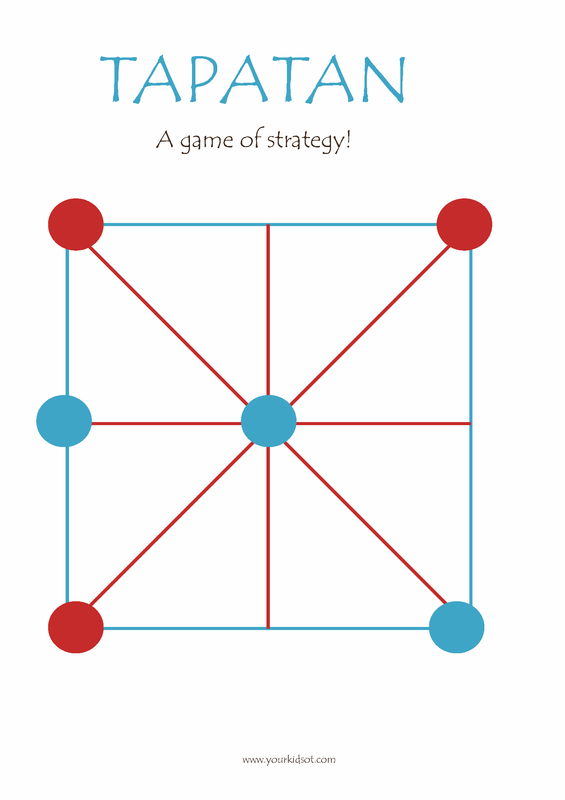
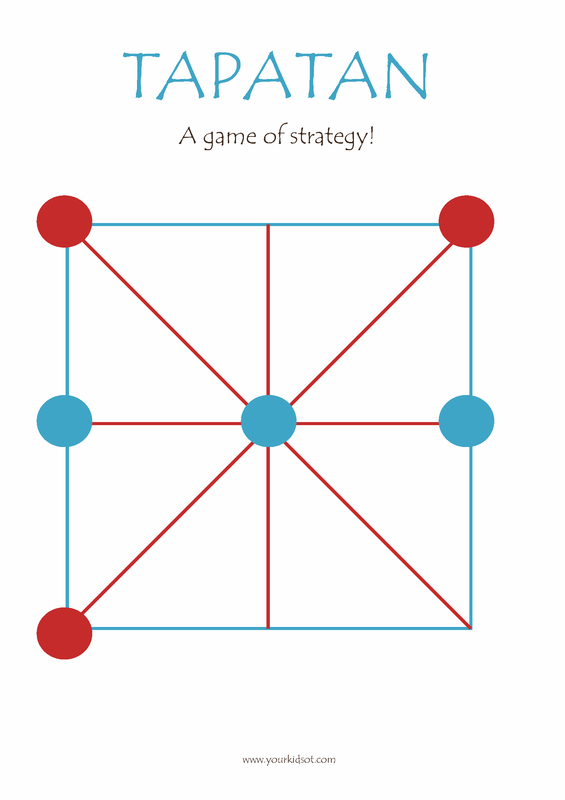
Here is a sample game unfolding...
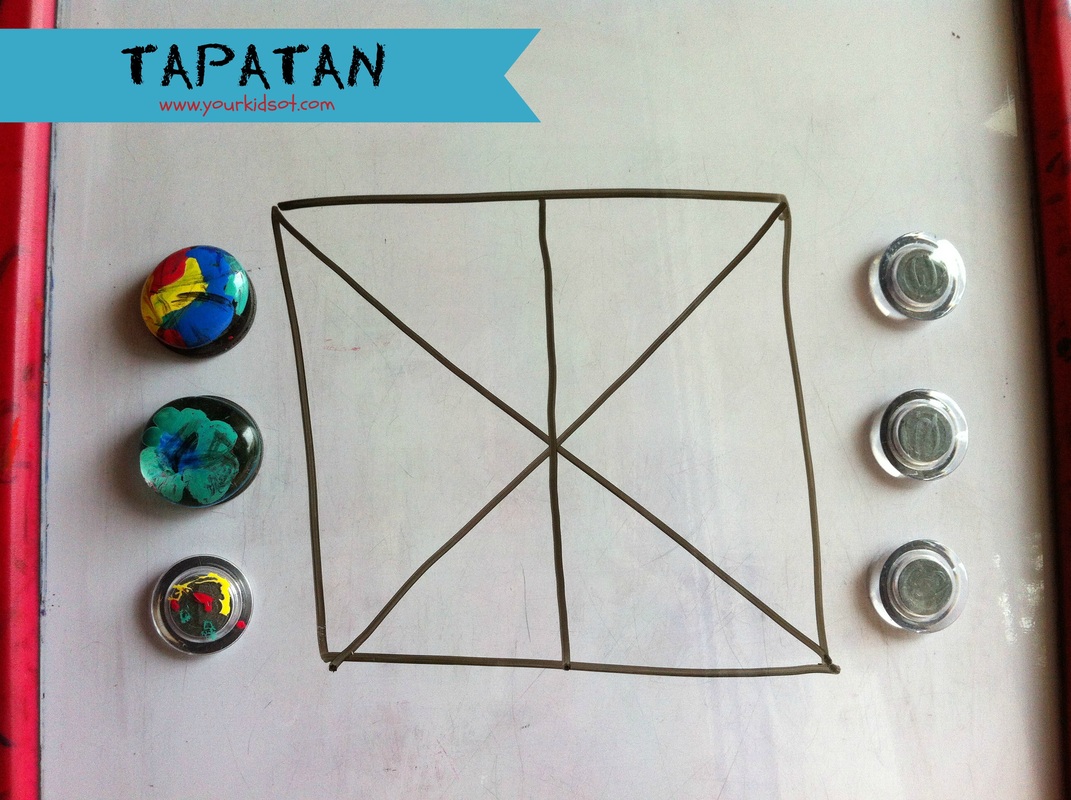
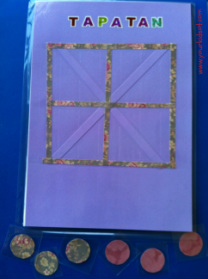
Your school age kids will love TAPATAN! Download it today or make your own game board this weekend. Teachers, why not get your class to measure out the sides of the square and intersecting lines, then play the game. Let me know if your kids love it. I would love to see photos if you have a go. Try it this weekend.
Note: For those with a keen eye, yes I did notice that both my TAPATAN squares are slightly askew. Hopefully you can draw a straighter line than me.
We are going overseas (**cue excited dance**). This involves an 8 hour flight and airport time (**cue nervous laughter**). We have travelled before as a family with a memorable almost-two-year old leaving her screams as a souvenir for those on our flights. This scarred us and we have waited for Mr 3 (almost 4) to "grow up" a little before attempting an international flight.
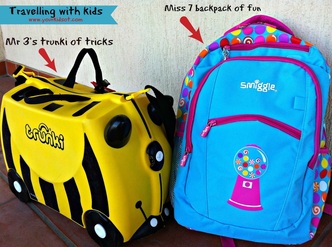
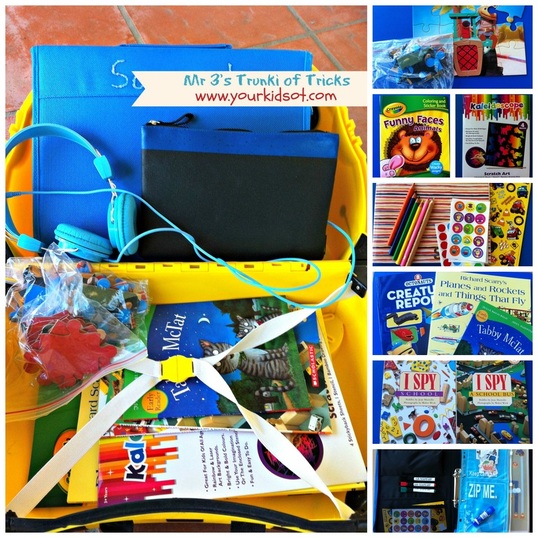 Travelling with a preschooler. What's in Mr 3's "Trunki of Tricks"? 1. Trunki - the suitcase itself is a great fun. Mr 3 can sit on top of it and push along with his feet. We can pull him along whilst he sits and lifts up his feet. It fits neatly underneath the seat in front on the aeroplane so the contents can be accessed easily. Importantly, if you are in a hurry the Trunki has a long shoulder strap that adults can use to carry it. 2. Puzzles - individually packed in zip-locked bags. 3. Funny Faces colouring book by Crayola - includes stickers and colouring pages. 4. Kaleidoscope scratch art - includes wooden pencil, stencil and 2 pieces of scratch art paper. 5. Notebook, pencils and stickers 6. Books to read - chosen based on Mr 3's interests. 7. I -Spy books - very thin small books that have lots of detail to find. 8. Mr 3's folder of fun! - I found this neat zip up folder at Office Works. It has a small pocket which I have put the tiny car erasers and cars seen below. The folder also includes dry-erase markers, a glue stick and the following activity sheets.  My homemade activity sheets were made from scrapbooking paper, stickers and some printables. I laminated all of these activity sheets. They include: 1. Dinosaur scene with small dinosaur stickers. Mr 3 loves to tell stories with dinosaurs and I'm hoping this will occupy him for quite a while. 2. Thomas printables and train track. Both of these were found on the internet. 3. Car mazes with small cars. Three of the small cars are erasers found at a discount shop. These can be driven along the mazes or Mr 3 can use the dry-erase markers to draw on them. 4. Counting page. Mr 3 loves to count. 5. Rainbow I-Spy. I created this page for "spying" at the airport and on the aeroplane. Especially for the time that you sit on the runway and taxi to the runway....well this can take a long time! {Flashback to being delayed for an hour on the runway with almost-Miss-2-year-old}. You can find this printable at the Your Kids OT shop as a free printable. 6. Shapes matching page. Mr 3 can draw using the dry-erase markers to match the shapes or around the shapes. 7. Empty faces. Mr 3 (or I) can draw some funny faces. Yes, I know that there is quite a lot of stuff and hopefully it won't all be used! There is still the plane ride home. I will be trying to post to the blog whilst we are away but apologies if it doesn't work! These activity ideas are not restricted to travel times! The activity worksheets could be used in a therapy context. Do you think your preschoolers would like any of these activities? What is your "must pack" travel activity?
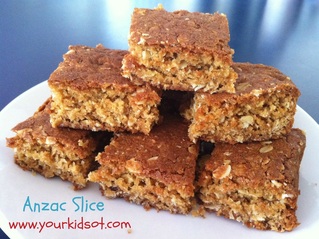
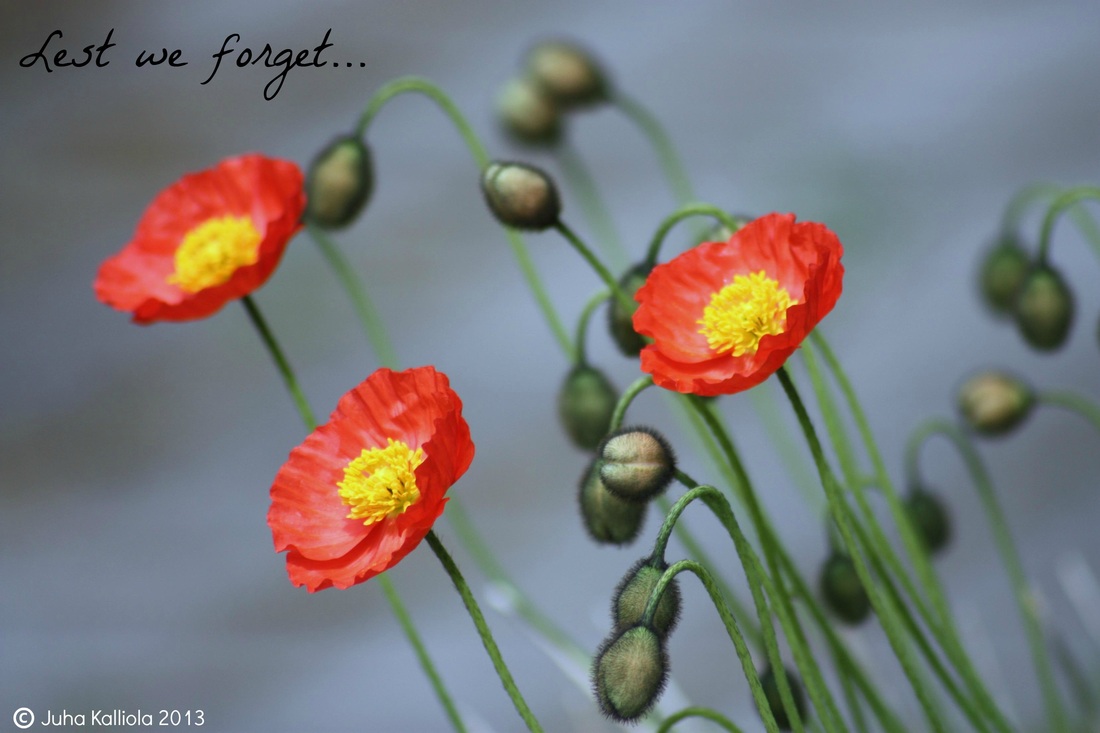
ANZAC stands for Australian and New Zealand Army Corps. The soldiers in those forces quickly became known as Anzacs, and the pride they took in that name endures to this day. ANZAC Day – 25 April – is probably Australia's most important national occasion. It marks the anniversary of the first major military action fought by Australian and New Zealand forces during the First World War when the landed at Gallipoli, Turkey. Anzac biscuits (or bikkies) have been associated with Anzac day as it is claimed the biscuits were sent by wives to soldiers because the ingredients do not spoil easily and the biscuits kept well during naval transportation. We love Anzac bikkies! 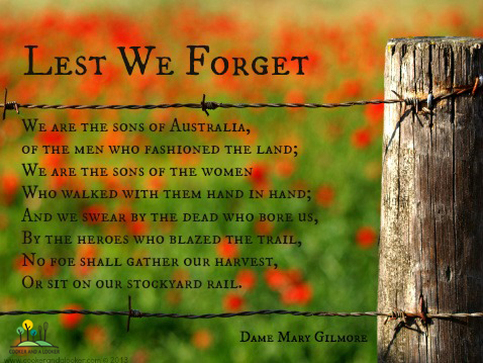 Image used with permission from www.cookerandlooker.com
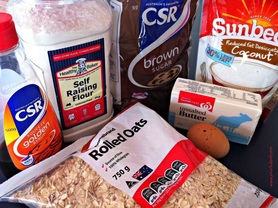
Method 1. Preheat the oven at 180°C (350°F). 2. Place butter in a microwave safe bowl. Place the bowl in the microwave and heat for 1 minute. Remove and set aside. 3. In the mixing bowl, pour flour, coconut, oats and brown sugar. 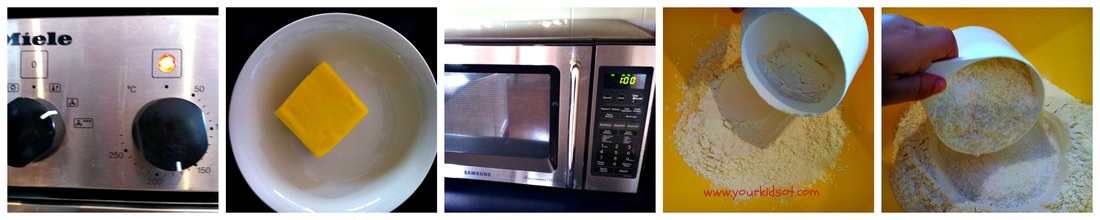 4. Add the melted butter, egg and golden sryup. 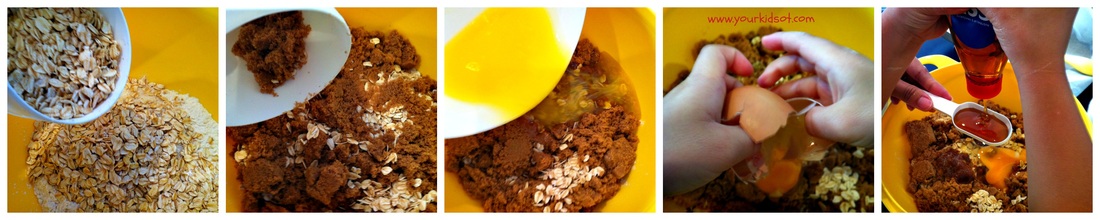 5. Stir with a spoon. 6. Line the baking tin with baking paper. Pour the mixture in the baking tin. 7. Place in the oven and bake for 30 minutes. 8. Remove and cool. Slice into squares and serve.  This slice is enjoyed all year round at our house (as are ANZAC biscuits). It is our "go to" slice and is perfect for school lunch boxes or to share with others. Try it today! Happy baking and "lest we forget" this Anzac Day.
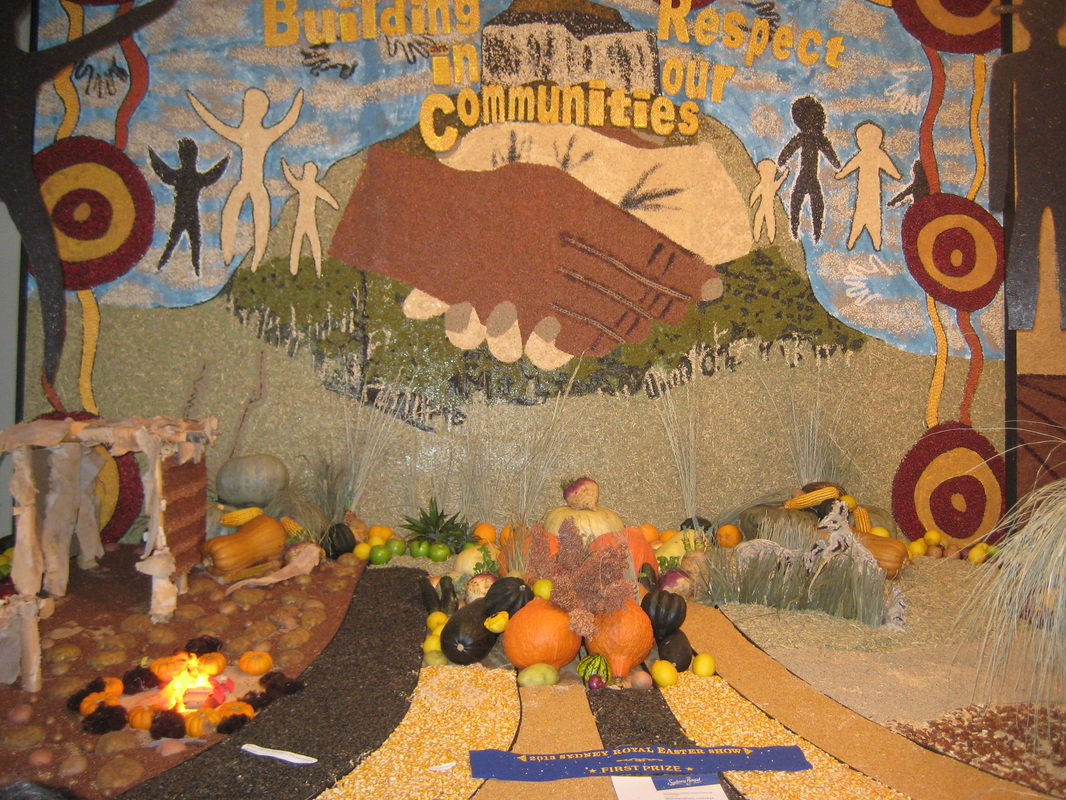
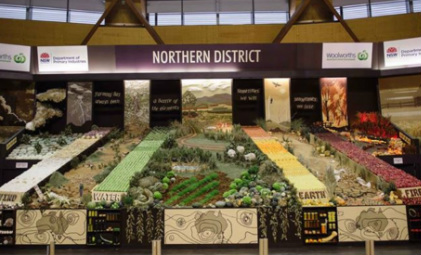
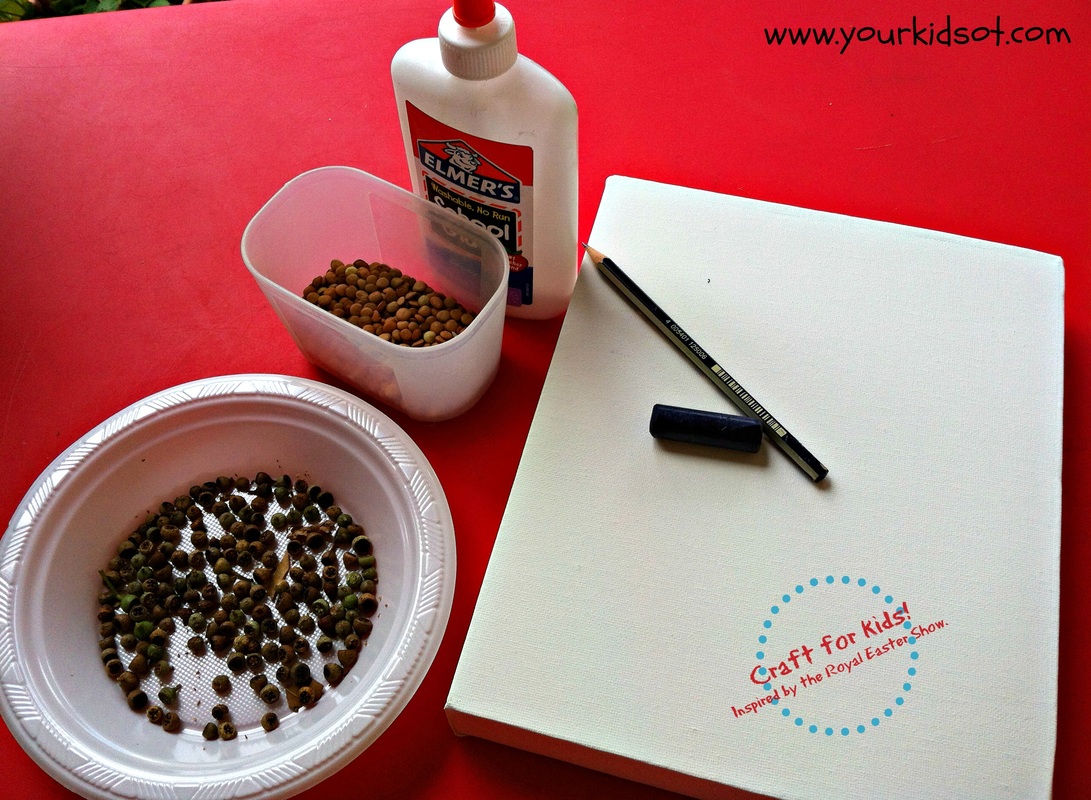
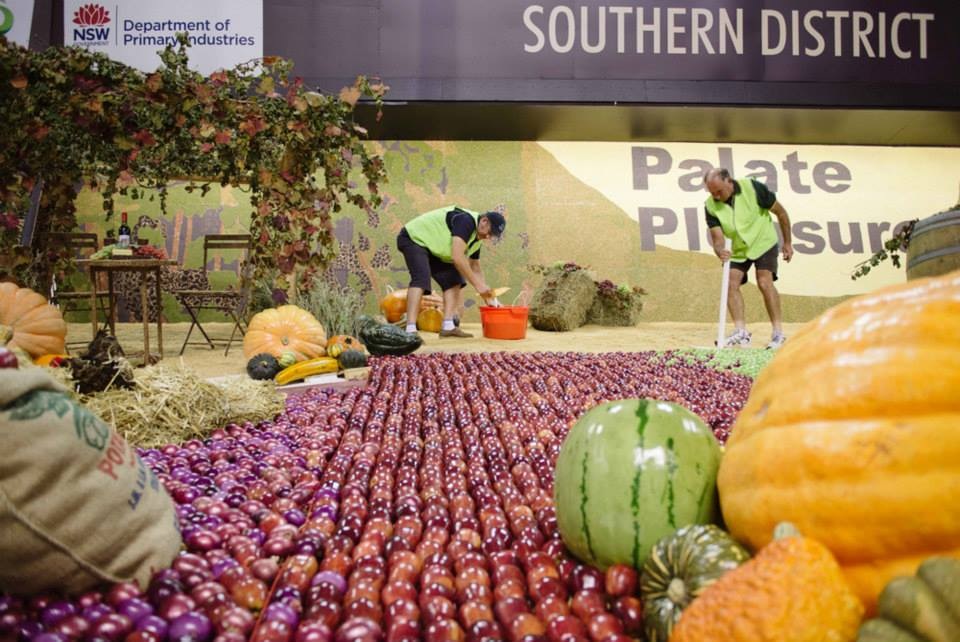
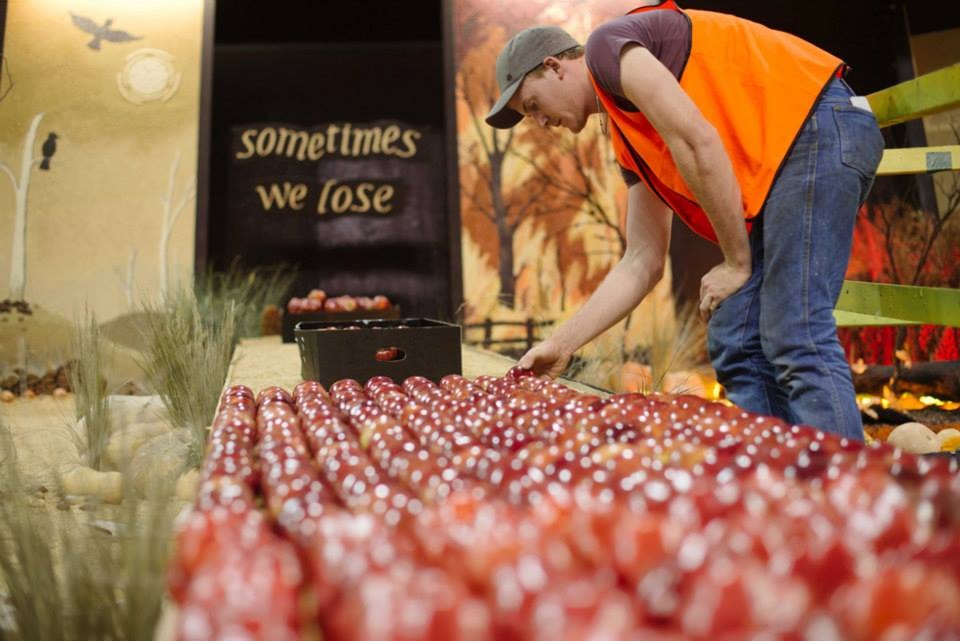
This craft is inspired by the district exhibits found at the Sydney Royal Easter Show. Instead of fruit and vegetables, we gathered some seed pods from the garden, lentils, rice and pasta.
What do you do?
Drying time is quite a while (several hours, depending on how much glue is used). 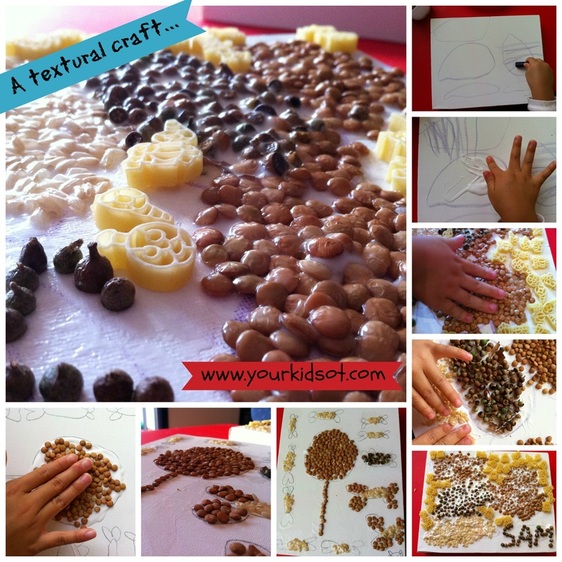
This is a "free form" craft and suits kids of all ages. As you can see from the photographs, Miss 7 drew a picture and was quite precise with her layout and placement of textural elements. Mr 3 was less precise, however still enjoyed placing the various textures onto the canvas {and yes he received help to spell out his name}.
Depending on your child's attention span, this is a craft that your child might start and then come back to at a later time or even on a different day. You could introduce a new element for them to paste when they return. The finished work might not be as stunning as a fruit and vegetable display from the Sydney Royal Easter Show, however, it provides a textural board for hands to explore. The textures are really interesting when the glue has dried. It also makes a unique artwork for your child's bedroom wall or as a gift. Ours are displayed above our fireplace (still not completed, mind you). This is the perfect craft to do over the school holidays, maybe after a visit to the show. Do you enjoy visiting the Sydney Royal Easter Show? What do you like best? If you live somewhere other than Sydney - do you have something similar to our district exhibits?
Ever had a pinterest inspired attempt at a craft and fail? Guess which is mine?
It looked so beautiful, it sounded so easy ... anyway moving right along, I'm an OT - flexible, creative, adaptable ... the post is now called "Homemade sensory experience with colour!" See it sounds better already.
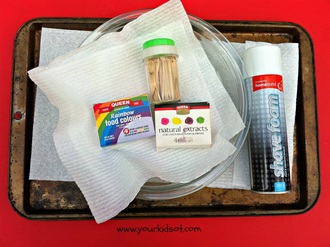
Here is what we did.
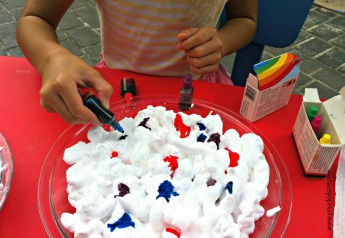
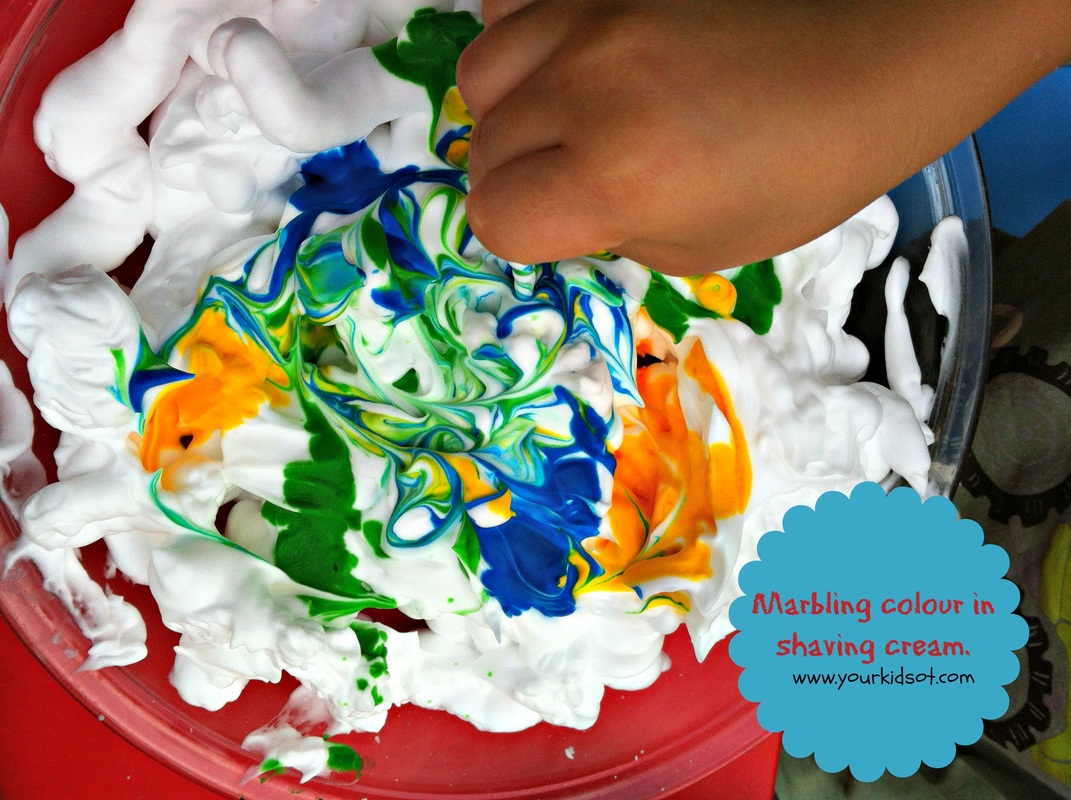
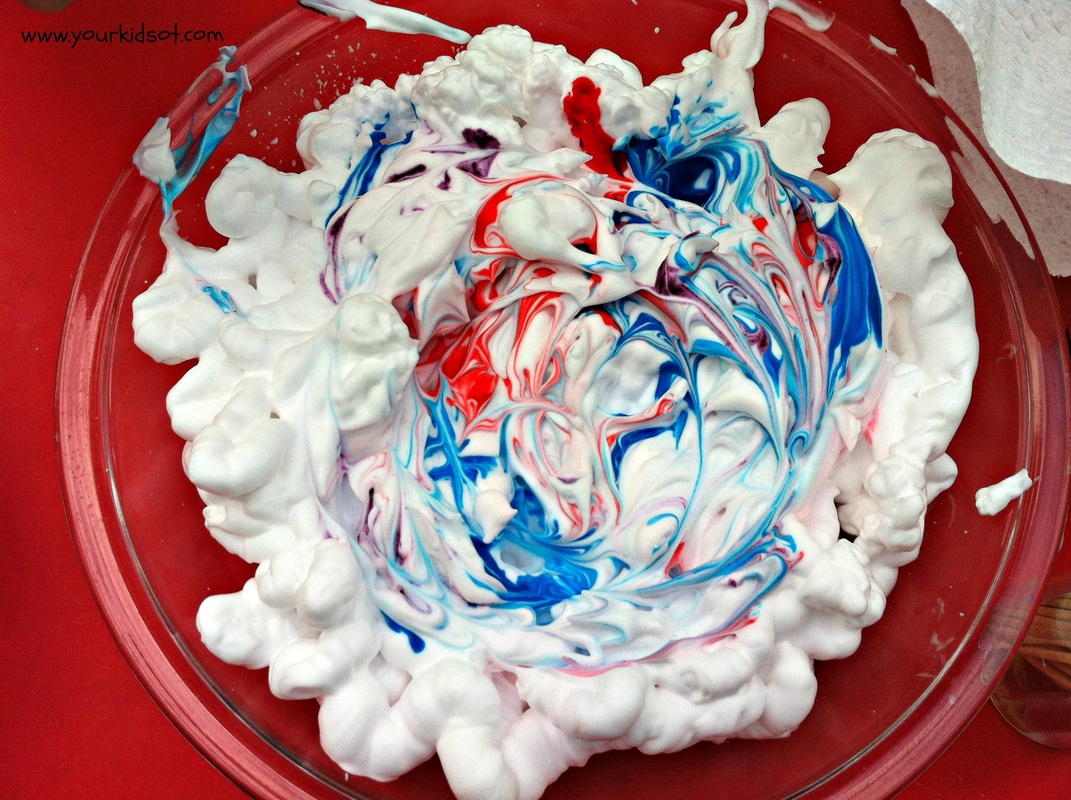
3. Use a toothpick to marble the food colouring into the shaving foam.
4. Roll the egg into the shaving foam mixture.
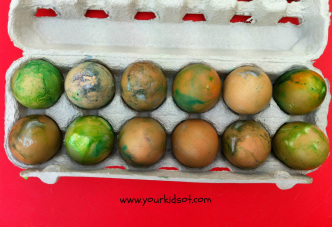
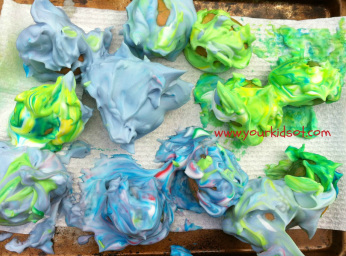
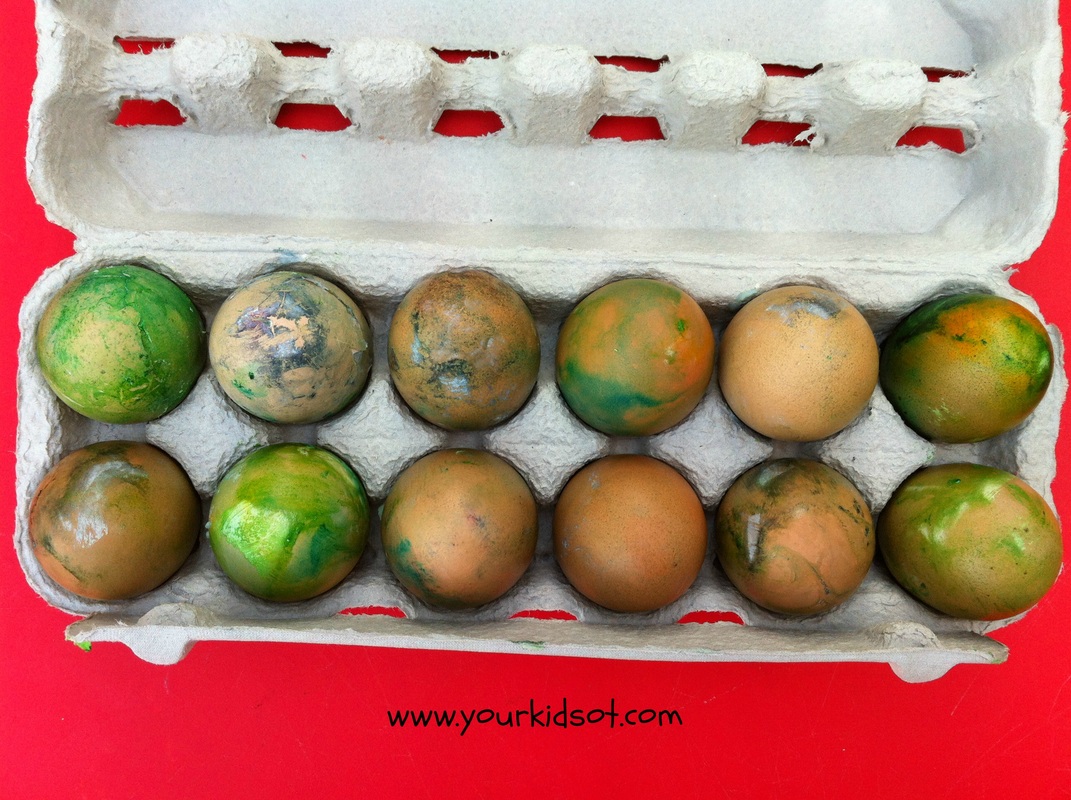
5. Place the shaving foam covered egg onto a tray with paper towel to dry for 30 minutes. Remove shaving foam with paper towel for final dyed eggs.
So our colour didn't really stick to the egg. There are probably a few good reasons - our eggs were still warm from being recently boiled and I think the original eggs were white and maybe blown out so they were lighter than the shaving foam...
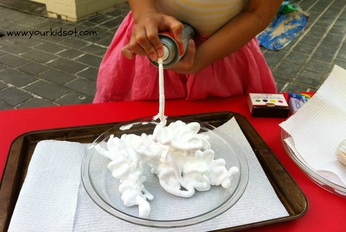
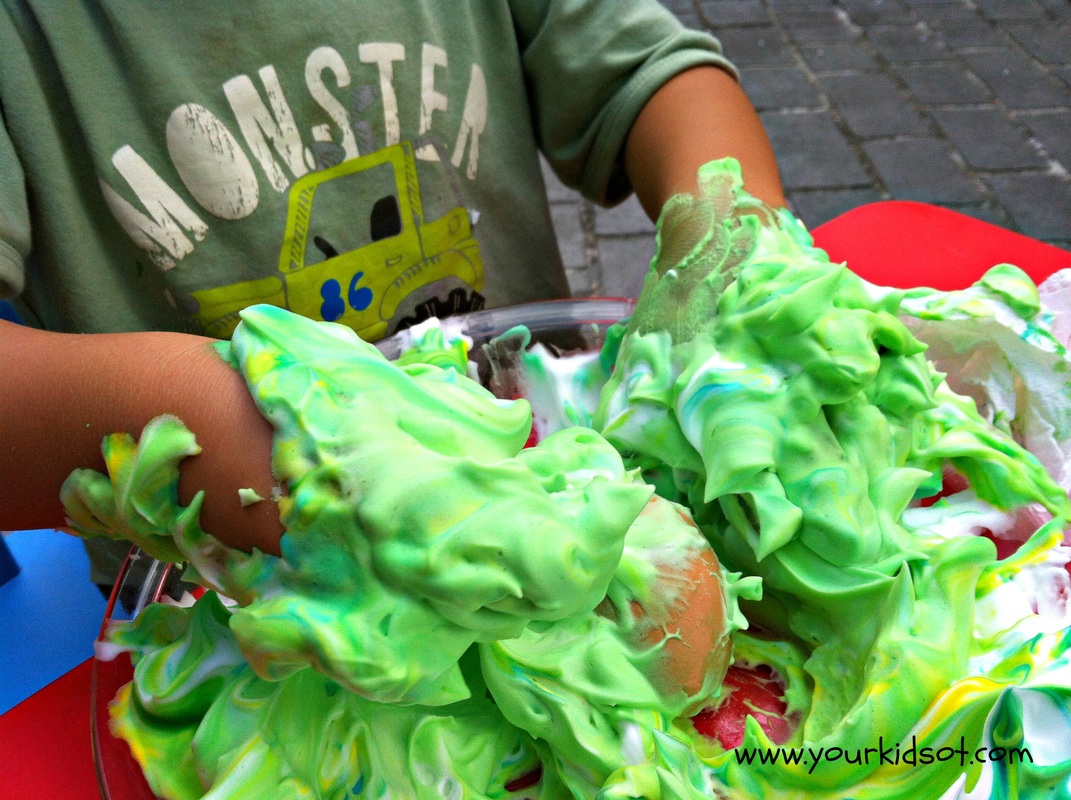
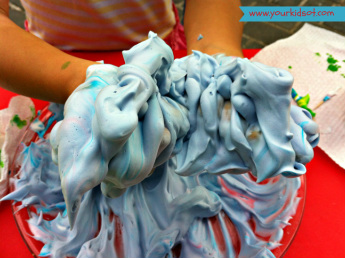
Well we certainly made a good coloured sensory mess and the kids loved it! They loved spraying the shaving cream, dropping the colour, mixing it with a toothpick and getting their hands into the mess. So as a homemade sensory experience with colour, it worked really well! Have you had a Pinterest inspired fail? Have you got a tried and tested way of dyeing your eggs? Do your kids enjoy messy play?
Note: Shaving foam should not be consumed. Children should be supervised during this activity and it is not recommended for children less than 3 years of age. I would not recommend consuming the egg after this activity.
|
AuthorHi, I'm Cindy and I am an Occupational Therapist. I enjoy working creatively with children to see them reach their potential. Read more about me here. 
SEARCH THIS SITE

Archives
April 2024
Categories
All
Popular Posts

 |


 RSS Feed
Join the YKOT e-newsletter!
Subscribe to get our latest content by email and receive
the SHAPE ROADS PRINTABLE NOW!

Success! Now check your email to confirm your subscription and receive your free printable!
Join our Mailing List!
Subscribe to get our latest content by email and receive
the SHAPE ROADS PRINTABLE NOW as a thankyou!
Success! Now check your email to confirm your subscription and receive your free printable!
Disclaimer: The information on this site is general in nature and should be used for educational and entertainment purposes. The activities are safe for most children, however, you should consult an Occupational Therapist or health professional to address specific movement, sensory or other medical conditions. This blog does not replace formal therapeutic professional advice given by a health professional or medical practitioner. Reviews and endorsements of products will only be made based on my expertise and personal opinion; and deemed worthy of such endorsement. The opinions shared in sponsored content will always be my own and not that of the advertising company or brand. Content, advertising space or posts will be clearly identified if paid, affiliated or sponsored. Affiliate links may be found throughout this website in advertising. This means that if you follow through with a purchase from these links, Your Kids OT will receive a percentage of the sale. Your Kids OT undertakes to meet the requirements of the "Social Media Policy" as published by Australian Health Practitioner Regulation Agency (AHPRA). Further information about this policy can be found here.
Find meFollow me |

|
About me
AuthorHi, I'm Cindy and I am an Occupational Therapist. I enjoy working creatively with children to see them reach their potential. Read more about me here. 
|
Copyright © 2017 Your Kid OT