|
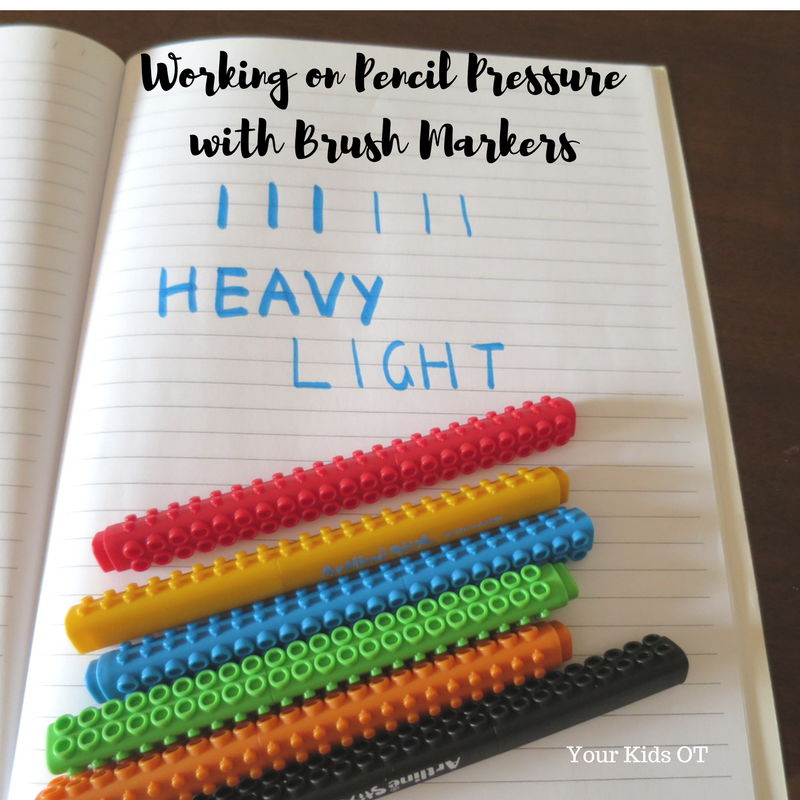
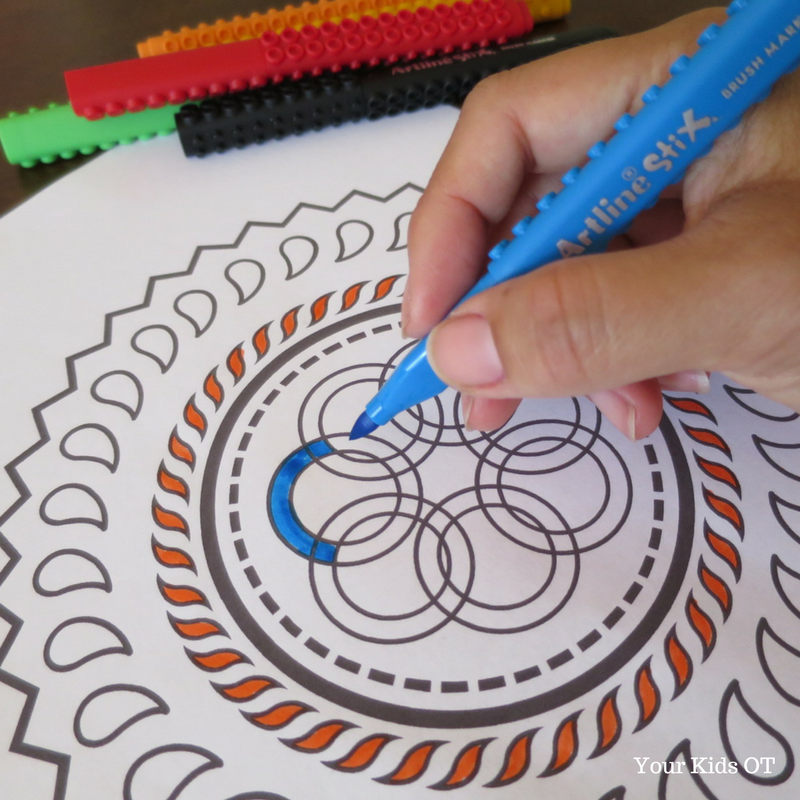
Affiliate links are used throughout this website to promote products I love and recommend. I receive a commission if any purchases are made through these links. Please see my disclosure policy for more details. Do you have a child who pushes down too hard onto the page when writing? Do they push so hard that the page tears or you can see their work through several pages? or Do you have a child who writes too lightly on the page... so lightly you can't see what they have written? Have you tried brush markers? Brush markers are a popular tool for those who do faux calligraphy and hand lettering. If you search Pinterest, Instagram or You tube... you will find many experts showing you how to use brush markers and the beautiful art work they can create. I'm a novice when it comes to faux calligraphy and hand lettering, but I do enjoy trying! I've been practicing with "brush markers" for a couple of years now and what do they say ... "practice makes progress"! Brush markers are marker pens or textas that have a soft tip. Depending on the amount of pressure you apply to the marker will determine the thickness of the stroke. You can see this in the writing below. Heavy pressure on the marker will produce a thicker stroke on the page and light pressure on the marker will produce a think stroke. Brush markers are a wonderful way to work on pencil pressure! In comparison to other textas and crayons, brush markers provide sensory feedback (proprioception) as the marker responds to the amount of pressure you apply. Children can see for themselves what happens when they press down "too hard" or "too lightly" with the feedback to their muscles and joints that often can't be described to them. Brush markers are fantastic for writing letters as seen above. I often have children write their names and if they have learnt cursive writing, they can be taught some basic faux calligraphy. The essence of faux calligraphy is to push down with more pressure on the "down strokes" of a letter and to reduce the pressure so there is a thin line on the "upward strokes" of a letter. Brush markers are also a fantastic tool for colouring in pictures. I have paired brush markers with my printable "5 Mandalas to Practice Pencil Pressure" which you can purchase from the Your Kids OT shop. "Mandala" originates from sanskrit and means "circle", however they have now become a tool for mindfulness and self expression. Brush markers are available in many different brands. The brush markers I use are called Artline Stix (not sponsored). I like them as there are a range of colours, they are economical and they have a triangular shape to grip onto (encouraging a tripod grasp). Kids also love them as they can be linked together. Watch how I use brush markers to write the heavy and light strokes in this video. If you have trouble viewing this video, please try this you-tube link https://youtu.be/q8A2NkpQ3zU For more information about "too much pencil pressure" go to "Why Your Child Presses Too Hard When Writing" from Miss Jaime OT! For more information about "too light pencil pressure" go to "Why Your Child Presses Too Lightly". Do you know a child who struggles with pencil pressure on the page? Have you tried brush markers?
The information on this site is general in nature. The activities are safe for most children, however, you should consult an Occupational Therapist or health professional to address specific movement, sensory or other medical conditions.
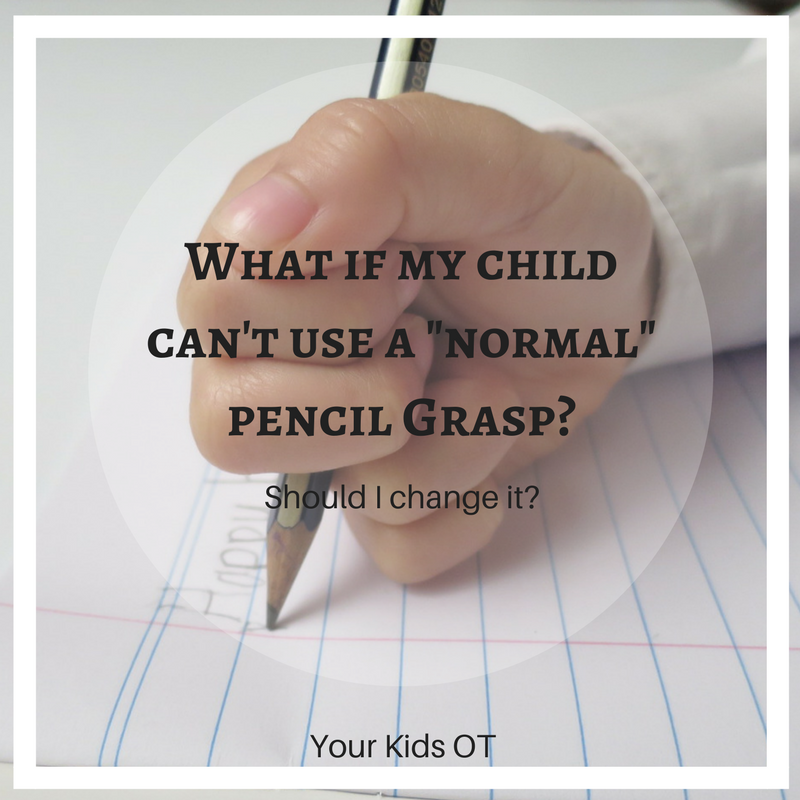
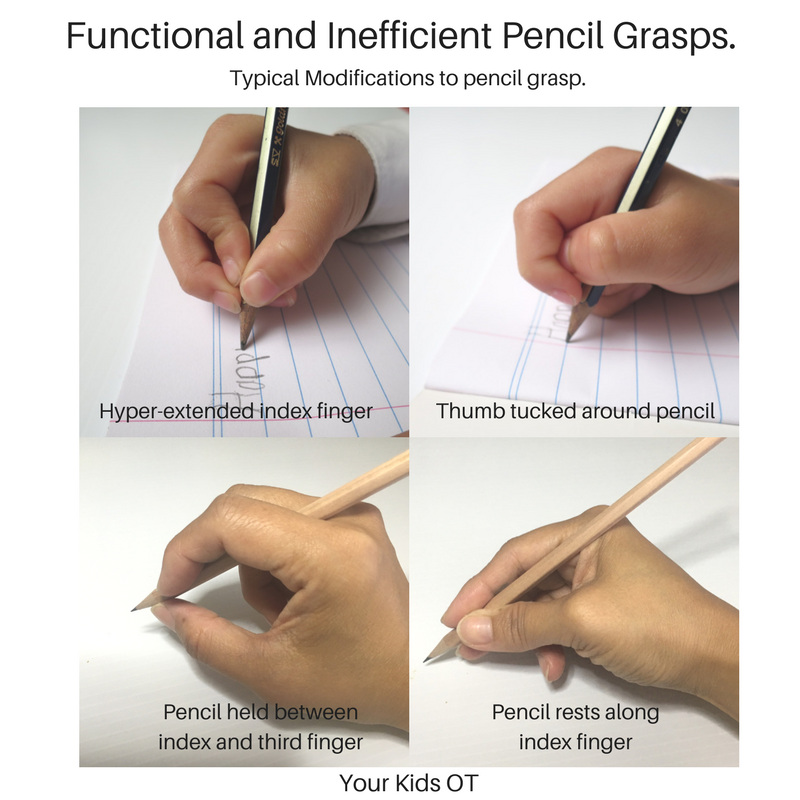
You may also like: Affiliate links are used throughout this website to promote products I love and recommend. I receive a commission if any purchases are made through these links. Please see my disclosure policy for more details. Not everyone uses a functional efficient pencil grasp. If you walk into a room full of adults and look at how they hold their pens, you will find a range of "functional grasps". In my last article I explained what makes a grasp "functional" and "efficient"; read more about this here. Functional Inefficient Pencil Grasps Some people are happy to use an inefficient pencil grasp because what they have is comfortable for them and produces legible writing. We all adjust our pencil grasps according to comfort and pain. Inefficient pencil grasps develop for a number of reasons. Sometimes these inefficient grasps develop because of weak hand muscles, low muscle tone or hyper-mobile joints. Sometimes the writing may be a little messy, however this compromise is accepted because it enables the writer the least amount of pain or the most stability. Some writers who use an inefficient grasp also make other accommodations. They may write for a short duration with regular breaks or use a modified writing implement. Typical Modifications of Pencil Grasp Here are some ways that children and adults hold the pencil to adjust for weak hand muscles, low muscle tone or hyper-mobile joints.
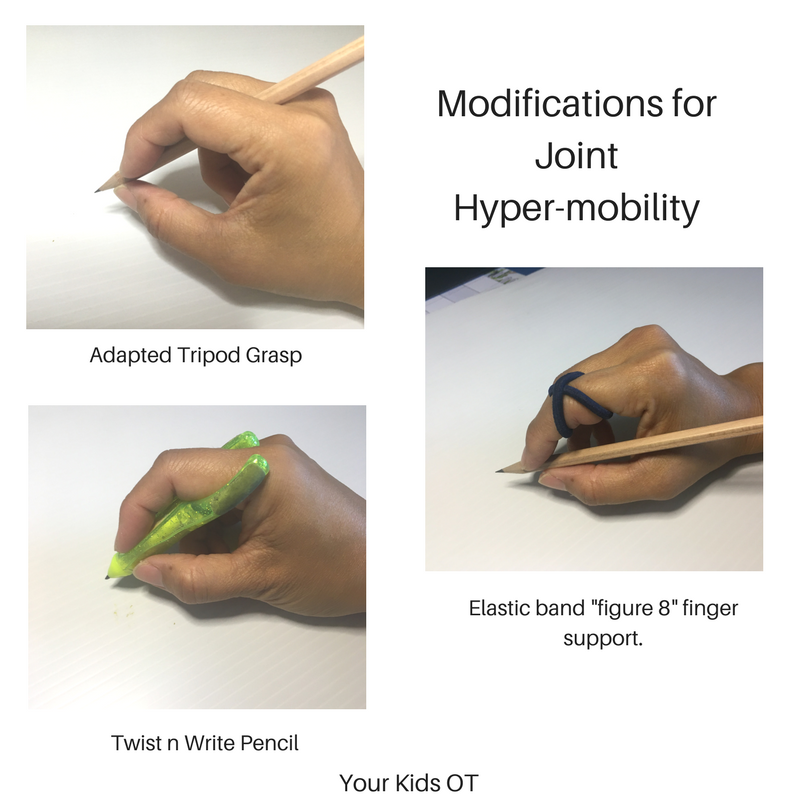
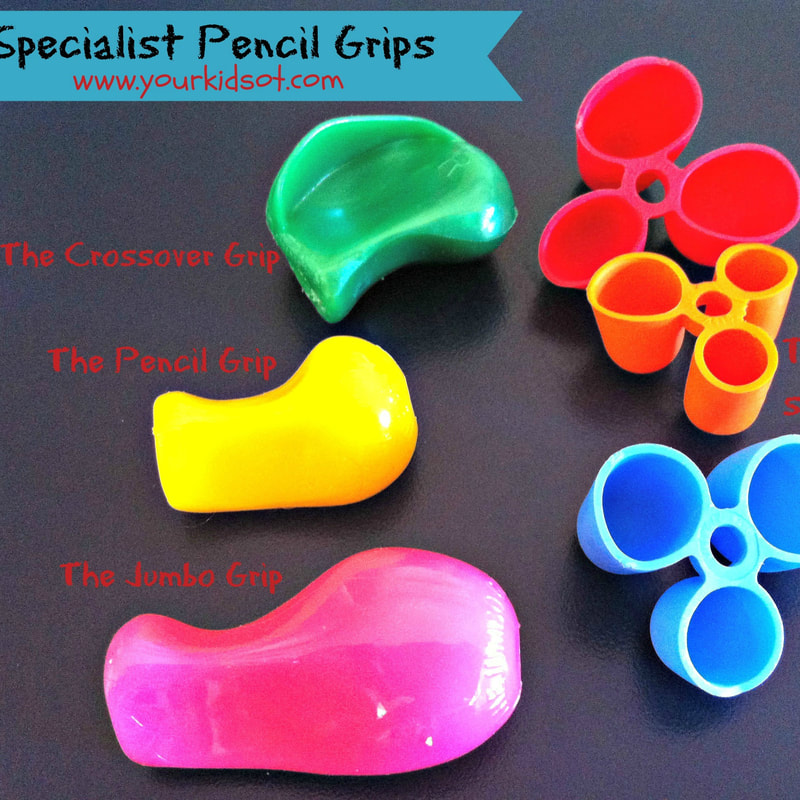
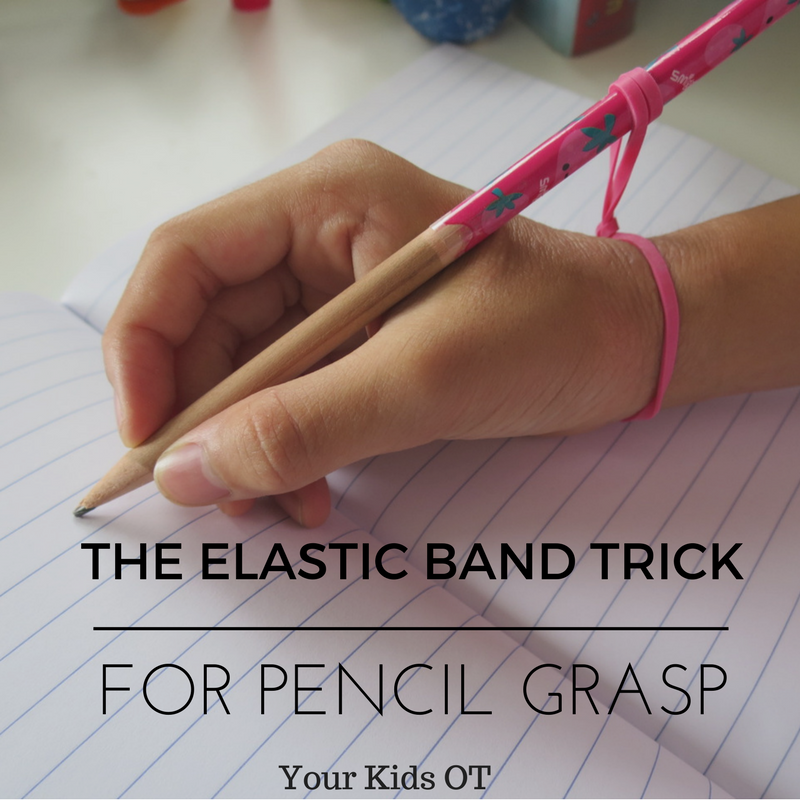
Movement of the pencil using these grasps may be either static (control coming from wrist, elbow or shoulder) or dynamic (from the fingers). Joint Hyper-mobility Children with finger joint hyper-mobility (often called "double-jointed") have difficulty stabilizing their joints to control pencils and other implements. These children are prone to fatigue so consideration should be provided with how much they are expected to write and for how long. Joint protection should also be considered (this may depend on the severity of joint hyper-mobility). Joint protection may be achieved through strapping or splinting to provide extra support to their fingers during tasks that require manual dexterity. A quick trick is to use a hair elastic twisted into a "figure 8" over the joint to provide some extra support (see photo below). Some children with joint hyper-mobility also benefit from using a modified pencil grasp such as those mentioned previously. Benbow (2006) describes the grasp held between the second and third fingers as the adapted tripod grasp. The "Twist n write" pencil (pictured below) provides an alternative way to hold a pencil. If you suspect that you child has hyper-mobile joints, seek professional medical advice. Inefficient and not functional Pencil Grasps. An inefficient pencil grasp moves from functional to not functional when there is an issue with: -
When to change a pencil grasp if it is inefficient? Pencil grasps should be looked at as part of an overall age-appropriate handwriting assessment and remediation. Consider working on a more dynamic pencil grasp with children who may be demonstrating one of the following :-
For some great ideas to work on pencil grasp - check out my "Handwriting and Writing" Landing page. There will be more practical ideas to come here on the blog! Where a grasp can not be changed due to a child's age or the issues described previously with low muscle tone and joint hyper-mobility; then consideration should be made with regard to the use of technology such as laptops, ipads and speech to text recognition. Additional exam support may also be considered for older children such as extra time or the use of a scribe. Do you or someone you know use an "inefficient" grasp? Is it functional?
References:
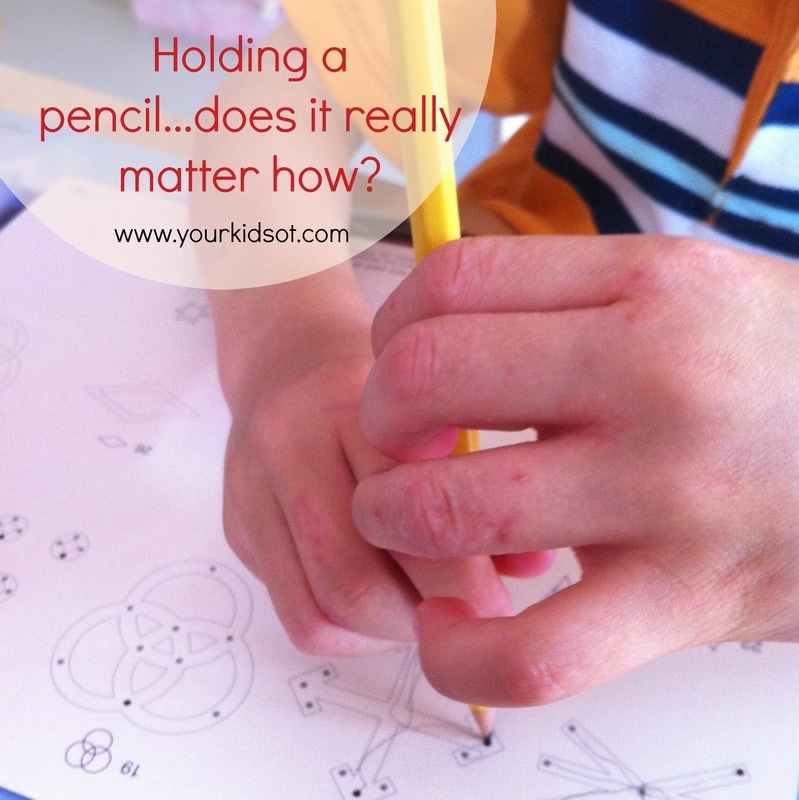
* Benbow, M. (2006). Principles and Practices of Teaching Handwriting. In Hand Function in the Child Foundations for Remediation (pp. 319-342). Mosby Elsevier. You may also like: Affiliate links are used throughout this website to promote products I love and recommend. I receive a commission if any purchases are made through these links. Please see my disclosure policy for more details. Ever been called "The pencil grip lady?"? Ever had parents say to you "I've got a shocking pencil grip but I've been alright with writing"? Ever been asked by friends at a kid's birthday party about how their child holds the pencil? Ever had friends say, "Can you check my pencil grip"? Ever have your own kids correct YOUR pencil grip? What's the big deal? Is it really important how our kids hold the pencil? Pencil grasps have been an ongoing discussion with teachers, parents and therapists. This article will be of particular interest to teachers and therapists. Some say pencil grasp doesn't matter. Some insist on change. Our children develop so differently. Benbow (2006)* tells us that boys have a tendency to develop their fine motor skills more slowly than girls and may have great difficulty managing writing tools; whilst girls may begin "writing" when they are as young as 2 1/2 years and may adopt pencil grasps that are inefficient or harmful as they pursue an early fascination with letter formation. Benbow also tells adults that we should not assume that children will know the best way to hold a pencil or that they will acquire the ability through incidental experience. Some studies have indicated that how a child grasps a pencil does NOT have significant influence on handwriting performance, however children WITH poor handwriting use significantly less mature pencil grasp patterns than children with good handwriting. ** There is also much discussion in the literature about dynamic (mature) grasps being suggested as the best grasp for writing when compared with static (immature) grasps. *** SO WHAT DOES THIS ALL MEAN? PENCIL GRASP AND HANDWRITING Pencil grasp is just ONE aspect of handwriting that occupational therapists consider. There is a developmental progression that is expected that children work through in their early years. Grasp patterns develop through play and experiences that children have interacting with their environment and objects they find in their environment. Read more about the developmental progression of pencil grasp here. Evaluation of Pencil Grasp. When looking at a child's pencil grasp, there are a number things that occupational therapists consider.
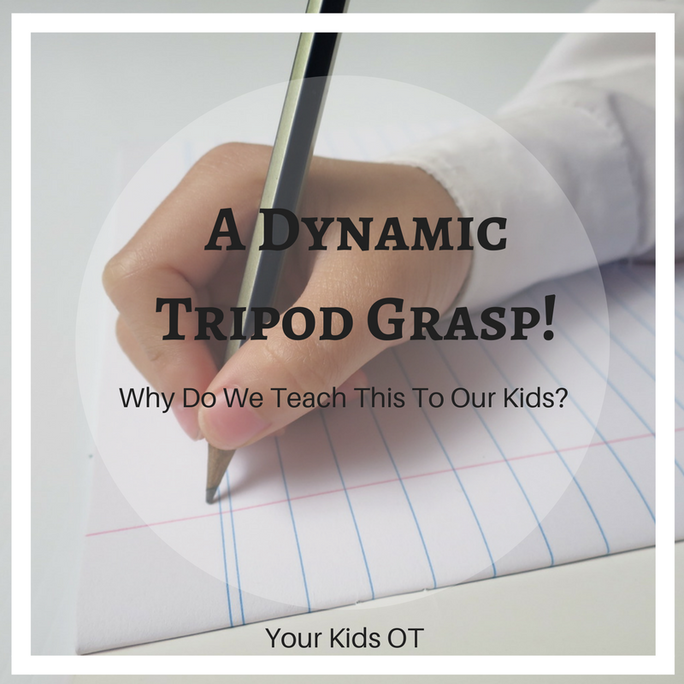
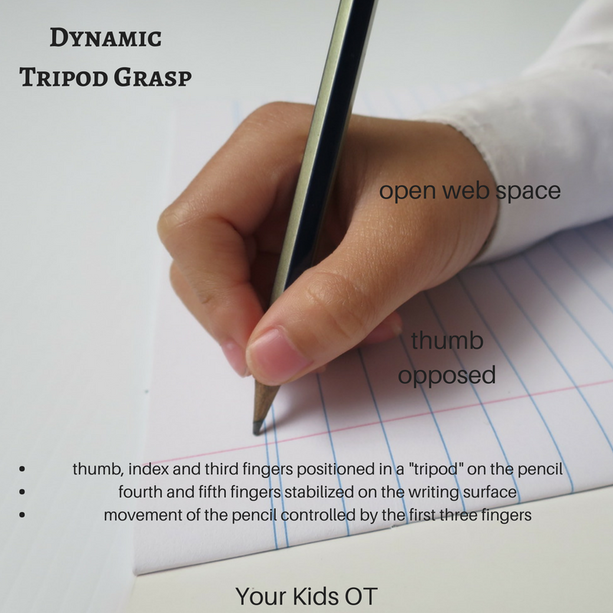
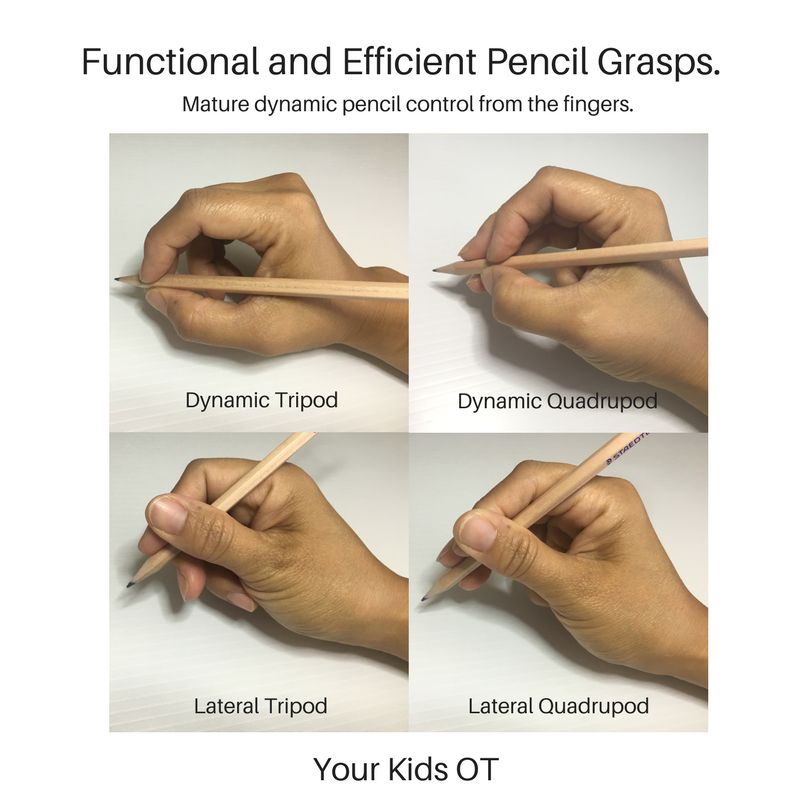
Defining Pencil Grasp. What makes it good? Functional? Efficient? Static? Dynamic? For efficient pencil control, OTs have for a long time looked for a dynamic pencil grasp (see photo below). The dynamic pencil grasp involves the thumb opposed to the index and third fingers with all three fingers position in a tripod on the pencil; creating an open web space (the nice circle made by the thumb and index finger) with the fourth and fifth fingers stabilized against the writing surface.*** It is the preferred grasp for writing speed, control and letter formation with movement of the pencil being controlled by the first three fingers (thumb, index and third fingers). **** This grasp is described as efficient, functional and dynamic. HOWEVER, this is not the only grasp which can be described in this way. Let's look at some definitions. FUNCTIONAL: A functional pencil grasp is any grasp that produces output on the paper whether that is scribble for a toddler, legible or messy handwriting for a school age child or adult. Whilst functional, this grasp may (or may) may not lead to fatigue, pain, slow writing speed or poor endurance. EFFICIENT: An efficient grasp is any grasp that produces writing on the page which is legible and was completed within a reasonable time frame. It enables the writer to produce a reasonable quantity of work without pain or fatigue. DYNAMIC: A mature pencil grasp where pencil control comes from movement of the thumb, index and third fingers whilst the fourth and fifth fingers are tucked into the palm and stabilized on the writing surface. STATIC: An immature pencil grasp where pencil control comes from the wrist, elbow or shoulder so that the hand moves as one unit. TRIPOD: A grasp where the pencil is held with three fingers touching the pencil (thumb, index and third fingers). QUADRUPOD: A grasp where the pencil is held with four fingers touching the pencil (thumb, index, third and fourth fingers). LATERAL: A grasp where the thumb lies adducted to the side of the index finger or crosses over the pencil and the movement of the pencil comes from the index and middle fingers predominantly (without the thumb's assistance). Which grasp should we teach? As occupational therapists we are primarily concerned with helping a child achieve a functional and efficient pencil grasp. This has been seen in recent literature as being achieved through dynamic movement of the fingers which can be seen in 4 differing grasps. These grasps are the dynamic tripod grasp, dynamic quadrupod grasp, lateral tripod and lateral (thumb) quadrupod. *** Schwellenus et al (2012) found that neither speed nor legibility of writing was affected by these grasp patterns. These authors continue to recommend that the dynamic tripod grasp should be taught to children when commencing writing. If a child has difficulties with writing then the grasp pattern should be observed and if it was one of these grasps mentioned then the therapist should look at other areas of handwriting remediation. Just a side note from my personal experience as an occupational therapist. There are also many children who may hold the pencil using the grasps described in this section (and seen in the photo below), however it is also important to observe where pencil control comes from. Does the child hold these fingers rigidly and move their hand at the wrist, elbow or shoulder? In which case these grasps are no longer dynamic but static and child demonstrates some difficult with separation of the two sides of the hand (read more about that here). THIS month is all about PENCIL GRASPS at Your Kids OT! I have more to share with you about inefficient and adaptive grasps; and a fun easy way to practice applying the "right" pencil pressure. Can't wait?!
I'm looking forward to seeing some wonderful creative ways to address pencil grasp and pencil control! What is your favourite way to encourage a dynamic, functional and efficient pencil grasp?
References: * Benbow, M. (2006). Principles and Practices of Teaching Handwriting. In Hand Function in the Child Foundations for Remediation (pp. 319-342). Mosby Elsevier. ** Pollock, N., Lockhart, J., Blowes, B., Semple, K., Webster, M., & Farhat, L. et al. (2009). Handwriting Assessment Protocol (2nd ed.). McMaster University. *** Schwellnus, H., Carnahan, H., Kushki, A., Polatajko, H., Missiuna, C., & Chau, T. (2012). Effect of pencil grasp on the speed and legibility of handwriting after a 10-minute copy task in Grade 4 children. Australian Occupational Therapy Journal, 59(3), 180-187. http://dx.doi.org/10.1111/j.1440-1630.2012.01014.x **** Elliott, J. M & Connolly, K. J. (1984). A classification of manipulative hand movements. Developmental Medicine and Child Neurology, 26 (3), 283-296. You may also like:
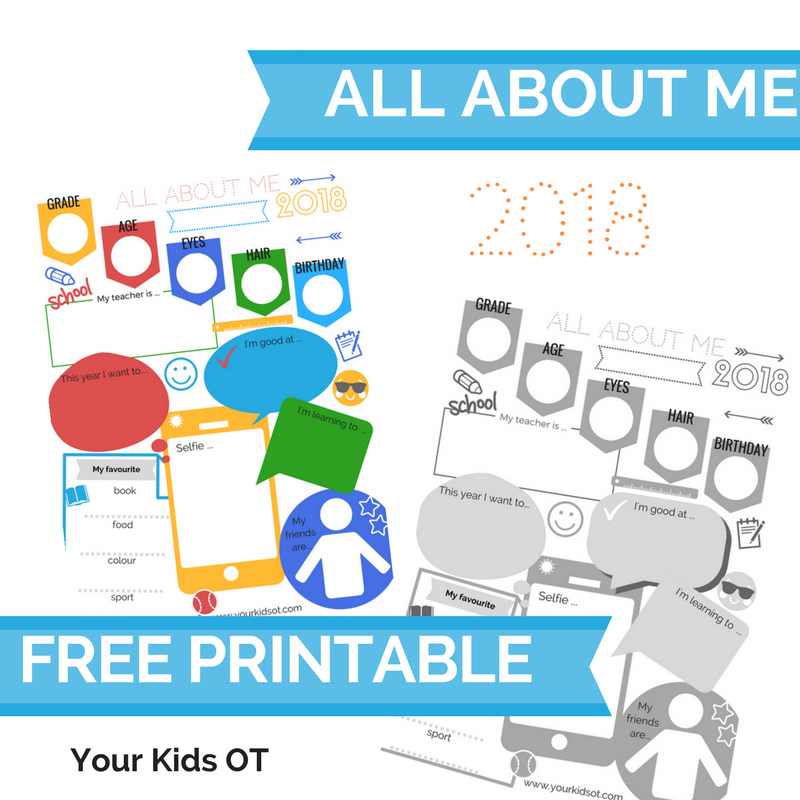
The beginning of the year is the perfect time to record a snapshot in your child's life! It is the beginning of new school year in Australia and I know teachers and therapists are busy planning an exciting year ahead!
The printables I create at Your Kids OT are first and foremost for me and my own use! I'll be using this with my OT kids in the first sessions of the year. I like to share my printables with you so that you can use them too! The 2018 "all about me" page is here with a colour and a black and white version! Miss 11 years suggested that kids would prefer a coloured version! I suggested that those conscious of the cost of ink cartridges may prefer a black and white version! lol It's easy to get your copy of this FREE printable (both in black and white as well as colour). Simply subscribe and confirm your subscription. Receive the free printable as a thank you. (Current subscribers will only be added once to the list) I hope you like it! Sign up for the YKOT e-newsletter!(Receive the ALL ABOUT ME 2018 PRINTABLE as a thank you!)
This forms collects information we will use to send you our newsletter with our latest posts, products and special offers. Already subscribed? Don't worry you won't be added twice! Success! Now check your email to confirm your subscription to receive the FREE "All about Me" Printable!
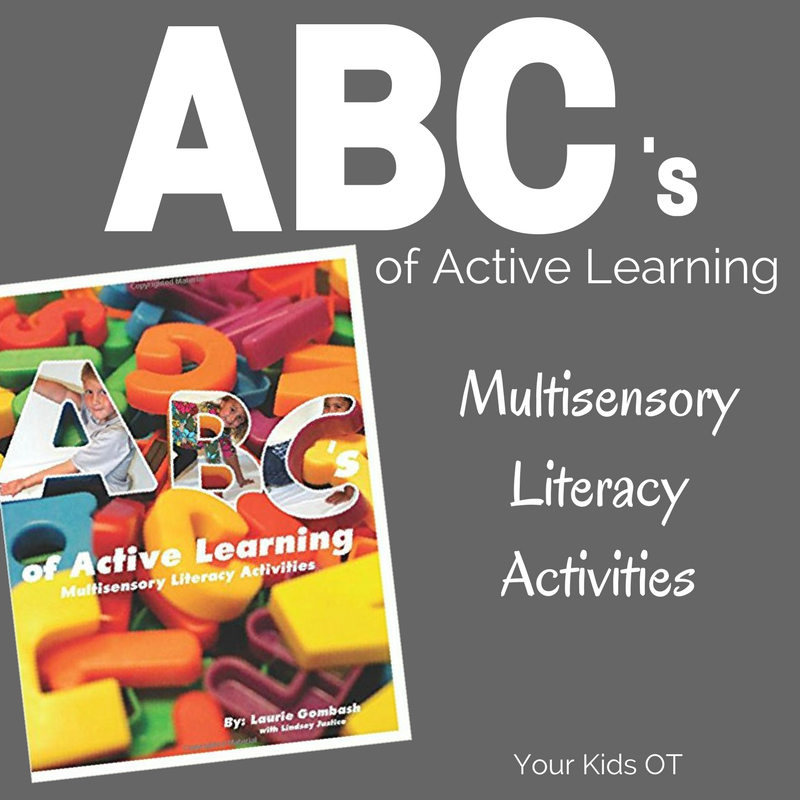
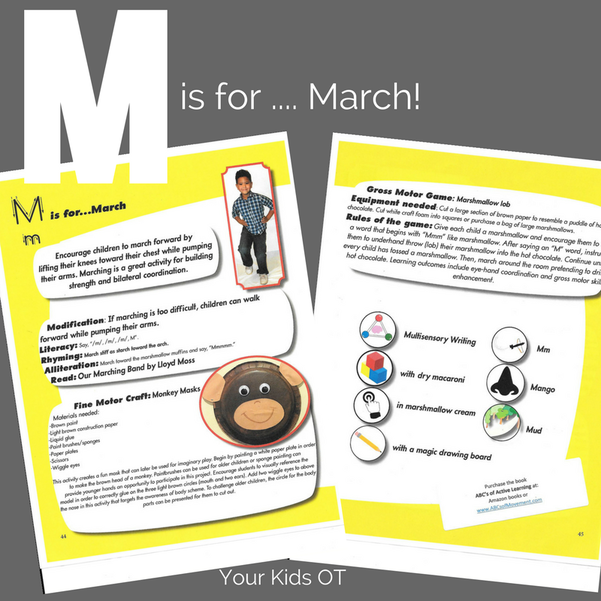
Today on the blog, I would like to introduce Laurie Gombash! Laurie is a physical therapist who loves to teach the alphabet through movement and a range of multi-sensory activities. To capture an array of learning variability gives children an opportunity to learn in ways they understand through their senses. Laurie is sharing her latest book, ABC's of Active Learning© with us today! What an exciting resource that would be valuable for anyone working with young children! Thanks for this opportunity to guest blog and tell everyone about my new book, ABC’s of Active Learning©. It's the same 26 letters with a multi-sensory twist that provides a lively and engaging teaching and learning experience! As parents, caregivers, practitioners, or teachers, we realize the importance of early literacy development, but how do we continue to find creative ways to present critical learning skills? More importantly, how do we capture the motivation of our learners who come to us with different strengths and areas in need of continued development? The ABC’s of Active Learning© targets the whole brain through movement activities, organized games, multi-step crafts, as well as multi-sensory pre-writing activities that can be used and graded for learners of all abilities. With the rise of technology dominating so much of the young child's time, this tool takes learning back to the basics, providing organizing movement activities that help to establish a child who is ready to be an active participant in his or her learning! For example, for the letter M, Our Marching Band by Lloyd Moss is the suggested read.
To challenge children’s phonological awareness, encourage them to say the words that start with the “M” sound. Learning outcomes from Marshmallow lob include eye-hand coordination, phonological awareness, and gross motor skill enhancement. All activities are designed to be fun and motivating, while simultaneously providing rich multi-sensory input, improving motor development and learning. This book can stand alone or be a supplement to The ABC’s of Movement® activity cards. To purchase these products or to find out further information refer to www.ABCsofMovement.com.
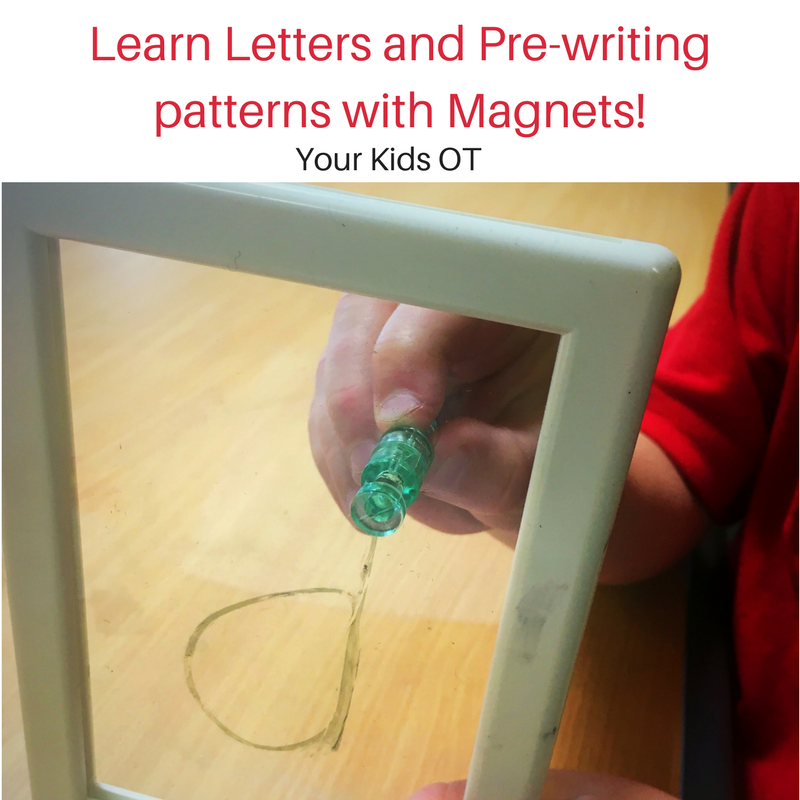
Magnets are so fascinating for kids! How do they work? What makes them attract or repel something?
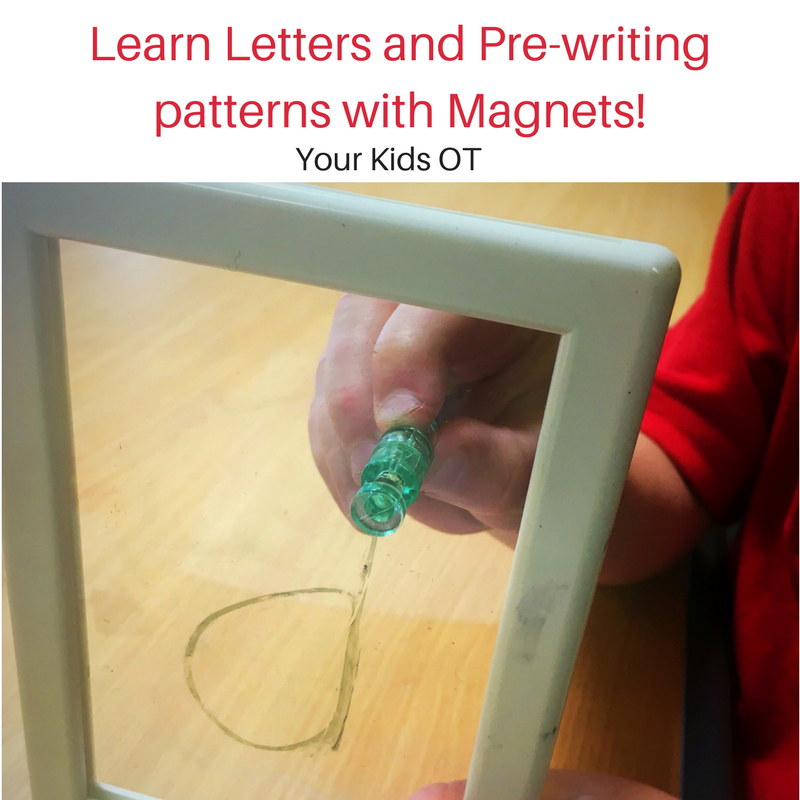
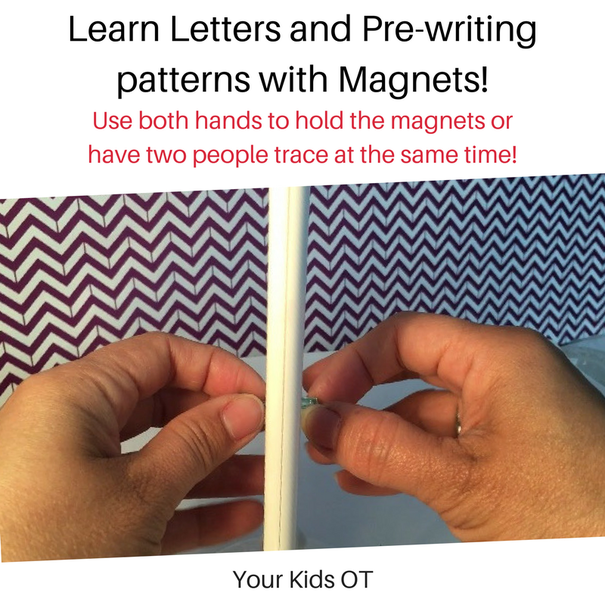
Using the fascination children have with magnets ... I created a fun way to learn pre-writing patterns and learn letters too! What do you need? * two-sided plastic frame (I use this frame from IKEA and took out one of the plastic sheets) * magnets * whiteboard markers (and eraser) * felt/glue (optional) The felt and glue are optional. I added a small piece of felt to my magnets to prevent scratching the plastic frame. What do you need to do?
I hope you enjoy this video showing you what you need and what you need to do to learn pre-writing patterns and letters with magnets!
Note: The last time I included a video in my blog post, my loyal newsletter subscribers couldn't see it! Please also find the video available on You Tube at this link !
Why I love this activity!
This activity has so many great benefits! * Pincer grasp - Encourage your child to hold the magnet between their thumb and index finger. * Separation of the two sides of the hand - Encourage your child to tuck away their 3rd, 4th and 5th fingers. * Wrist Extension - As this frame is vertical; your child's hand will naturally be placed in a position of wrist extension. * Bilateral coordination - Encourage your child to use their dominant hand to hold and move the magnet, whilst using the non-dominant hand to hold the frame. * Visual Tracking - Your child should naturally watch the magnet as it traces the pattern, shape or letter. If they can't track visually - check out my variation below! * Shape and letter formation - Use this activity to teach pattern, shape and letter formation as your child will "feel" their hand moving in space as each letter is formed (spatial awareness). This learning through movement is called "kinesthetic" learning. Children can also learn the planning involved with forming patterns, letters and shapes. You may want to add a verbal element so that your child may repeat this to help with understanding the steps involved. The verbal prompt may also help them to plan when they form these patterns, shapes and letters on their own. The development of these skills are so important for handwriting on paper! This activity provides an excellent way to build "handwriting" skills without having your child "just write" for practice. It provides multi-sensory learning, is "novel" and fun! It is really quick to set up (once you gather your supplies). It is also transportable ... perfect for the mobile therapist!
Variations
For more activities to promote the development of fine motor skills; see this page with a list of my articles on this subject! Does your child love magnets? Do you have an IKEA nearby? I would love to hear if you make any further variations to this activity idea!
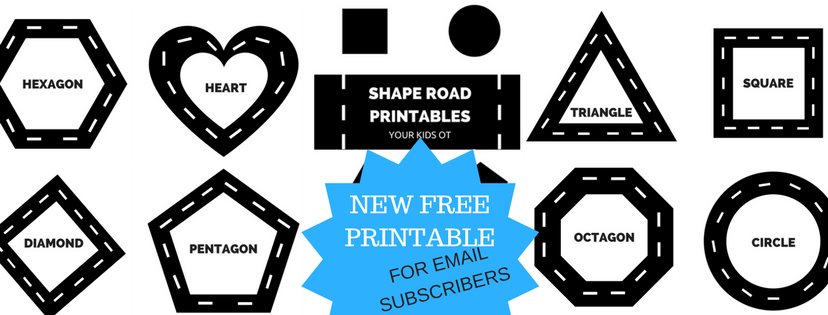
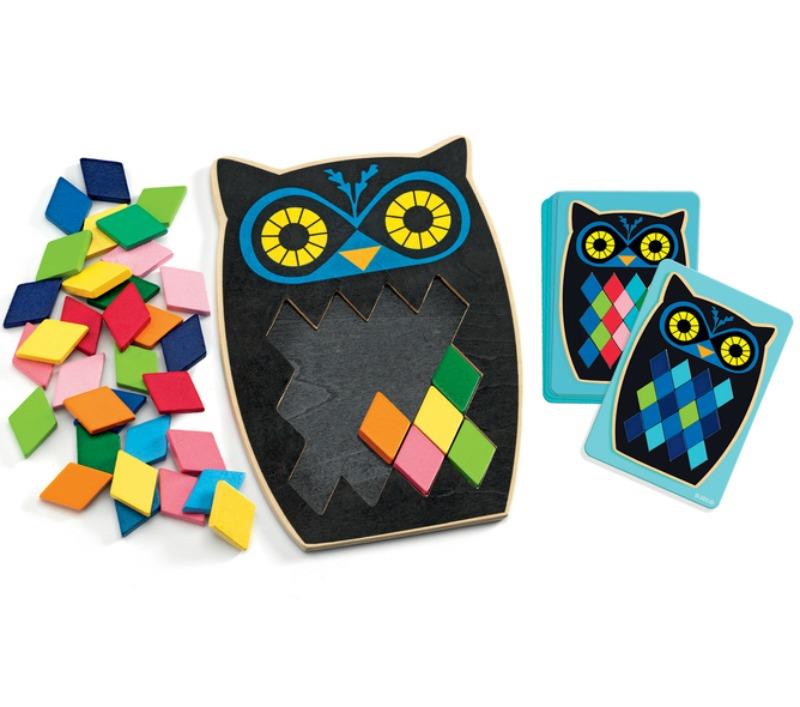
Toys are a BIG thing for occupational therapists! Maybe we are just BIG kids that never quite grow up (Peter Pan style)? We get excited when we see new products released. We get thrilled when we see old products re-used or re-purposed. We are nostalgic about our old toys. We are curious to see how children "play". We love seeing children use their imaginations and interact with each other. We are fascinated when children use "non-toys" as "toys"! AND We love to see toys which help guide child development! This may be fostering curiosity, problem solving, creativity, cause and affect.... or developing skills (fine motor, gross motor, visual motor, sensory motor, etc)! But what fine motor skills are important with pencil grasp and handwriting? As occupational therapists, we are looking for more than a child's ability to play with Legos or pick up sultanas! These are the common examples that get shared with us in relation to fine motor skills. A child's ability to hold a pencil (ie. pencil grasp) and then use the pencil fluently and effectively may be influenced by a number of skills. Before we look at the hand and fine motor skills, we also need to consider the development of bilateral coordination skills (using both sides of the body in a coordinated way), being able to stabilise the body during writing and having the right posture (read about this at Miss Jaime OT). Important fine motor skills for pencil grasp and handwriting. • Pincer grasp - This is the neat "pinch" achieved between the thumb and index finger. Read more about this HERE. • Thumb opposition - This refers to the ability of the thumb to rotate and reach to touch all other fingertips of the same hand. Read more about this from The Inspired Treehouse HERE. • Palmar arches - This refers to the arch formed when we "cup" our hands and is related to the loops of blood vessels which are found in our hands. Read more about this from Irvine USD Special Education Preschool HERE. • Separation of the two sides of the hand - This the use of the thumb, index and third fingers of the hand whilst maintaining stability in the fourth and fifth fingers of the hand. Read more about this HERE. • Wrist stability and extension - This is the position of the wrist so that it is resting on the table and slightly extended so that the fingers can be used to control the pencil. This is one of the reasons as occupational therapists, we love to encourage working on a vertical surface or use of a slope board if necessary. • Hand strength - This refers to the contraction of the hand muscles to grasp a pencil to control it without fatigue or pain. Read more about hand strength HERE. • In-hand manipulation - This refers to the ability to move items around in the hand using precise finger movements and includes translation, rotation and shift. Read more about this in THE HANDWRITING BOOK. This is a list of MY favourite toys that help children in the fine motor skills they need for an efficient pencil grasp and fluent handwriting. 1. Wind-up toys. 2. Bubble Wrap 3. Travel-size toys (eg. connect four, battleship, mastermind) 4. Stick toys (eg. Kerplunk, Pop-up Pirate) 5. Wikki stix 6. Tweezer/tong games (eg. avalanche, Operation, ) 7. Squeeze Toys (eg. bath toys, claw activaters, popper toys, roll tongue animals etc) 8. Beads and lacing toys (eg. FILO, HAPE wooden beads) 9. Dice games (eg. Snakes and Ladders, Monopoly, etc) 10. Trigger finger games (eg. Hungry Hippos, jumping frogs) 11. Finger Lights 12. Playdough or putty games (Refer HERE for ideas!) 13. Finger puppets 14. Spinning tops 15. Elastic Band Toys (eg. loom bands, Thumbs up, etc) 16. Toys with small suction pads (eg. Squigz, Stik Bot, Oogi) 17. Screwdriver, nuts and bolts toys 18. Eye droppers 19. Mosaic tile games (Moza Blop - see photo) 20. Peg boards 21. Marble games (eg. Tricky Fingers, marble runs, marble maze) 22. Magnetic boards (eg. Magnatabs, Marbletick, magnetic drawing boards) 23. Stamps with ink pads 24. Stickers 25. Trigger toys (eg. small water pistol, pinball) Don't forget to look around your home for "loose parts"! "Loose parts" might be anything from buttons, toothpicks, pom poms, paper clips, sticks, elastic bands, coins, etc. These make great "tools" for fine motor play. Use them over my "Shape Roads" (which you can receive by subscribing HERE) or "Letter Roads" (read about this HERE). What are your favourite toys for the development of fine motor skills?
Disclosure: Affiliate links are included in this article to promote products that I recommend. Reviews and endorsements of products will only be made based on my expertise and personal opinion; and deemed worthy of such endorsement. The opinions shared in sponsored content will always be my own and not that of the advertising company or brand. You may also like:
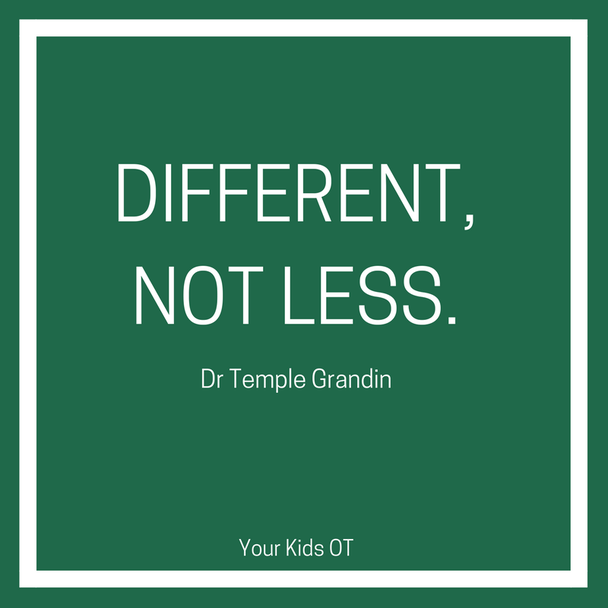
"Different, Not Less" Dr Temple Grandin.
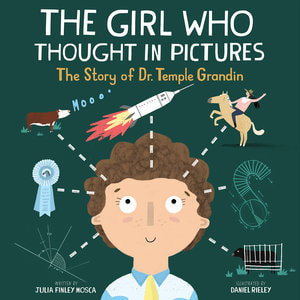
Dr Temple Grandin is internationally recognized as a renown scientist and spokesperson about her own life as a person with autism. She seeks to help others to understand that people with autism may have differences which make them unique and special. Dr Grandin shares her own experiences so others can gain insight; demystifying what it means for someone to have autism, helping to remove preconceptions and prejudices. "The Girl Who Thought in Pictures: The Story of Dr. Temple Grandin" is a wonderful picture book written by Julia Finley Mosca and illustrated by Daniel Rieley. Presented as a children's book with rhyming couplets and engaging pictures, the book outlines Dr Grandin's life including her struggles in childhood (such as speech, regulating her emotions, social interactions with teachers and peers). The reader journeys with Dr Grandin as she discovers her own unique features and recognizes that she is "different, not less". Whilst the book provides a simplified version of Dr Grandin's life, it provides an age-appropriate introduction to Autism for children to understand. It introduces concepts and themes about visualization (seeing in pictures), difficulties with communication and social skills, acceptance of support, facing adversity, accepting one's weaknesses and strengths, problem solving and learning from mistakes. All children will be able to relate to these themes. We learn how Dr Grandin's perseverance and determination helped her to "march right through that door", leaving readers with a powerful message to embrace their unique characteristics and to stand tall when facing challenges or new experiences. At the end of the book, there is a letter by Dr Grandin to the reader, some fun facts and a timeline of her life. These supplements help the adult reader to understand more about this incredible woman, providing more of the "back story" for those who may be reading about Dr Grandin for the first time.
TheWorld Health Organization (April, 2017) report that the prevalence for autism is now 1 in 160 children. This means that most children will know of a child who has autism; whether this is within their own family, their school environment or local community. Despite the prevalence of autism, there continues to be many prejudices and preconceived ideas about autism in our society. Books such as "The Girl Who Thought in Pictures" are important for educating both our children and society at large, introducing them to autism in a way that can be related to through the life of Dr Temple Grandin.
I highly recommend this book to families, therapists and schools. I have created a set ofprintable resources to accompany this book which includes writing prompts for a character study, story re-tell, an examination of the themes and a word find puzzle. These printables are FREE for a limited time (offer ends October, 2017), so download them today and buy the book!
Also available from our TPT store!
Have you read "The Girl Who Thought in Pictures: The Story of Temple Grandin"? I would love to hear what you think of the book!
Disclosure: This product was gifted to Your Kids OT for the purposes of a review. Reviews and endorsements of products will only be made based on my expertise and personal opinion; and deemed worthy of such endorsement. The opinions shared in sponsored content will always be my own and not that of the advertising company or brand. Affiliate links may be found throughout this website in advertising. This means that if you follow through with a purchase from these links, Your Kids OT will receive a percentage of the sale.
You may also like:
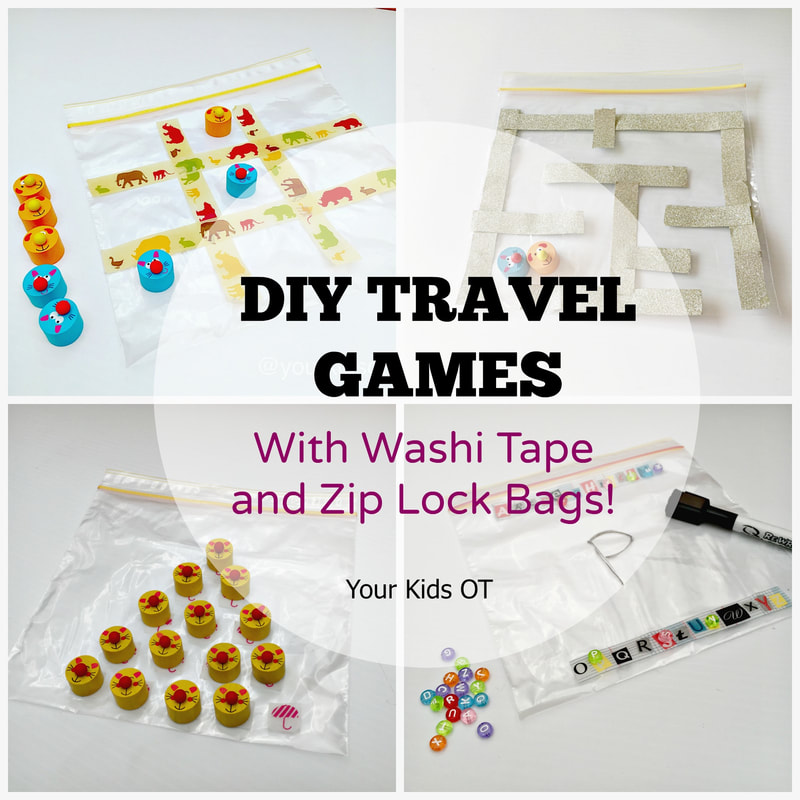
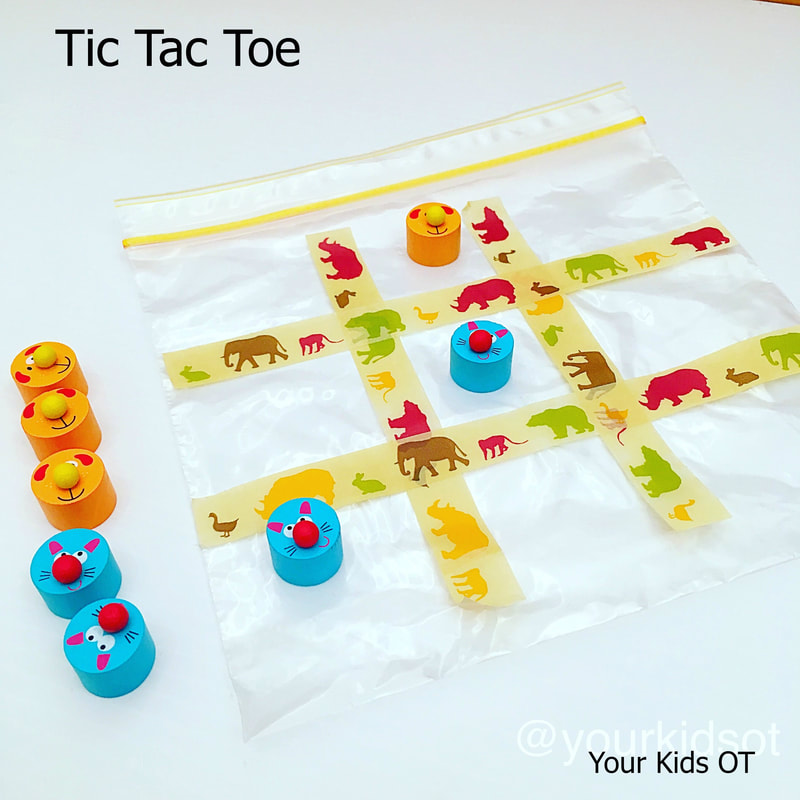
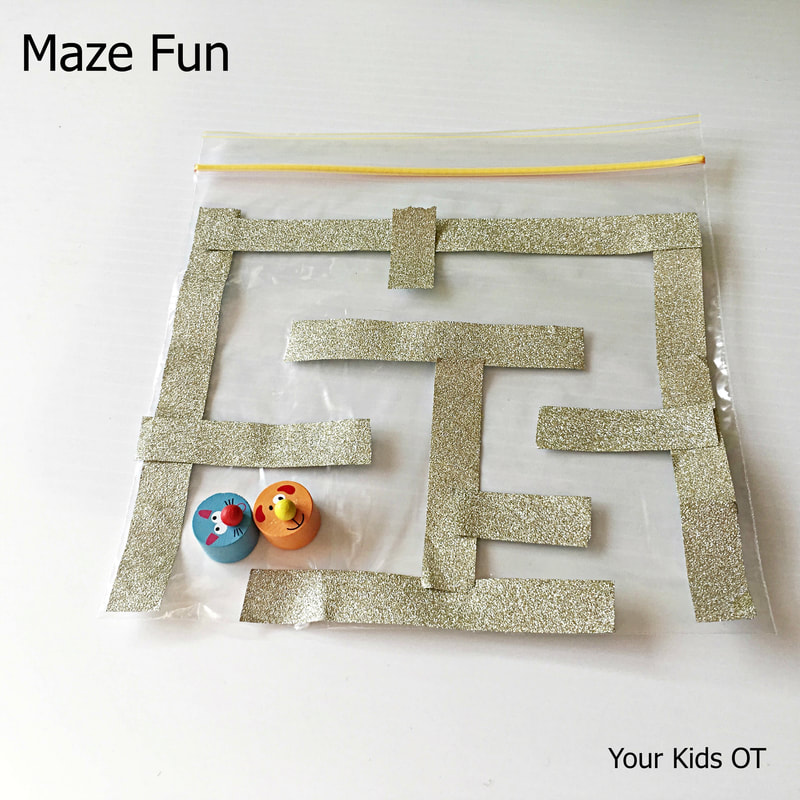
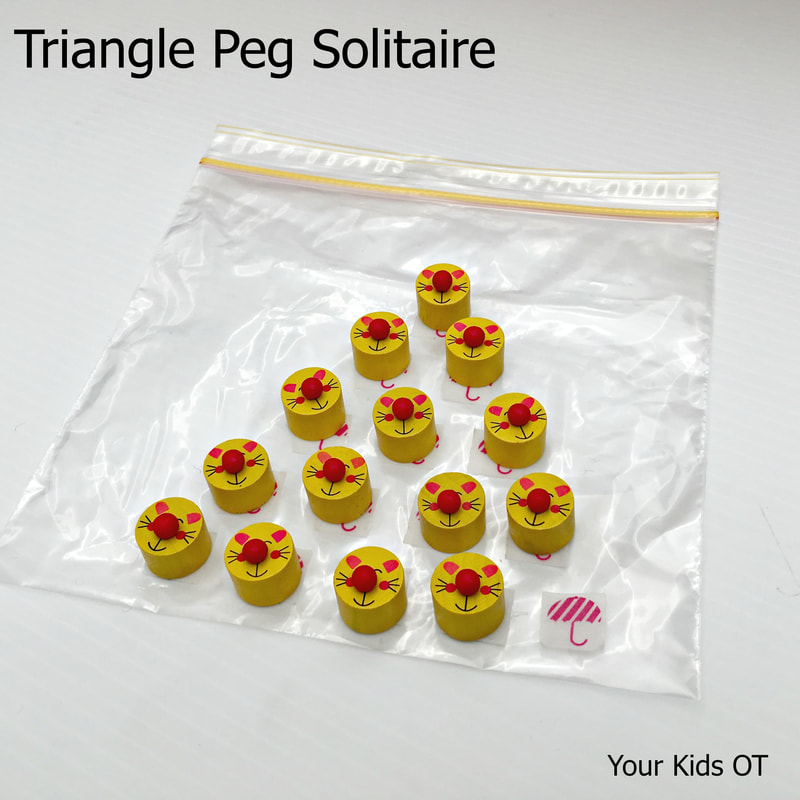
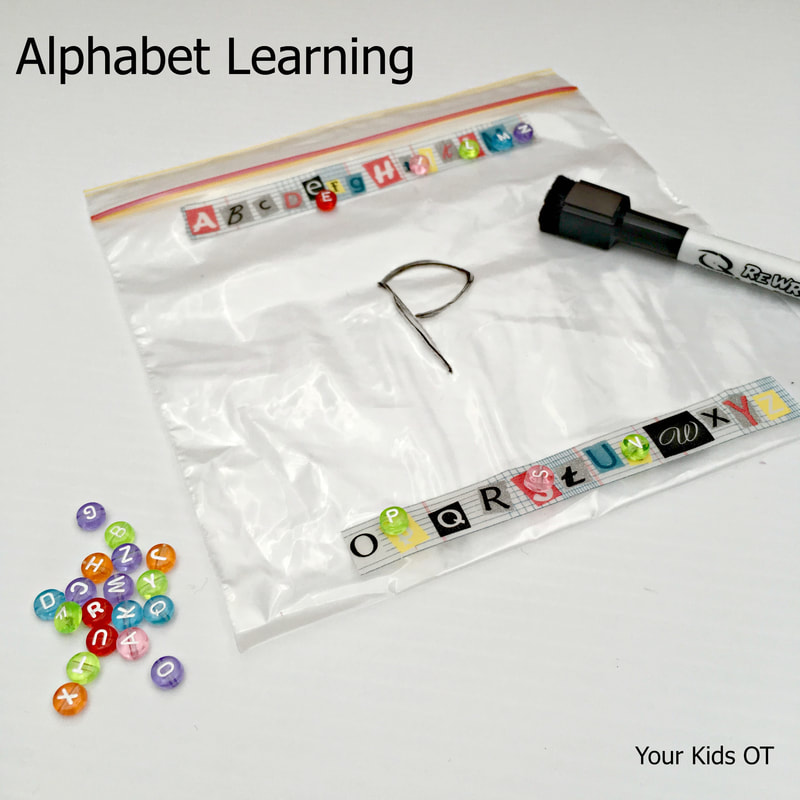
Ever struggled to entertain your kids on a long haul flight or doctor's waiting room? or maybe you are a mobile therapist looking for new ideas that are light and easy to carry?! Here are some quick easy DIY travel games that you can make with your favourite washi tape and some zip lock bags to keep your kids entertained and learning at the same time! The surface of the zip lock bag is the playing surface and all the small parts can be stored in the bag after playing! So neat and convenient, ready for travel! 1. Tic Tac Toe (or noughts and crosses). You will need a zip lock bag, 4 strips of washi tape and 8 small counters (four of each type). Simply lay your washi tape strips to form the tic tac toe board and you are ready to play! Can't get any easier than that! My cute counters came from an old game we weren't using anymore, however you could use small pebbles, buttons, pom poms or any other "loose parts". Tic tac toe is such a great game for kids to work on motor planning and turn taking. You can encourage a pincer grip with the counters too! 2. Maze Fun You will need a zip lock bag, washi tape cut into strips and some counters. Design a maze on your zip lock bag using washi tape. You could make one like the one I have made or you could make a shape or a road too. The best thing about washi tape is that is repositional. Change the maze after you play! If you have an older child, they may be able to come up with their own design. You could use counters to go through the maze or you could make the washi tape the path to follow. Draw some black lines down the middle of your tape and you have a road for a little car to drive down. Draw some line across the washi tape and you can easily create train tracks! Mazes are such a great way for kids to work on visual motor planning and tracking. They can work on problem solving too if the maze is too hard for them. And you guessed it, encourage a pincer grasp with the counters or loose parts that you use! 3. Triangle Peg Solitaire You will need a zip lock bag, 15 small squares of washi tape and 14 counters. Start this game by assembling the counters like the photo above with the bottom right hand square empty. To play the game, you may move a counter to "jump over" one other counter onto an empty square. Pick any counter next to continuing "jumping over". Play ends when you can't move (ie. you don't have a counter to jump over). The aim of the game is to have the least counters left over. This game is perfect for older kids who may be challenged to one counter left after making all moves. This game will be addictive, as your child will want to try again to beat the number of counters they have remaining. It is a good problem solving and visual planning game (whilst working on that pincer grasp). 4. Alphabet Learning. You will need a zip lock bag, alphabet washi tape (or write on plain washi tape with permanent marker), alphabet beads, whiteboard marker and eraser. Alphabet beads are easy to find in hobby or craft stores or you may even find them in your local discount (dollar) store. Have your child match the beads to the washi tape for alphabet recognition and learning alphabetical order. You could also put in a small tub of playdough so that the beads could be pushed into the playdough. Use a whiteboard marker to write the letters on the zip lock bag and have an eraser (or a tissue will work) to rub out the letter. Change it up and use lower case letters, numbers or spell out sight words or spelling words! The benefits of this activity are self explanatory! Educational with a touch of fine motor manipulation! Yes you guessed it, this also works on pincer grasp but you can also work on pencil grasp and letter formation too! Do you want to see these games in action? Watch this video I put together (be kind as I'm still learning about video editing!). If you are reading this in your email, please click on the title of this blog so that you watch this video via your internet browser! Looking for more amazing travel games? Today. I'm linking up with some of OT blogging friends to bring you more! Make sure you check out their ideas and follow them too!
Let me know if you try out my DIY travel games made with washi tape and zip lock bags! No crafting experience required! Happy playing!
You may also like:
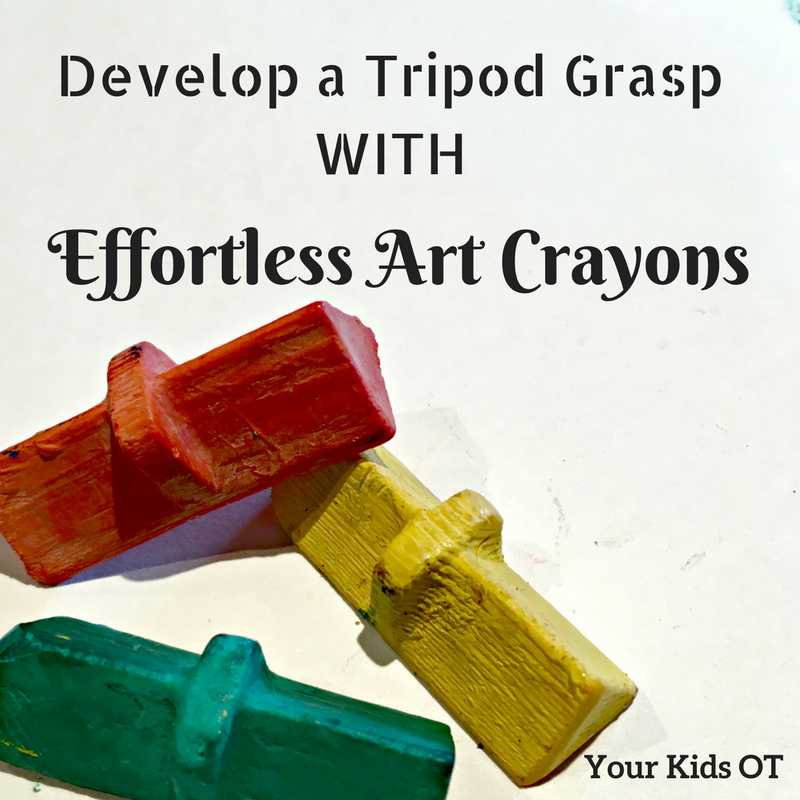
Encouraging a tripod grasp and a child's interest in drawing can be difficult. As an occupational therapist, I am often asked to see these children to help them with their first steps in holding a "drawing implement" and to help them to make meaningful marks on the page. We use the term "tripod grasp" to describe a grasp of the pencil or crayon with three fingers of the hand (thumb, index and third finger). Ideally, movement and control of the implement also comes from the muscles of these fingers. By about 4 years of age, a child can be encouraged to use a tripod grasp. Not sure if your child is holding the pencil or crayon the way they should be? Refer to this article HERE which talks about developmentally appropriate pencil grasps, inefficient and functional grasps. Introducing "Effortless Art Crayons" by Two Sparrows Learning Systems. "Effortless Art Crayons" are a uniquely shaped crayon which was originally designed with input from an occupational therapist. They are short triangular shaped crayons that may be used at either end. There is also a small raised section in the centre which may be used to assist grip (but doesn't need to be). This unique shape works well for children of all ages. I found that the young OT kids whom I see (who are yet to develop a tripod grasp), held these crayons comfortably. I encouraged these children to "pinch" the crayon, although the triangular shape lends itself to be held with one finger on each surface (ie. a tripod grasp). There are six points of contact of the crayon to the page from the triangular ends, rather than the traditional one rounded end of a crayon promoting success in those beginning to marks on the page. The crayons glide along the page easily, which explains the "effortless" in the name of this crayon. Children do not need to exert much pressure onto the page which is really helpful if they have poor hand strength and poor control. Read about more tips for those who have difficulty with pencil pressure HERE. We also found that the crayons could draw a controlled thin line or a thicker shaded line (the "art" aspect of the crayon). My daughter, Miss 10 years especially enjoyed using these crayons to create! According to her, they are the "best crayons ever" as they give her the control that she would otherwise have from pastels or coloured pencils but with the shading and depth of colour of a crayon. {I have a feeling that I may have lost this set of crayons to her!} Two Sparrows Learning System is a family owned business owned by Nancy and Jason. Nancy is a former special education teacher. The company vision is to "create learning products for all ages and abilities that are intuitive, inclusive, and environmentally conscious in design". The "Effortless Art Crayons" are their first product and are hand made from 100% recycled crayons! This is a terrific initiative where old crayons are collected (and saved from being dumped in our environment) to produce these unique products. "Effortless Art Crayons" are currently only available for shipping in the USA, however follow Two Sparrows Learning Systems on Facebook or Instagram to be kept up-to-date with new products and initiatives. What is your favourite crayon for those developing a tripod grasp? Have you tried these?
Disclosure: This product was gifted to Your Kids OT for the purposes of a review. Reviews and endorsements of products will only be made based on my expertise and personal opinion; and deemed worthy of such endorsement. The opinions shared in sponsored content will always be my own and not that of the advertising company or brand. You may also like:
|
AuthorHi, I'm Cindy and I am an Occupational Therapist. I enjoy working creatively with children to see them reach their potential. Read more about me here. SEARCH THIS SITE
Archives
June 2024
Categories
All
Popular Posts |
Join the YKOT e-newsletter!
Subscribe to get our latest content by email and receive
the SHAPE ROADS PRINTABLE NOW!

Success! Now check your email to confirm your subscription and receive your free printable!
Join our Mailing List!
Subscribe to get our latest content by email and receive
the SHAPE ROADS PRINTABLE NOW as a thankyou!

Success! Now check your email to confirm your subscription and receive your free printable!
Disclaimer: The information on this site is general in nature and should be used for educational and entertainment purposes. The activities are safe for most children, however, you should consult an Occupational Therapist or health professional to address specific movement, sensory or other medical conditions. This blog does not replace formal therapeutic professional advice given by a health professional or medical practitioner. Reviews and endorsements of products will only be made based on my expertise and personal opinion; and deemed worthy of such endorsement. The opinions shared in sponsored content will always be my own and not that of the advertising company or brand. Content, advertising space or posts will be clearly identified if paid, affiliated or sponsored. Affiliate links may be found throughout this website in advertising. This means that if you follow through with a purchase from these links, Your Kids OT will receive a percentage of the sale. Your Kids OT undertakes to meet the requirements of the "Social Media Policy" as published by Australian Health Practitioner Regulation Agency (AHPRA). Further information about this policy can be found here.
Find meFollow me |
About me
AuthorHi, I'm Cindy and I am an Occupational Therapist. I enjoy working creatively with children to see them reach their potential. Read more about me here. |
Copyright © 2017 Your Kid OT








 RSS Feed
