|
Toddlers are busy little people. They like exploring with their hands (and mouths). They love putting things in and taking them out of containers. They continue to explore different textures. They are starting to use both hands together and as they get older starting to choose one hand as the dominant "worker" hand and use their other hand as the "helper. They are starting to learn about colours, shapes and counting. They are learning about their own body parts and how to move them to perform certain actions.
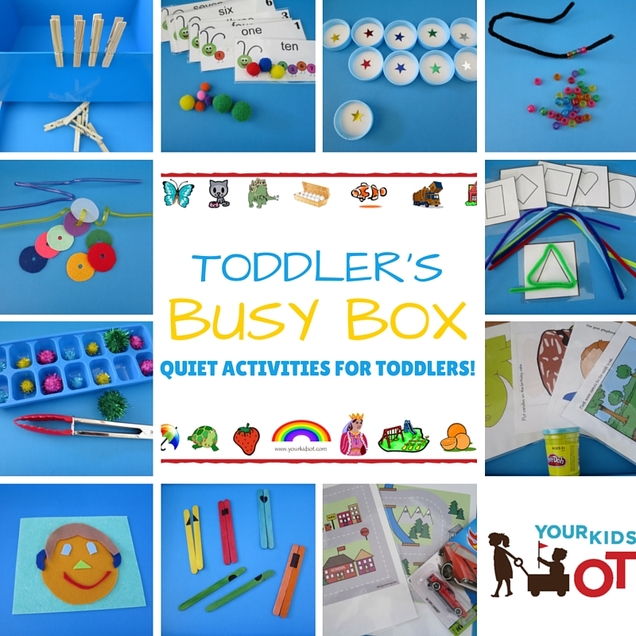
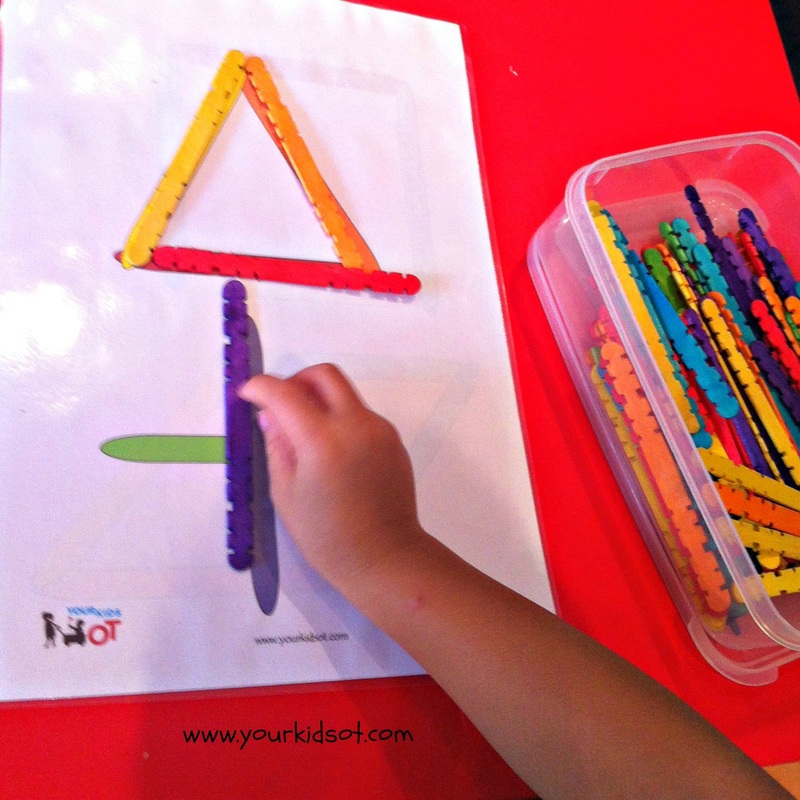
I would like to say recently, but it was actually some time ago I made some "toddler busy boxes" to give to friends who were expecting their second children. These were gifts to keep their "firstborns" busy with quiet interesting activities. These toddler activities were chosen so they can be done almost independent of mum (who may be busy with the newborn) and could be repeated over and over again. Depending on the age of your toddler and their exposure to similar activities, you may need to show them how to do these several times before they are independent. You may like to introduce one activity at a time rather than give your child the whole box of activities in one go. I placed each individual activity into a zip-lock plastic bag so all the pieces could be kept together. I then placed all the activities into a sturdy box with the child's name on top. 10 Great Toddler Busy Box Activities! 1. Felt face - I cut out a square as a background piece, a circle for the face and various interchangeable pieces for the facial features. Your toddler can make "faces" trying out different positions for various features. They may learn about their body parts and how to organise the felt face to match the spatial positions of their own face. As your toddler gets older they could try drawing a face using the felt face as a model. 2. Ice cube tray, tongs and pom poms - Your toddler places a pom pom into each hole in the ice cube tray. They may also use the tongs to pick up and release pom poms. They may develop hand strength and learn colours from this activity. 3. Crazy straw and felt circles - I cut out a series of felt circles and made a hole in each circle. Your toddler may thread the circles onto the crazy straw one at a time so that it goes for a "ride". They may place all the circles onto one straw to see how many fit. They may learn about colours and use both hands collaboratively. 4. Pegs - Your toddler may place the pegs onto the side of the box. You could change this over time by adding colours or letters to the pegs which may be matched to a corresponding card. They may develop hand strength and start using both hands together. 5. Caterpillar counting pages and pom poms - I downloaded these counting pages from Powerful Mothering and laminated them. Your toddler may match the pom poms with the caterpillar body. As they get older they may be able to match the corresponding coloured pom poms to the pictures and count them. 6. Milk Bottle Lids and star stickers - I placed some star stickers onto 10 milk bottle lids. Your toddler may match the stars with the same colours. They may like to stack the lids and knock them over. As your toddler gets older you may use the lids as a memory game placing them all face down and trying to find the matching pair turning over two at a time. 7. Pipecleaner and small beads - Knot one end of the pipe cleaner with a bead so that their is a "stop" end. Your toddler may begin to thread beads onto the pipecleaner. This activity may require supervision so that beads are not placed into the toddler's mouth and swallowed. 8. Shapes and pipecleaners - I provided laminated pictures of shapes and pipecleaners. Older toddlers will be able to manipulate the pipecleaners to the shapes. You may also provide a dry-erase marker for your toddler to trace or colour in the shapes. 9. Playdough and playdough mats - I provided a new tub of playdough and laminated playdough mats from Planet of the Apels. Your toddler may add their playdough to the mats to complete the pictures. You may find more ideas to do with playdough here! 10. Car and Road maps - I provided a new "Matchbox" car and laminated road maps from the DIY Mommy. Toddlers will love driving their car around these roads and race track. 11. Paddlepop stick shapes - Draw a shape across two paddlepop sticks which are the same colour. Your toddler can match the shapes and colours together. The paddlepop sticks could also be used with the playdough.
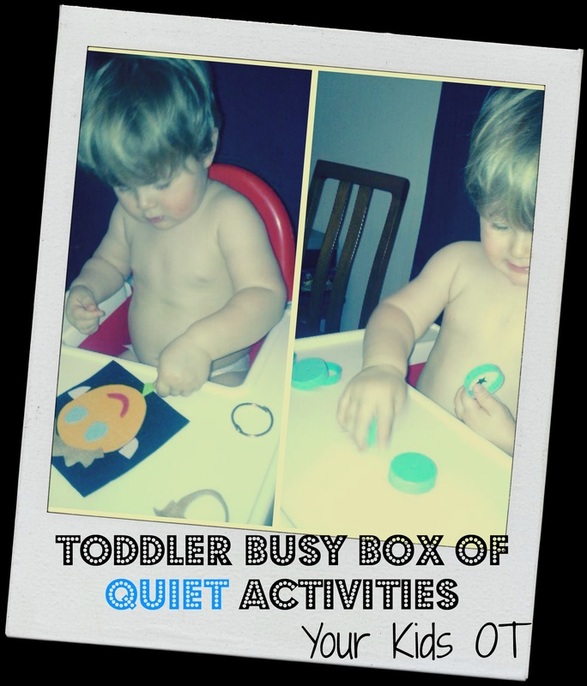
It was lovely to be sent photos of these busy boxes in action! Isn't Mr E adorable?!
These activities would also be great for an OT to have in his/her therapy bag to use with toddlers and preschoolers! Have you made your toddler a "busy box"? Have you made one as a gift?
You may also like:
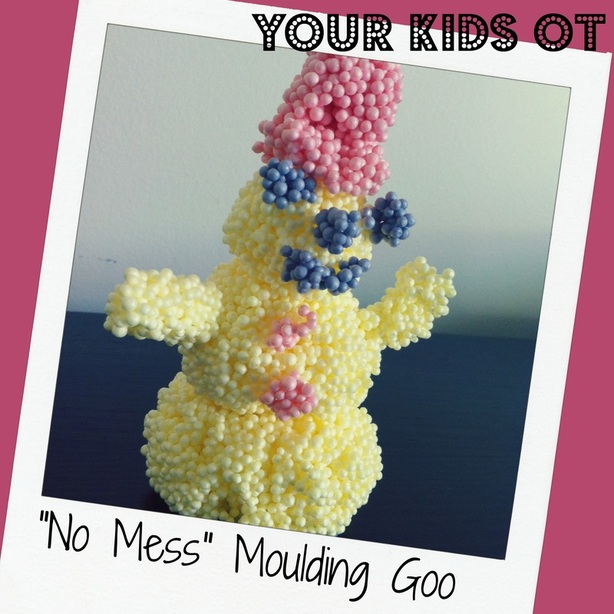
A "no-mess" moulding goo? We had to try this out!
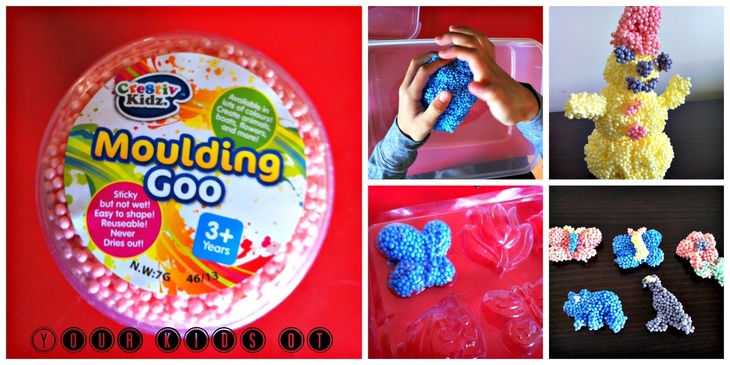
I purchased these for $1 a tub from Kmart (price is now $1.50 Aust). It comes in a range of colours and is not suitable for children less that 3 years of age. Definitely a potential choking hazard! It says "sticky but not wet" on the label and it was. The moulding goo is made from little polystyrene balls that stick together. The first challenge is to get it out the plastic container as it is so sticky.
Once out of the container, you can shape the goo with your fingers and hands into basically whatever you want. You can roll it into balls or press it into a mould.
Mr 5 found it a challenge to think of ideas for moulding and wasn't very fond of the "stickiness" of the balls. Miss 9 enjoyed pressing the goo into shape moulds and mixing the colours to come up with a creation. Separating the colours out again was pretty impossible so if you want separate colours don't mix them in the first place! Suitable for children 3 years and older, this activity should be supervised with preschoolers as it should not be consumed! Three year olds will be able to manipulate and shape this "goo" without leaving a mess on your table or floor. It also never dries out so if it is not packed away straight after use it will be fine to use again and again. OTs may find this a great alternative to take along to therapy sessions as an alternative sensory experience. It can be used to encourage exploratory play as well as an opportunity to develop fine motor skills. A cheap alternative sensory experience. Have your kids tried it?
Note: I have received no remuneration for this post and all comments made are my own.
Also linking up with:
Looking for more sensory experiences? Try these...
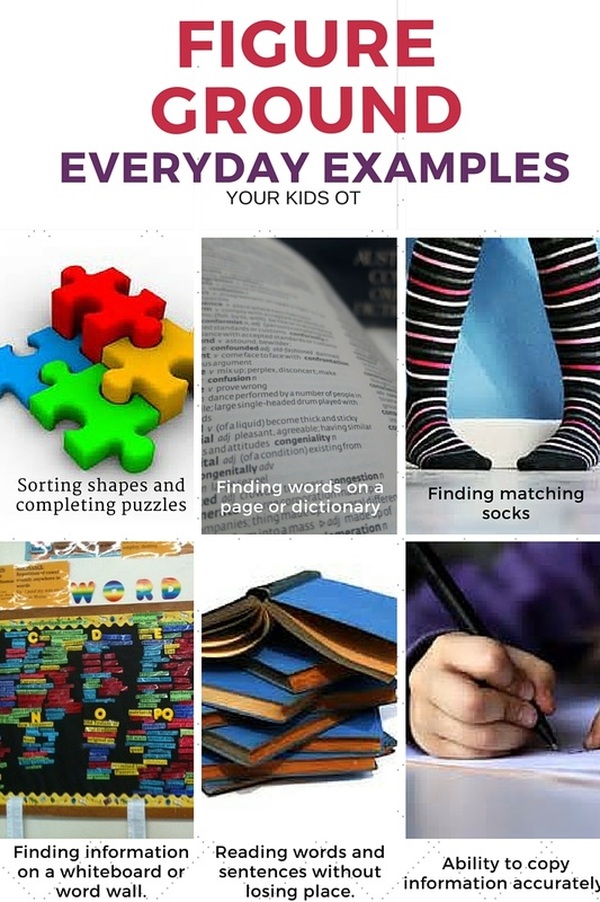
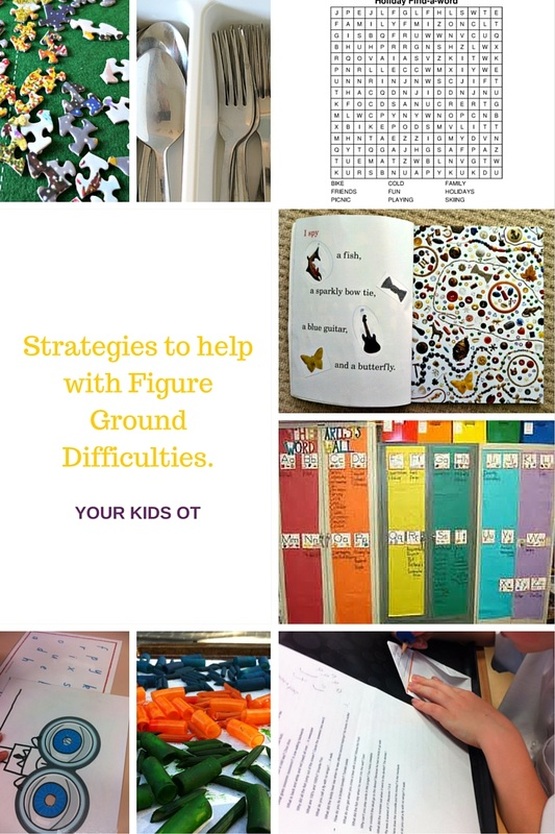
It has been three months since I released my "Visual Perception Reference Sheet". This article contains information from the reference sheet and looks at the aspect of visual perception called "figure ground", every day examples of where it is needed and potential areas of difficulty as well as strategies to assist.
Figure Ground The ability to see an object or form when presented in a complex background with a lot of visual information at one time. Everyday examples where visual perception is needed and potential areas of difficulty.
Strategies to assist.
Do you have an everyday example of Figure Ground? What is your favourite strategy to assist those having difficulty?
You may also like:
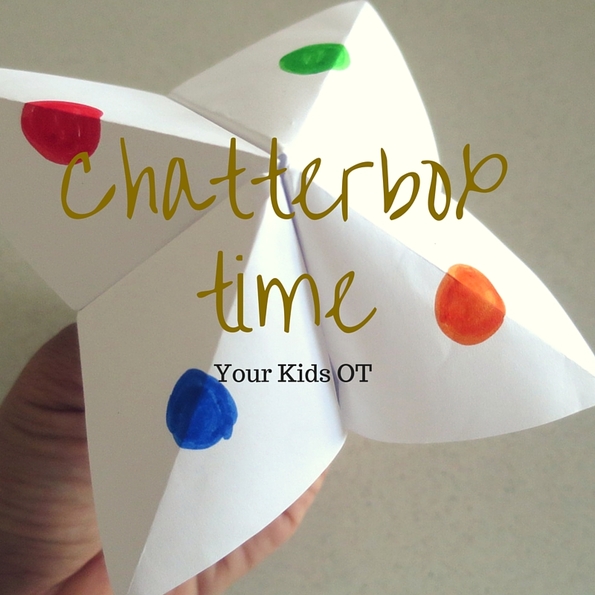
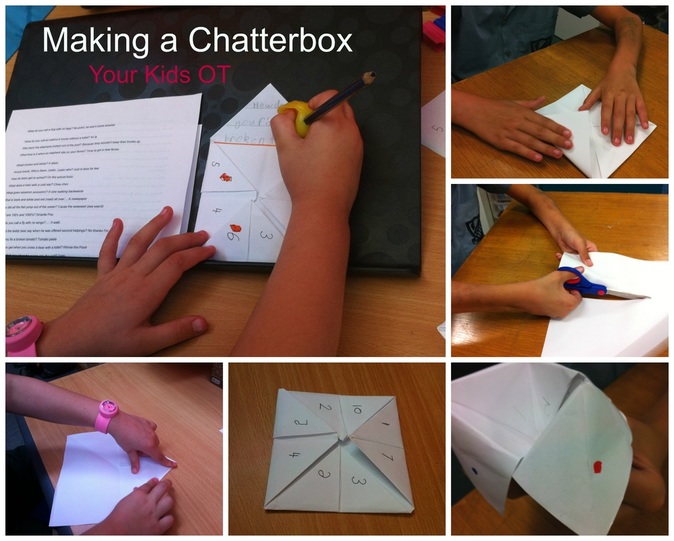
Chatterbox Time! Kids all love to make and play with chatterboxes! I remember making them when I was a child, did you? Last week, I made these with some of the kids I see for therapy and it was the perfect activity to work on a range of skills.
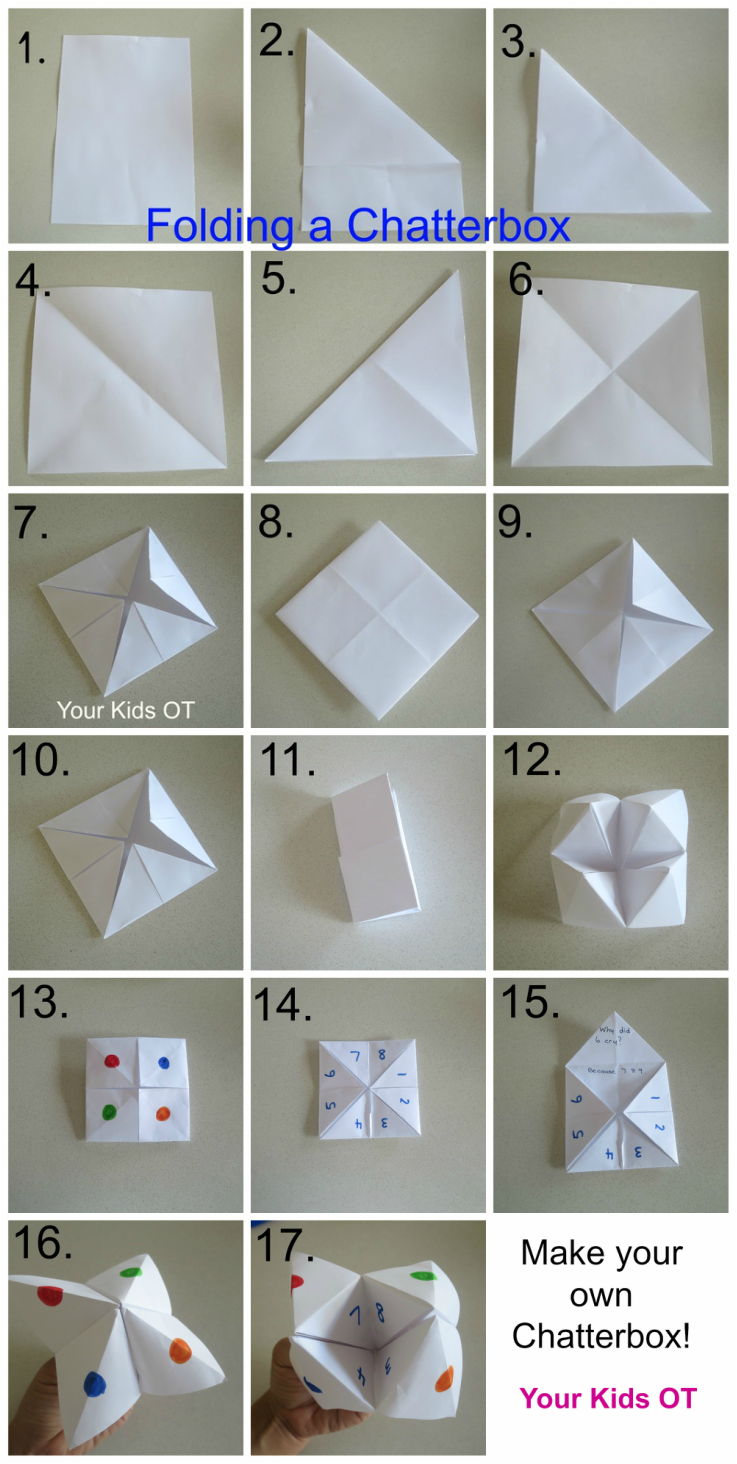
If you haven't made one for a while, this is how you fold your chatterbox. Start with an A4 size piece of paper and make sure you press down each fold neatly. The neater the folding the better the chatterbox will work in the end. 1. Start with an A4 piece of paper. (You could also start with a square piece of paper and skip to step 4.) 2. Fold down one corner so your triangle lines up with the side. 3. Cut off the section under the triangle. 4. Open out your triangle so you can see your square. 5. Fold down another corner creating a triangle. 6. Open out your square so you can see the two folded diagonal lines. 7. Bring each corner into the middle, pressing down on the fold. 8. Flip over your square. 9. Bring each new corner into the middle, pressing down on the fold. 10. Almost there! 11. Fold along the horizontal middle line, open and fold along the vertical middle line, open. (This will held with the movement of the chatterbox when playing.) 12. Put your fingers in the "open square" parts of each quarter. Your chatterbox is now ready to decorate! 13. Add a coloured dot to each square. (We also wrote the colour name for those kids who needed a reference to spell the colours when playing.) 14. Flip over your square and write a number in each triangle section. Try to have odd/even numbers to help later with playing. 15. Open out each double triangle to write a question/joke. Write the answer in the bottom half. (If your child has small legible writing you may be able to fit in a question/joke in each small triangle.) 16 and 17. Ready to play. Use your thumb and index fingers on both hands to open and close the chatterbox. We had a great time making these in OT last week. Here are some of the skills we worked on:
Whilst I had a double-sided page of jokes for the kid's to choose from, these were the clear favourites!
Have you made a chatterbox recently? What's your favourite kids joke?
You may also like...
|
AuthorHi, I'm Cindy and I am an Occupational Therapist. I enjoy working creatively with children to see them reach their potential. Read more about me here. SEARCH THIS SITE
Archives
June 2024
Categories
All
Popular Posts |
Join the YKOT e-newsletter!
Subscribe to get our latest content by email and receive
the SHAPE ROADS PRINTABLE NOW!

Success! Now check your email to confirm your subscription and receive your free printable!
Join our Mailing List!
Subscribe to get our latest content by email and receive
the SHAPE ROADS PRINTABLE NOW as a thankyou!

Success! Now check your email to confirm your subscription and receive your free printable!
Disclaimer: The information on this site is general in nature and should be used for educational and entertainment purposes. The activities are safe for most children, however, you should consult an Occupational Therapist or health professional to address specific movement, sensory or other medical conditions. This blog does not replace formal therapeutic professional advice given by a health professional or medical practitioner. Reviews and endorsements of products will only be made based on my expertise and personal opinion; and deemed worthy of such endorsement. The opinions shared in sponsored content will always be my own and not that of the advertising company or brand. Content, advertising space or posts will be clearly identified if paid, affiliated or sponsored. Affiliate links may be found throughout this website in advertising. This means that if you follow through with a purchase from these links, Your Kids OT will receive a percentage of the sale. Your Kids OT undertakes to meet the requirements of the "Social Media Policy" as published by Australian Health Practitioner Regulation Agency (AHPRA). Further information about this policy can be found here.
Find meFollow me |
About me
AuthorHi, I'm Cindy and I am an Occupational Therapist. I enjoy working creatively with children to see them reach their potential. Read more about me here. |
Copyright © 2017 Your Kid OT





 RSS Feed
