
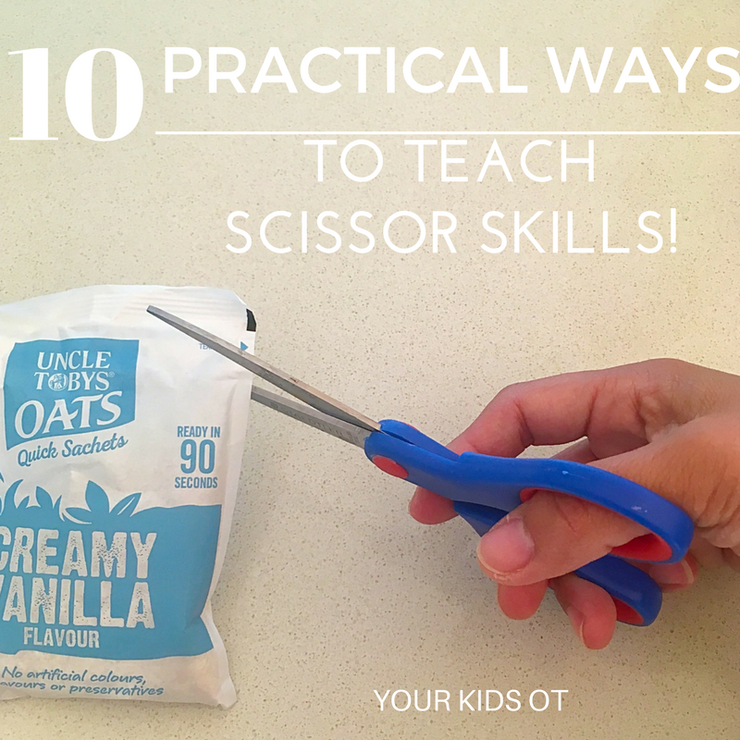
Scissor Skills, what is the point? Why bother?
Have you been receiving my emails about THE SCISSOR SKILLS BOOK and being wondering, why even teach kids to cut? Some children love creating and experimenting. They love picking up scissors and cut anything they can get their hands on. They love craft and collages. And yet... There are some children who may have scissors presented to them at home, in their child care setting or at school... and yet never choose to pick those scissors up and try them! Just an aside... did you ever sit in algebra class in school and wonder "what is the point of this?" or may be for you it was studying Shakespeare or reading Jane Austen (although our friendship will be tested if you say this is you), for others it is sport... What is the point? Why bother? I'm all about practical! What is the point of using scissors? Why both teaching scissor skills? It is so beneficial when teaching a skill, to show the practical ways that these skills may be used. How can this skill be applied to everyday life? What is the point? What is the purpose? Why? 10 Practical Ways to Teach Scissor Skills to Kids! 1. By example! For children, it is important for them to see YOU using scissors! They may watch you cutting up a BBQ chicken, cutting up material for sewing, cutting a string to tie a package, cutting/pruning the garden, cutting a pizza into slices, cutting nails with nail scissors, cutting flowers to put into a vase... and the list goes on. 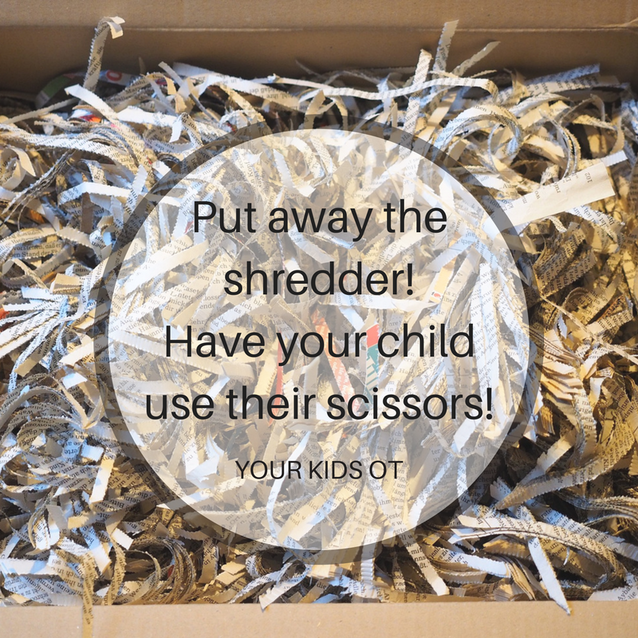
Now over to the kids to try their hand at using scissors for themselves in every day activities.
2. Use scissors to open packaging. Open packaging for cookies, crisps, candy, new pyjamas, envelopes or a new game. 3. Use scissors to gift wrap. Involve your child in gift wrapping for all those birthday parties they are invited to. Involve them in choosing the wrap, ribbon, tissue paper or cellophane. Have them manipulate the scissors to cut the paper. Draw a line for them to cut and fold the paper at the same point. Early scissor users can do the "snip" required to cut ribbon/string. 4. Use scissors to cut off price tags or clothing tags from new purchases. An easy "snip" to cut off these tags. They will be motivated especially if the new item is for them, however it is also great when the new item is a gift which is then wrapped for a friend or family member. 5. Use scissors to cut larger paper so you can make note paper. You could turn this into a game of "postman" by making simple cardboard "post boxes" for members of the family. Have your child cut large paper into pieces depending on their ability. You could start with a snip off a long strip or fold the paper to create "shapes" such a large triangle. Alternatively the note paper could be used to write down a shopping list or things to do list for your child. 6. Use scissors to cut wax or grease proof paper from a roll to wrap a sandwich. Have your child help to cut kitchen paper and them wrap their sandwich or roll. 7. Use scissors to cut sticky or masking tape. Leave the dispenser aside and have your child make the "snip" to cut sticky tape or masking tape. 8. Use scissors to cut out a clipping from a magazine or newspaper so it can be kept. You could find things of interest to your child (eg. they might love dogs) or you might pick a theme like colours, shapes, textures to find and cut out. Depending on your child's ability, you may want to draw a shape around the image for cutting. You could also cut out interesting "letters" from the newspaper to spell out words or names! 9. Use scissors to cut up old receipts (or paper grocery bags). Put the "shredder" aside and have your kids help to "cut up" old receipts or documents! There is no "right" or "wrong" with this sort of "cutting"! Place all the "cuttings" in the recycling bin or use the cuttings to make a sensory bin (slowly adding it each time there is "cutting practise") where you can hide objects to find. 10. Use scissors to cut out "coupons". Some households cut out and collect "coupons" more than others. Even if you are not one who would normally cut out coupons, this is an excellent way to encourage scissors skills in a practical way. Coupons are usually rectangular or square in shape (not always) so they are the perfect shapes to work on manipulation of the page (turning). Using scissors is a complex skill that we take for granted as adults. Would your child be more "engaged" with learning how to use scissors when shown how they are used in a practical context? 
Next week, we look at how to help children who have difficulty with their "pencil pressure" when they are writing!
I hope you join me again! 
Disclosure: Affiliate links are included in this article to promote products that I recommend. This means that if you follow through with a purchase from these links, Your Kids OT will receive a percentage of the sale. Reviews and endorsements of products will only be made based on my expertise and personal opinion; and deemed worthy of such endorsement. The opinions shared in sponsored content will always be my own and not that of the advertising company or brand.
You may also like:
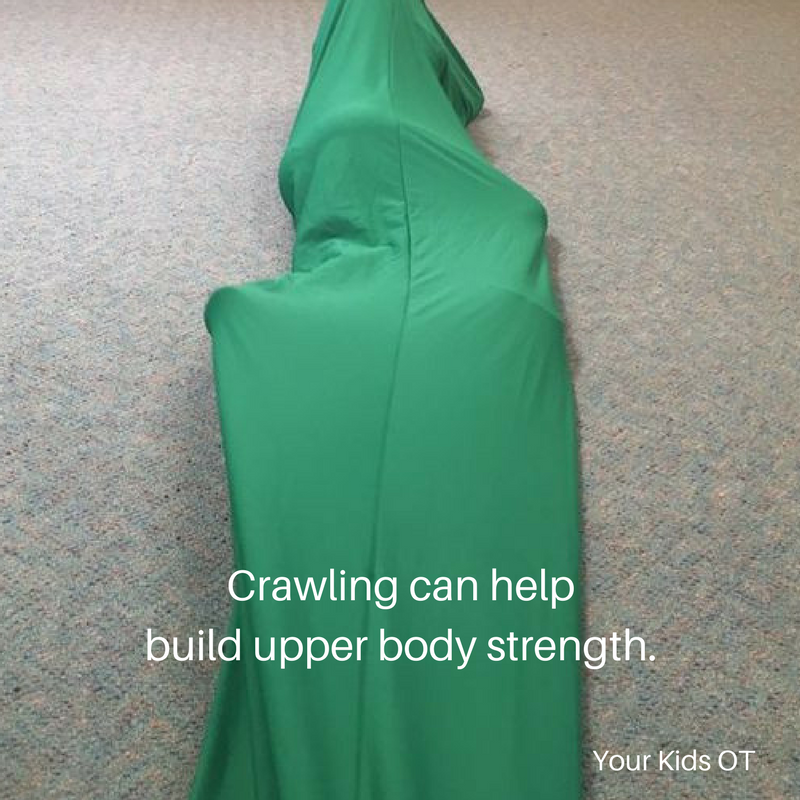
Ever have an arm wrestle? or pulled in a "tug of war"? or have you tried indoor rock climbing?
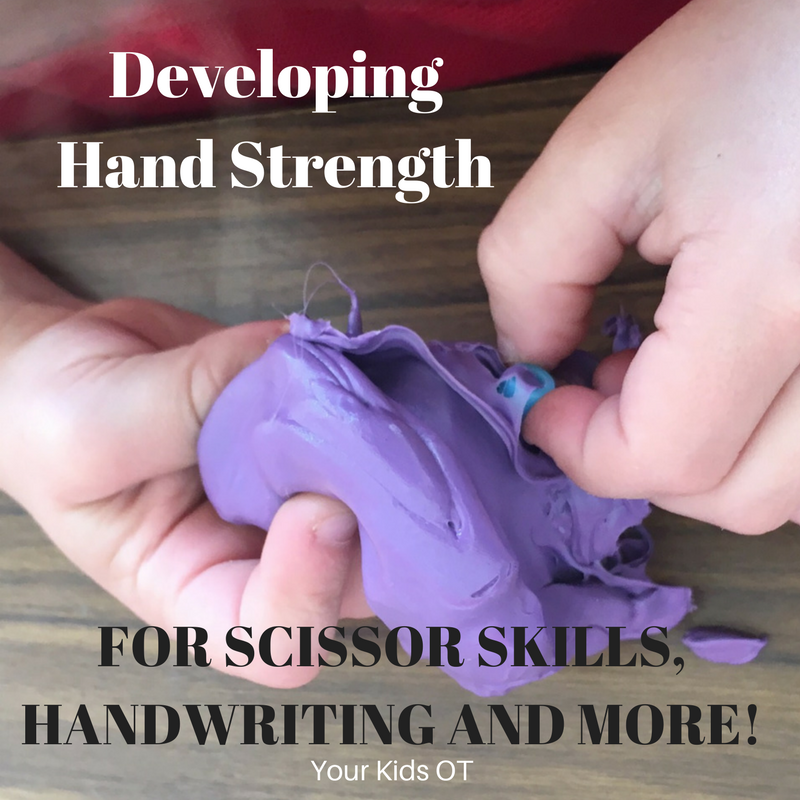
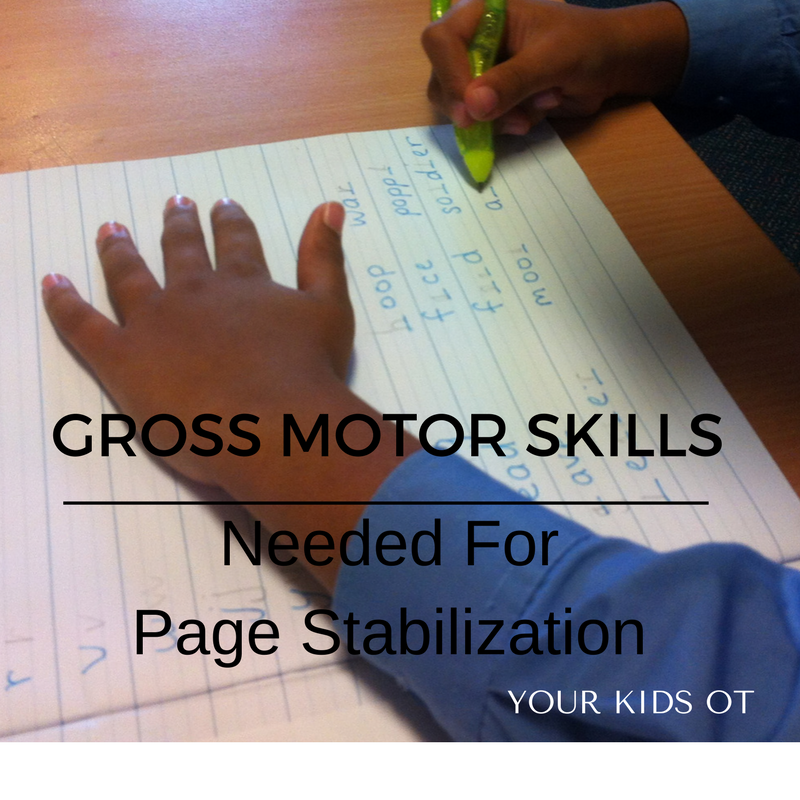
These activities all require a significant amount of upper body, hand and finger strength. We might not all win arm wrestles ... but we all require adequate strength in our arms, hands and fingers to perform daily activities. Children need adequate hand and finger strength to carry out their daily "jobs" such as writing, using scissors, doing up buttons and using a knife and fork. When muscles in the hands are strong, children can hold tools for longer and use them more efficiently. If a child has weak hand muscles they may tire quickly (giving up) or swap hands (to give the other hand a turn). In using scissors, they may have difficulty opening and closing their hand adequately to cut the page or drive their scissors forward. In using a knife and fork, children with weak hand muscles may not be able to apply adequate pressure to stabilize or cut the food properly. In handwriting, children with weak hand muscles may have difficulty applying pressure to their pencils or they may not be able to write as much as others. Some children may have poor hand and finger strength due to low muscle tone, developmental delay or a neurological condition. There are sometimes no known cause for a child's hand weakness, however medical advice should be sought if you are concerned. Activities which help with the development of strength involve some weight bearing or resistance. They involve pushing or pulling and may also be considered "heavy work" when looking at a sensory diet. Read more about sensory diets here. You could try the following activities to encourage the development of strength! Upper Body Strength and Stability(hands, arms and shoulders).
Hand and Finger (Pinch) Grip Strength
For even more suggestions for building hand strength read more pincer grip ideas here! Read about heavy work for little fingers HERE! 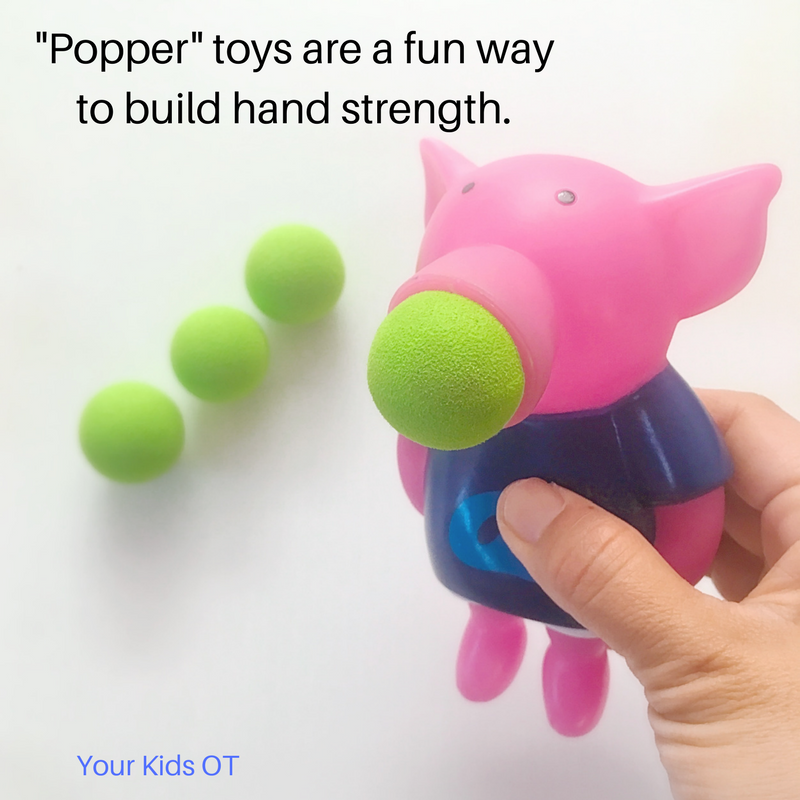
These hand strengthening activities are a great way to get hands ready for handwriting, scissor skills and more!
Does your child struggle with the strength needed to carry out daily "jobs"? Are they constantly "swapping hands"? What is your favourite way to help develop hand strength? 
Disclosure: Affiliate links are included in this article to promote products that I recommend. This means that if you follow through with a purchase from these links, Your Kids OT will receive a percentage of the sale. Reviews and endorsements of products will only be made based on my expertise and personal opinion; and deemed worthy of such endorsement. The opinions shared in sponsored content will always be my own and not that of the advertising company or brand.
You may also like:
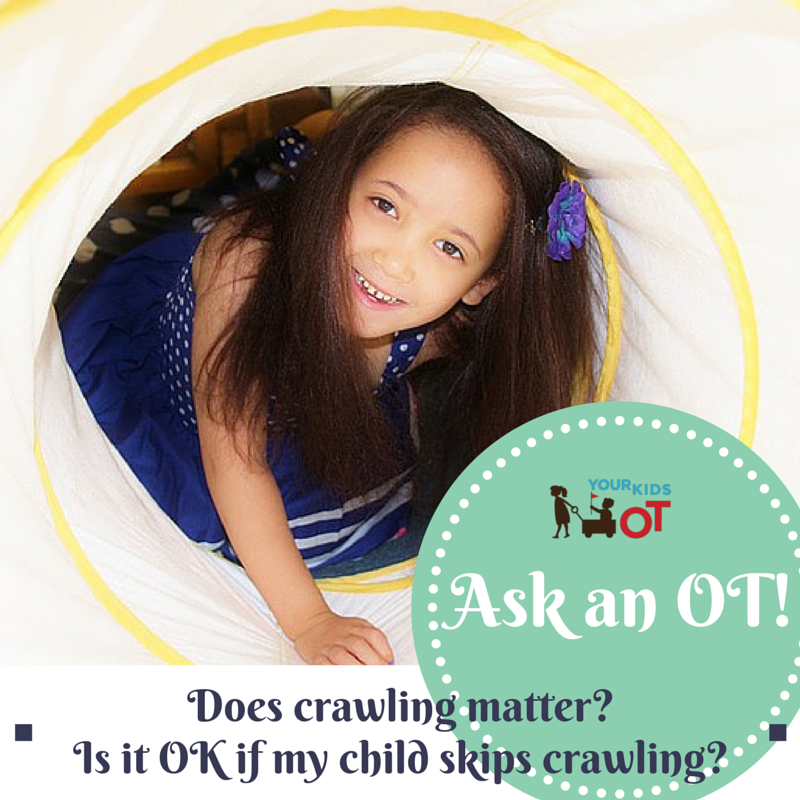
Parents, do you remember placing your finger into the palm of your baby's hand? They sweetly wrap their fingers around your finger and you go "awww, their holding me!" This first "grasp" pattern seen in babies at birth is a primitive "grasp reflex". It only lasts for about four months, however it prepares babies for voluntary grasp and release patterns. Grasp and release patterns are an important part of early child development. At about four months, babies are reaching for objects with a momentary grasp and by about nine months babies are learning to release objects voluntarily (Parks, 1996). Coordinated grasp and release skills (and therefore the opening and closing action of your child's hand) are important for the development of scissor skills. Children need to be able to hold scissors and guide them to open and close as they cut across paper. 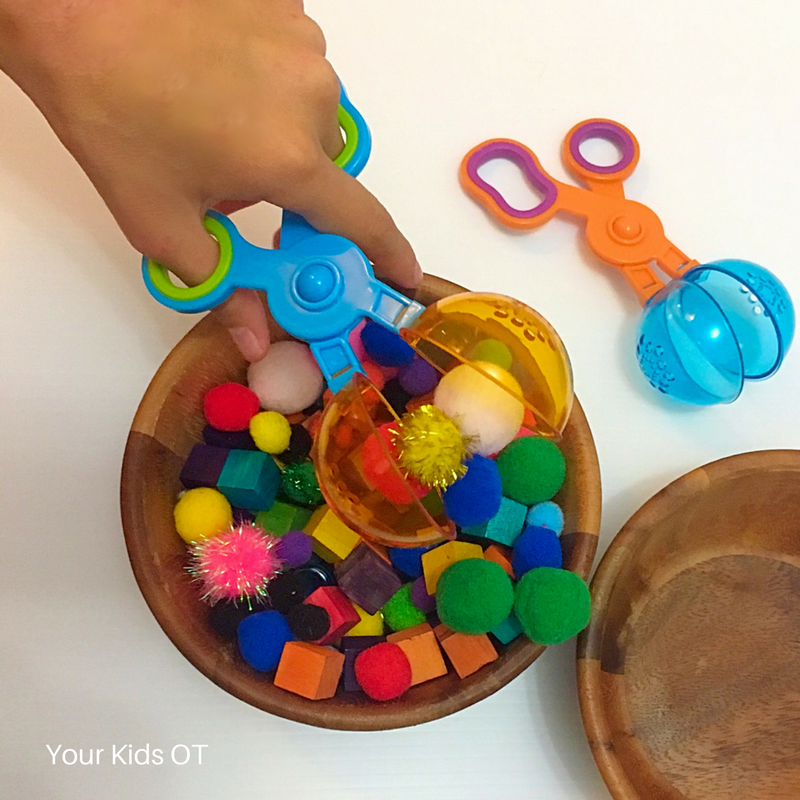
You can use the following activities to encourage children with "opening and closing hands".


Parks, S. (1996). HELP strands: curriculum-based developmental assessment: birth to three years. Palo Alto, CA: VORT Corp.
You may also like:
Cutting, laminating, photo copying, lesson planning .... do you do your preparation in the school holidays?
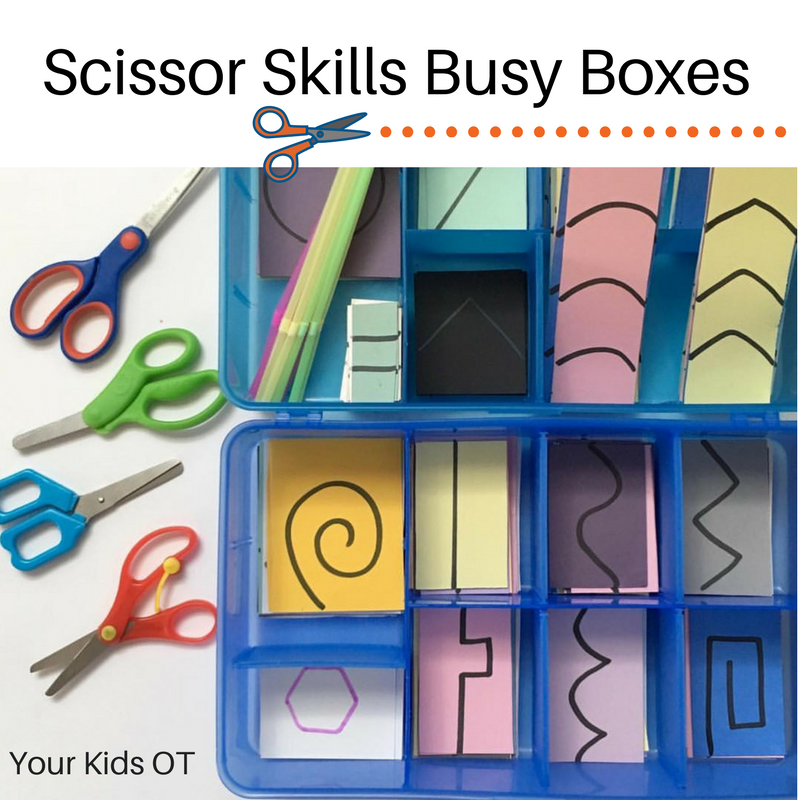
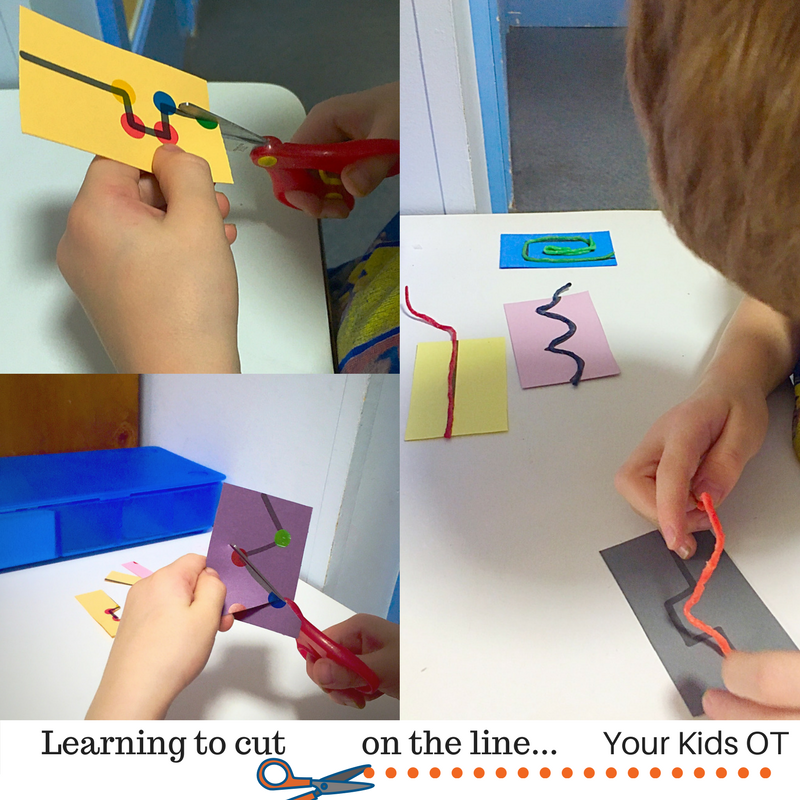
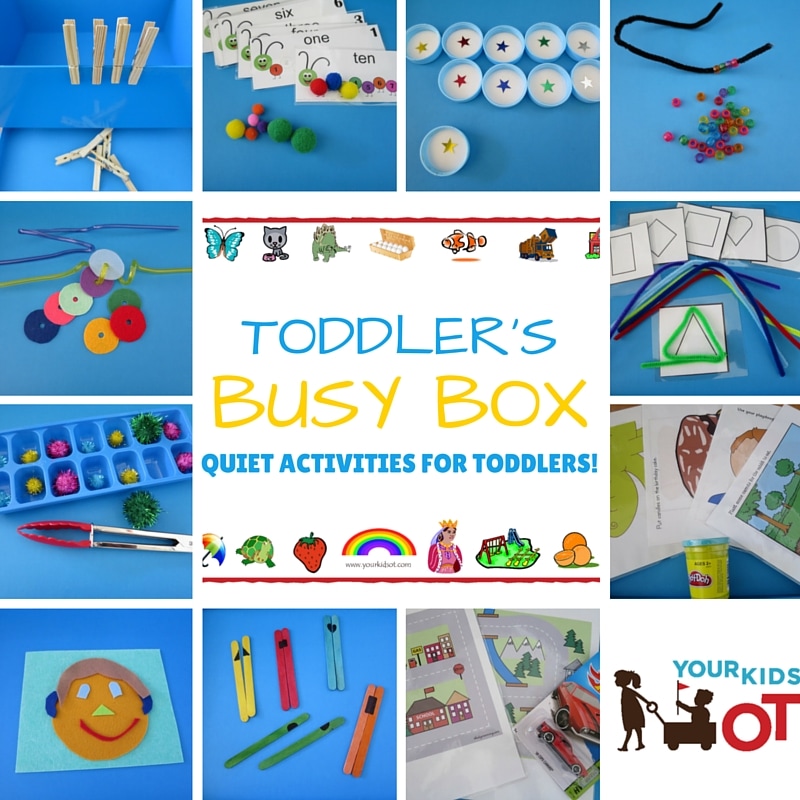
Teachers and OTs (or an other therapists for that matter)... we have a problem! We never quite "switch off"! We are always looking or listening out for a great idea that we can implement with the kids we see. Even on holidays... I notice ramps and think about access, I notice toys in shops and think how I could use that or I watch kids play and guess how old they are! Yep, I have a problem! Last year we were quarantined at home during one school holidays due to illness (gastro from memory). To make the most of this time, I made these scissor skills busy boxes! I knew that they would come in handy once the illness had passed and I was back at work! These boxes are perfect for home, preschool or in an OT tool kit! Yes they take a little while to set up but they are worth it! I sourced theseplastic boxes years ago from IKEA Australia and love that they have little compartments which can be adjusted in size. They also have a lid making them ideal to move around from place to place! I set up two types of boxes but you could use a combination of craft and cutting strips. The cutting strips were made from scrapbooking paper. This is a little thicker than normal writing paper and easier for little hands to hold and to cut (as it doesn't flop around as much and require too much stability with the non-dominant hand). In the cutting strip box, I wanted to have a range of developmental stages including shorter strips, thicker lines, thinner lines, curves, straight lines, corners and more! Read more about developmental stages over at MamaOT. If you are making this box for home, you may want to consider where your child is at developmentally before starting! 
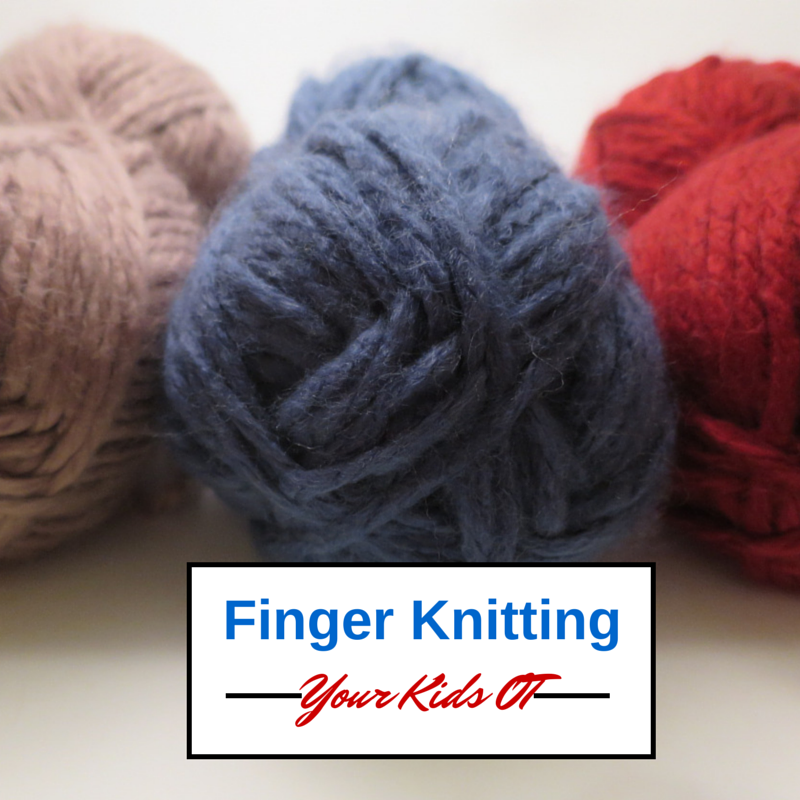
A craft box is a great way to encourage those who are just starting out with scissors! Present a range of things to cut such as straws, crepe paper, wrapping paper, tissue paper, wool, ribbon, twine, tinsel, etc! Encourage your child's creativity with some glue to stick down all the things they cut!
These scissor skills busy boxes will appeal to your child if they already interested in cutting or they love experimenting with craft supplies! However, there are some children who are just...not..interested...in...cutting! These are the kids who are referred to OTs because of poor fine motor skills, poor hand strength and poor postural control. Sometimes these children have difficulty with cutting because they have not yet established a hand preference or have poor bilateral coordination (see here for more information). Here are some tips for using the scissor skills busy boxes!
Please tell me that I'm not the only one who has trouble "switching off"! Perhaps this is a subconscious reason I started this blog, so that I could record ideas and observations!
Have you got a "busy box" for scissor skill practice? What have you included in your box?

How does your child hold their pencil? How do you? Does it really matter how the pencil is held? Well the last question was the subject of my very first blog post and you can read that HERE!
Some of the main aspects of pencil control come from how the pencil is held and how it is manipulated whilst in the hand. Ideally occupational therapists are looking for the following features when it comes to pencil grasp:
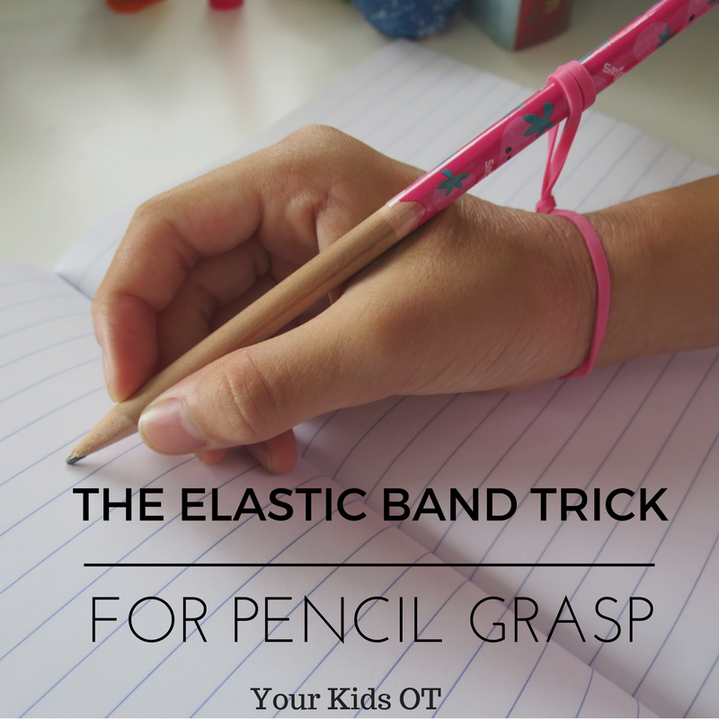
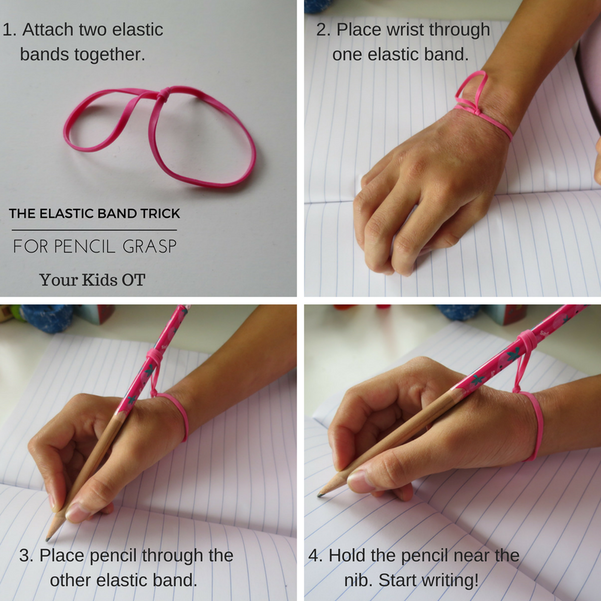
Here is a quick "trick" to help with the position of the pencil! This "trick" (or hack - I don't like the word hack though) is for those kids (and adults) who rest their pencil across the index finger rather than in the web space. This "trick" will help move the pencil into the web space whilst your child "pinches" it near the nib (where the pencil shaving meets the pencil cover). This "trick" encourages a more dynamic pencil grasp and open web space. What to do?
Considerations!
Have you tried the "elastic band trick"? Do you know a child who might benefit from trying this? 
I’m excited to report that The Handwriting Book has already reached hundreds of people so far this week!
Thank you for wanting to learn more about how to support handwriting development in kids and for being excited about using new handwriting strategies and ideas in your home, classroom, or therapy practice. Would you like to know more?? Who is The Handwriting Book for - therapists, teachers, or parents? The answer is...all of the above! The information in this book is perfect for parents who are trying to support their kids in the development of handwriting skills. Therapists will love having all of the handwriting information, tips, and strategies they need right at their fingertips as they work with kids and write evaluations and goals for the students on their caseloads. The Handwriting Book is also great for teachers who are looking for information and ideas to support handwriting development in the students in their classrooms. Can I get a print copy of The Handwriting Book? Not quite yet...if we continue to get a lot of requests for a print copy of the book, we may consider adding an option to purchase the book on Amazon in the future, but for now, the book will be available only as a pdf format ebook. What was your contribution to The Handwriting Book? The Handwriting Book is the result of a year long collaboration between 10 dedicated therapy bloggers who are all experienced pediatric therapists from across the globe! We have each written a contribution to the book and have worked together to bring you this unique reference. We have been working to bring you our knowledge, experience, tips and tricks ... creating the ultimate guide to handwriting! The Handwriting Book will provide you with evidence based practice as well as tried and tested practical tips! The Handwriting book covers:
More questions or comments about THE HANDWRITING BOOK? Just comment on the blog or email me. Don't forget to use #thehandwritingbook on social media when commenting about the book! Do you have a favourite "therapist tip" from the book?
Get 25% off with the discount code: HANDWRITINGHELP1
**Valid until 29th January, 2017 ** DON'T FORGET THE FREE PRINTABLES ARE NOW AVAILABLE UNTIL THE 29TH JANUARY, 2017! GET YOUR COPY TODAY!
Thank you again for those who have supported me with the purchase of this new e-book! I really hope that you find it a useful resource that you will continue to refer to again and again!
CindyChuan is a registered Occupational Therapist practising in Sydney Australia. She has two young children who are a constant source of inspiration and learning. Cindy loves working creatively to help children to reach their potential, finding opportunities in everyday living and making learning fun.
Cindy is the author of the Occupational Therapy blog Your Kids OT.
More great tricks:
Imagine an 11 year old girl attending an evening class at a local school with her friend. They wanted to learn how to type so voluntarily enrolled in a "word processor" course!
Gosh that was a life time ago and certainly ages me! Have you even heard of a "word processor"? Keyboarding and proficient touch typing is an essential skill for the 21st century. I don't believe that it will completely make handwriting obsolete, however I would be living in a cave if I didn't acknowldege how important keyboarding and typing skills are to a student's every learning. Learning to use a keyboard and to type isn't easy! It is a false assumption that children with handwriting difficulties will learn to type easily. It will certainly help these children in the long run, however, it is important to be remember that children with motor and planning difficulties (eg, bilateral coordination, eye-hand coordination, motor planning, visual perceptual and fine motor difficulties) in handwriting will also have these difficulties when initially learning to use a keyboard to type. Accomodations for these difficulties may need to be considered when teaching keyboarding and typing skills. 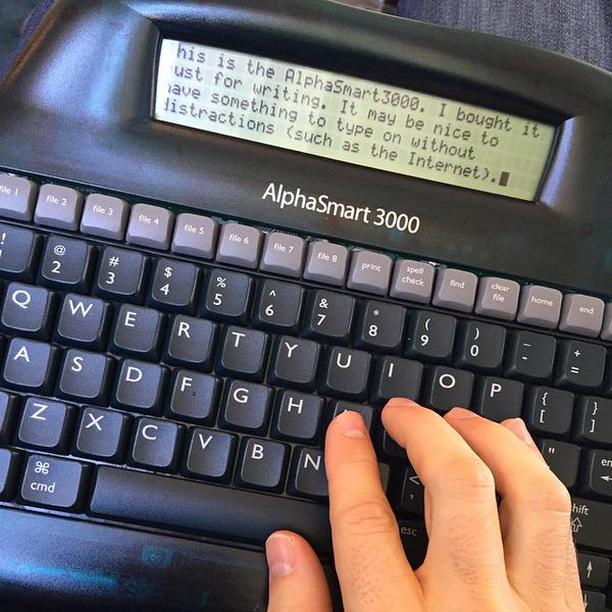
I learnt how to type on a word processor! Photo Credit: D. Kadavy via Flickr under the Creative Commons License. No modifications were made to the image.
How do YOU type?
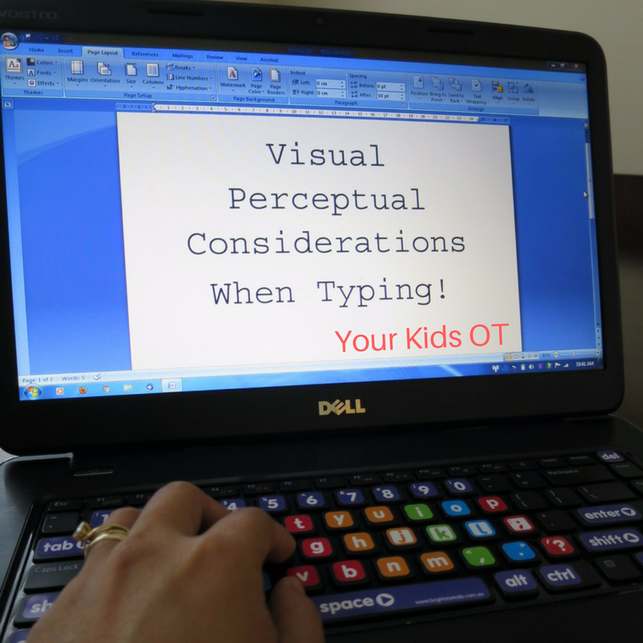
Hands up if you are a "2 finger" typer? Do you use your two index fingers to stab at the keyboard? Whilst there are a lot of proficient "2 finger" typers out there, I think it is important to teach kids proper finger positioning when learning how to use the keyboard! If you have a keyboard in front of you, look down at it for a moment. What do you see?
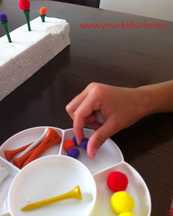
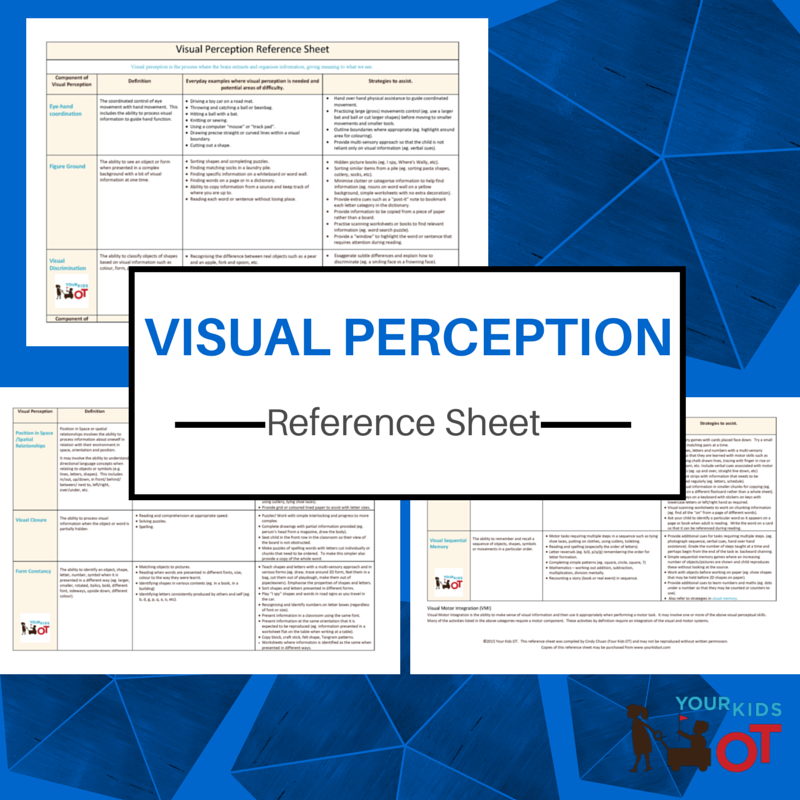
Did you notice what I asked you to do? Looking up at a screen then looking down at the keyboard. Did you easily find your place back up on the screen to read my suggestions? For children with visual perceptual difficulties this is one of the main issues they may have difficulty with as they look up and down and up again. They may also have to move their hands completely off the keyboard so they can see the keys. One of the main benefits of touch typing is eliminating this need to look up and down so often. Here is a look at the various aspects of visual perceptual skills required with keyboarding and typing. Eye-Hand Coordination Eye –hand coordination is the ability to coordinate eye movement with hand movements and includes the ability to process visual information to guide hand function. In keyboarding and typing, eye- hand coordination is needed to required to press the required keys. Beginner typists will need to look for each key to be typed, look up at the screen to make sure what is typed is accurate, look down again and so on. As touch typing develops, the eye can rest on the screen and monitor what appears rather than how the hand moves. The fingers are less reliant on "sight" of letters on keys and can move more automatically. Children may also need to watch their hand guide a mouse or track ball, with constant looking up at the screen and down at their hand as they work out the visual-spatial differences of moving something on a horizontal plane and how this can affect a cursor on the vertical plane. Visual Discrimination and Form Constancy Visual Discrimination is the ability to classify objects or shapes based on visual information such as colour, form, pattern, size or position. Form Constancy is the ability to identify an object, shape, letter, number, symbol when it is presented in a different way (eg. larger, smaller, rotated, italics, bold, different font, sideways, upside down, different colour). In keyboarding, and typing, children need to be aware that letters are produced in capital and lower case form. Most keyboards come with capital letter keys. Children need to grasp the concept of lower case letters being produced on the screen when capital letters are pressed on the keyboard. Some children will have difficulty reading certain fonts on the screen which they may be unfamiliar with. Some letters look quite different in different fonts (eg. a, g, k). Some children may also have difficulty with words written in italics and they may have difficulty with distinguishing letters because of their size on screen. 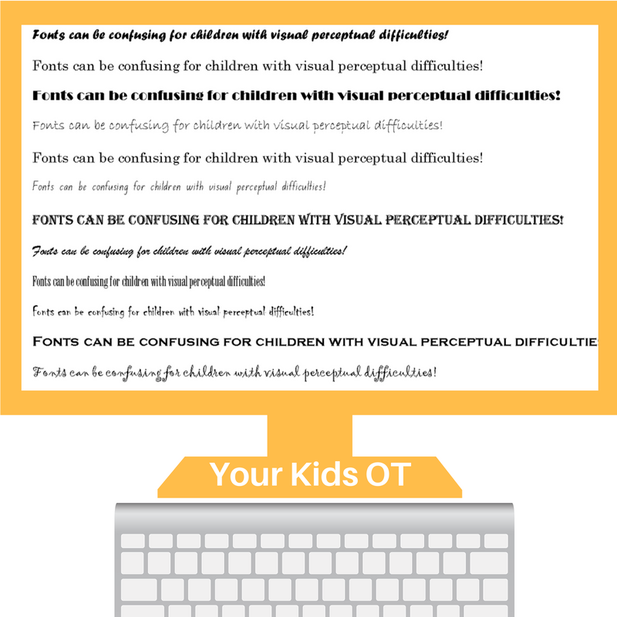
Recommendations and Accomodations for Visual Perceptual Difficulties
Position in Space or Visual Spatial Relationships.
Position in Space or spatial relationships involves the ability to process information about oneself in relation with their environment in space, orientation and position. It may involved the ability to understand directional language concepts such as up/down, next to, left/right, over/under, etc. As mentioned previously, as typing and keyboarding skills develop there is less reliance on visual guidance to find the right keys on the keyboard. Over time touch typers can understand where their fingers are "in space" and in relationship with other keys to be struck without looking. This is also true for the use of the mouse and trackball. Figure-Ground and Visual Memory Figure-Ground is the ability to see an object or form when presented in a complex background. Visual memory is the ability to remember and recall objects, shapes, symbols or movements in short term memory. Visual memory requires visualization of what to remember. In keyboarding and typing skills, both figure-ground and visual memory skills are required to learn the layout of the keyboard. They are needed to have a map (ie. visualization) of the keyboard in one's mind so that that finding the keys becomes automatic. Difficulties with figure-ground and and visual-memory may lead to more reliance on the visual skills of looking and scanning (ie. hunting) for the correct keys on the keyboard. This will slow down the typist and can often be observed with "2 finger typists". Both figure-ground and visual memory skills are also needed to enable a child to maintain their place on the screen when looking down and then up again to keep track of what they are writing on the screen. This is further complicated if the child is copying text to type onto the scren as they are looking at the stimulus, looking at the screen, looking back at the stimulus, looking at the screen, looking a their hands and so forth. Locating the cursor/pointer may also be difficult for children who have difficulty with figure ground skills. The pointer may look like a large capital "I" when typing text and be confused with the print on screen. 
Well I'm please to tell you that that 11 year old girl who learnt to touch type on a word processor can now type approximately 70 words per minute. I use this on a daily basis as an OT and for this blog!
BUT I also pre-wrote most of this article on paper first with scribbes here and there when I edited the order of my work and brainstormed what I wanted to cover! So don't throw the pen and paper away just yet! This article is part of the "Functional Skills for Kids Series by Pediatric Occupational Therapists and Physical Therapist". This is the last month of the 12 month series so do go back and check out any months you might have missed! You will find all the childhood functions HERE. Read all Your Kids OT’s monthly posts HERE Find more information about “keyboarding and typing”, read what other Occupational and Physical Therapists participating in the “Functional Skills for Kids series” have written:
When is My Child Ready to Learn to Keyboard? | Miss Jaime, O.T.
Fine Motor Skills and Typing | Therapy Fun Zone How to Implement a Keyboarding Club | Sugar Aunts 10 Keyboarding Modifications to Help Kids Type Better | Mama OT Activities to Help Children Learn to Type | Growing Hands-On Kids Assistive Technology for Kids Who Struggle With Handwriting | The Inspired Treehouse Work Station, Positioning and Keyboarding Skills| Your Therapy Source Visual Perceptual Considerations When Typing | Your Kids OT
BUT WAIT THERE IS MORE!
Have you enjoyed this 12 month series about Functional Skills for Kids? It has been an honour to work along side these amazing therapy bloggers. You can stay in touch with our whole team by joining us on FACEBOOK. Join THE FUNCTIONAL SKILLS FOR KIDS GROUP PAGE to be find out about the books we will producing based our this series and much more! 
Disclosure: Affiliate links are included in this article to promote products that I recommend. Your Kids OT is a participant in the Amazon Services LLC Associates Program, an affiliate advertising program designed to provide a means for sites to earn advertising fees by advertising and linking to Your Kids OT. Reviews and endorsements of products will only be made based on my expertise and personal opinion; and deemed worthy of such endorsement. The opinions shared in sponsored content will always be my own and not that of the advertising company or brand.
You may also like:

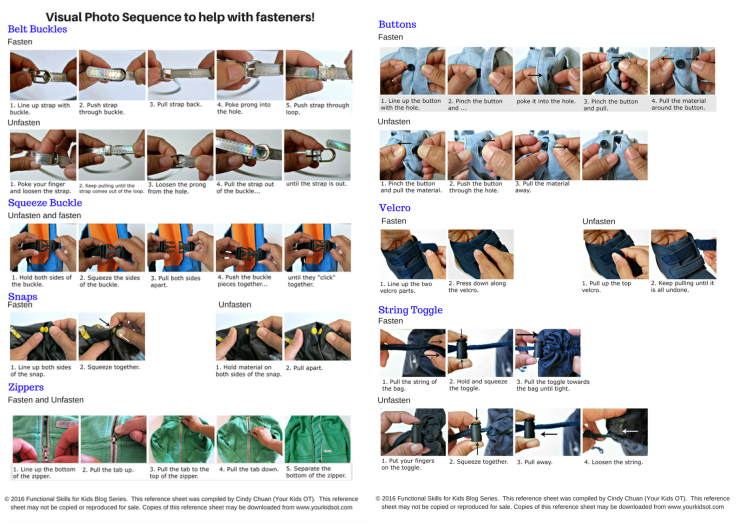
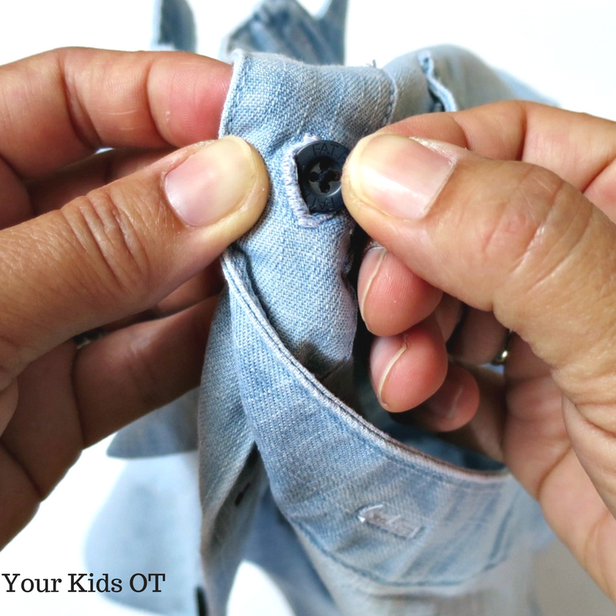
We are going to be late! Hurry up! I can't do this button up! I can't! Put on your jacket, it's cold out! I can't do the zip! I can't! The morning rush out the door to get to school can often be a struggle. Getting dressed can be a chore and then there are fastenings on school bags to manage too! This month in the "Functional Skills for Kids" Series, we look at helping kids with fasteners such as buttons, zippers, snaps (press studs) and more! My blogging colleagues will look at fine motor, gross motor, visual perceptual and sensory motor considerations. We will also cover when we should expect our kids to manage these tasks and how to incorporate this learning in play. Find the links for these articles below! 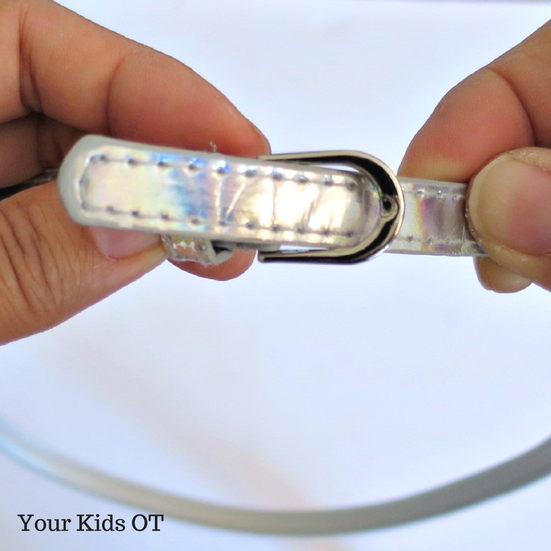
So it is time for your child to learn how to manage fastenings on their own but where do you begin? It helps to have an understanding of the steps involved with each of these tasks. I have outlined the steps involved in managing common fastenings here through visual photo sequences. For your printable copy of these sequences, download them HERE!
Once you know the steps involve there are a few tips in teaching your child how to manage these fastenings. (Actually these tips apply to teaching your child most new tasks!)
These are tips occupational therapists use all the time!
generalization of the skill (eg. zipper on dress, zipper on bag, zipper on pencil case, zipper on doll's skirt). 9. Reinforce and reward - We would like our kids to have intrinsic motivation to manage fasteners independently! Many children do desire this independence and often "force" it upon their parents too early with "I can do it myself!" Some children, however are not so intrinsically motivated. They stubbornly refuse to get dressed or insist on a parent helping them. For these children praise and reward are important to encourage desirable behavior. Often these kids benefit from a "backward chaining" approach discussed earlier. Rewards may include verbal praise "Great job!" or "You did it!". The reward may include letting your child choose their preferred outfit to wear or a sticker. A side note about rewards:
Is your child struggling with fasteners? Have you tried these tips?

This post is part of “Functional Skills for Kids: 12 month series by Paediatric Occupational and Physical Therapists”. You can read all of the childhood functions HERE. Read all Your Kids OT’s monthly posts HERE.
Find more information about “helping kids with fasteners” from other Occupational and Physical Therapists participating in the “Functional Skills for Kids series”:
When Can Kids Learn to Button and Zip? | Mama OT
Clothing Fasteners and Fine Motor Skill Development | Kids Play Space Clothing Fasteners and Gross Motor Skill Development | Your Therapy Source Inc How to Adapt Buttoning and Zipping for Your Child | Miss Jaime OT Learning How To Use Buttons, Snaps, Zippers, and Buckles Through Play | Growing Hands-On Kids Tips to Teach Kids to Zip and Button | The Inspired Treehouse Pinch. Poke. Snap... Helping Kids to Manage Buttons, Zips and More! | Your Kids OT Clothing Fasteners and Sensory Processing | Sugar Aunts The Visual Motor Aspect of Buttons and Zippers | Therapy Fun Zone 
"Open your mouth, here comes the plane!"
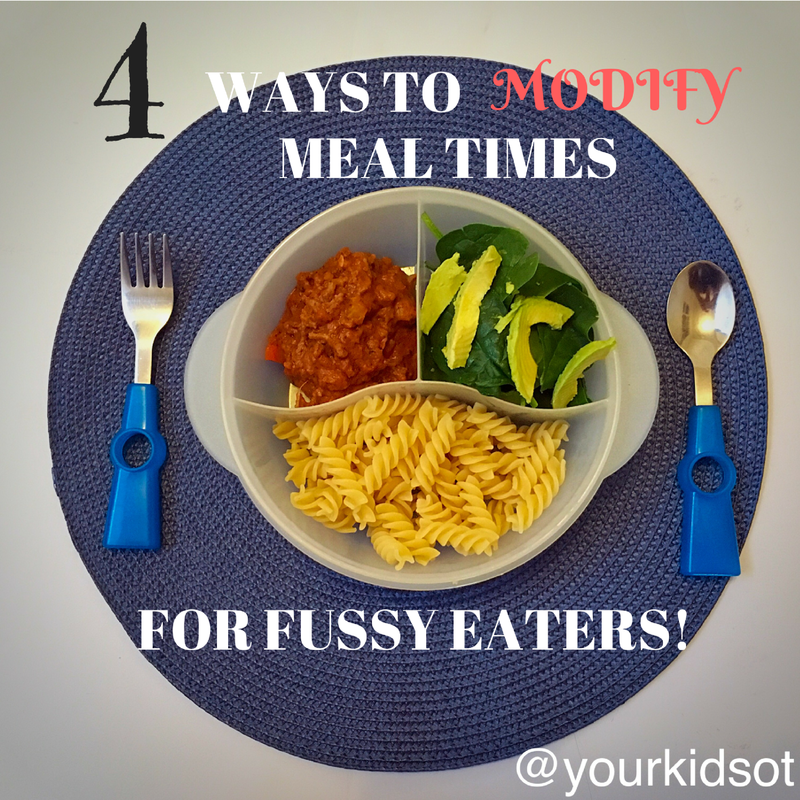
I'm having flashbacks to my young daughter and trying to bribe her with yoghurt to eat her dinner. Oh the things I tried. Oh the stress I placed on myself! Oh the stress I placed on her! Have you ever tried to coax your child to eat? It can be so STRESSFUL! Have you ever had to stop your child from over-eating? It can be so STRESSFUL! Join me this month in looking at meal times! I'm joined by my therapy blogger colleagues in the "Functional Skills for Kids Blog Series". There are heaps of tips and tricks to help your little ones at meal times with the links below. I wish I had read these articles as new parent. I wish I could tell first-time-parent-Cindy some of the things in this article! Here are 4 ways to modify meal times for your FUSSY eater!
1. ALTERNATIVE CUTLERY
(a) Cutlery with built up hands allow for easier grip for those with fine motor difficulties. Bendable necks of cutlery can help to angle the metal part so that the child (or adult) has more success with independent eating. Try Good Grips Utensils with built up handles. Read more about FM skills at meal times with Therapy Fun Zone's article HERE. (b) Shallower spoons are particularly good for kids with a strong gag reflex. The spoon does not need to be inserted too far into the mouth and the food comes off more easily. Try Gerber Graduates Spoon. (c) Weighted cutlery can help those who are experiencing difficulties with body and spatial awareness as well as sensory registration. Try Good Grips Utensils Weighted set of 4. (d) Chopsticks with training loops provide a guide for finger placement. Try Edison Chopsticks with right hand Minnie or right hand Mickey or left hand bunny. Some kids enjoy the novelty of picking food up with chopsticks. These are also great for working on hand strength and a tripod grasp too! I love using these chopsticks in OT (and not for meal times)! Read about thisHERE. (e) Novelty cutlery is everywhere on the market . You can find planes, bulldozers, block figures andvarious characters, etc! Kids enjoy using novelty cutlery as it brings a playful element into an every day activity. Read also how you can adapt regular cutlery withSugar Aunt's article here.

GET 10% EZPZ PRODUCTS WITH THIS LINK! CLICK ON THE IMAGE.
2. DIVIDED PLATES, BOWLS AND LUNCH BOXES!
Divided plates, bowls and lunch boxes are a great way to help fussy eaters. They allow you to separate food into portions. You may still present the food that they refuse and gradually encourage mixing foods from different sections. Remember that it often takes multiple presentations of the same food before a child will try something new. It is also okay if they don't eat it! Keep presenting it and don't worry! In a practical sense, divided plates, bowls and lunch boxes also keep wet foods separate from dry. There is a huge range of tableware on the market. You could try these:
For lunch boxes, you could try these:
Divided plates, bowls and lunch boxes can help kids who -
3. REGULAR ROUTINE
Establishing regular eating times and habits help children with meal times. It doesn't have to be regimented, however if meals are always around the same time of day; then your child will develop a natural circadian rhythm (natural body clock). They will begin to feel hungry at the same time of day. This will also help kids to sleep better! Establishing a family routine of setting the table, sitting, eating, talking, packing away... help children who have difficulty with transitions, creating stability and order. It can help children to understand the beginning and end of the "activity". Children also learn by example. As they see you trying new food, they want to follow. Sometimes the food on your plate might be more appealing than what they are eating. Some children prefer to feed themselves, whether that be finger food or with cutlery. Encourage this! Although it can often be quicker to feed young children yourself, this will pay off in the long run. 
4. HIDDEN VEGGIES!
For or against? There are two philosophies around disguising vegetables in other food. Some people stress the importance of teaching kids a knowledge of "farmyard to plate". Teaching kids where food comes from and how it grows. Getting kids digging in the garden, planting seeds, watering and watching them grow! Some people consider hidden veggies a brilliant idea! Genius! Sneak them in so at least kids are consuming veggies where they might otherwise refuse if they "see" them. You can try these recipes with hidden veggies!
Why not try both philosophies simultaneously?
As a new parent wrangling with my firstborn, I wish I had known of some of these ways to modify meal times. The main tip I would tell first-time-parent-Cindy... was that it was going to be okay if she didn't everything but to keep on presenting it to her anyway. REALLY - it's okay if she doesn't eat it! Do you have a fussy eater? Have you tried hiding veggies? Does your child have a favourite lunch box or dinner ware? What is your best tip to help modify meal times? 
This post is part of “Functional Skills for Kids: 12 month series by Paediatric Occupational and Physical Therapists”. You can read all of the childhood functions HERE. Read all Your Kids OT’s monthly posts HERE.
For more information about “meal times”, read what other Occupational and Physical Therapists participating in the “Functional Skills for Kids series” have written:
When Can Kids Feed Themselves? (and other mealtime milestones) | Mama OT Fine Motor Skills For Mealtimes | Therapy Fun Zone Postural Control, Gross Motor Development and Mealtime |Your Therapy Source Attention, Behavior, and Meal Time Problems | Sugar Aunts 4 Ways to Modify Meal Times for Fussy Eaters | Your Kids OT Mealtime Skills, Rituals & Play - Nurturing a Love for Food | Kids Play Space 15 Tips for Picky Eaters | The Inspired Treehouse Positioning, Motor Skills, and Table Manners: What the Connection? | Miss Jaime OT Visual Perceptual Skills Needed for Independent Feeding | Growing Hands-On Kids
Cindy is a registered Occupational Therapist practising in Sydney Australia. She has two young children who are a constant source of inspiration and learning. Cindy loves working creatively to help children to reach their potential, finding opportunities in everyday living and making learning fun. Cindy is the author of the occupational therapy blog Your Kids OT.
You may also find these affiliate links helpful...
Disclosure: Affiliate links are included in this article to promote products that I recommend. Your Kids OT is a participant in the Amazon Services LLC Associates Program, an affiliate advertising program designed to provide a means for sites to earn advertising fees by advertising and linking to Your Kids OT. Reviews and endorsements of products will only be made based on my expertise and personal opinion; and deemed worthy of such endorsement. The opinions shared in sponsored content will always be my own and not that of the advertising company or brand.

Tooth brushing is an important aspect of personal hygiene! This post is part of the "Functional Skills for Kids Blog Series" with a look at different forms of personal care. Make sure you check out all the great tips for hand washing, bathing, showering, nose blowing, hair cuts, sleep, screen-free quiet times as well as adolescent hygiene ..... at the end of this article!
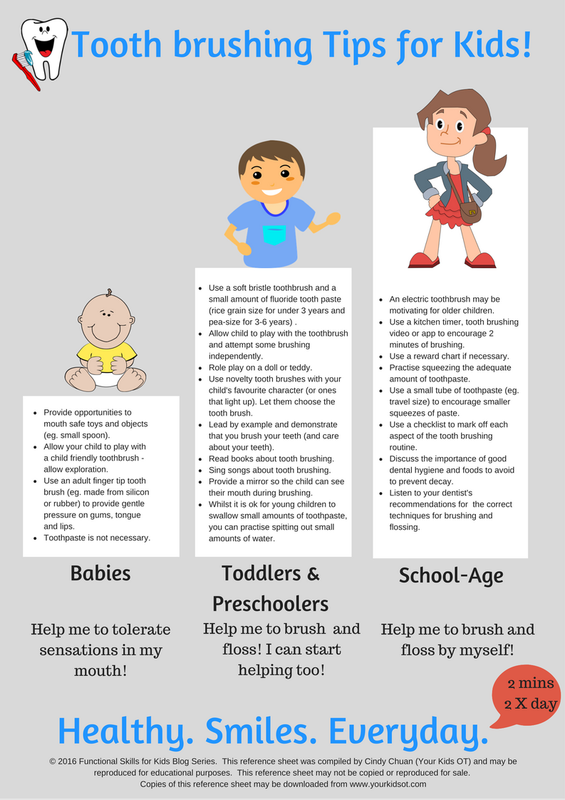
~~~~~~~~~~~~~~~~~~~~~~~~~~~~~~~~~~~~~~~~~~~~~~~~~~~~~~~~~~~~~~~~~~~~~~~~~~~~~~~ Dentists worldwide including the America Dental Association and theAustralian Dental Association recommend that children brush their twice a day for two minutes at a time. They also recommend regular visits to the dentist, use of fluoride tooth paste and daily flossing. Both of these sites have great resources to encourage your kids to brush and floss! Occupational therapists help people to become independent in activities of daily living (ADL). We consider aspects of the activity as well as environmental demands to determine why a child might have difficulty achieving independence in a task. For babies and toddlers, we also consider why they may not want to participate in the task! Firstly we may consider the developmental expectations for tooth brushing and some tips to help with these stages.
Babies
Aim: Tolerating oral sensation of something in the mouth and tongue movement. Tips for helping babies:
Toddlers/preschoolers Aim: Tooth brushing and flossing by an adult and beginning to brush parts themselves Tips for Toddlers and Preschoolers:
School Age Children Aim: Independent brushing and flossing teeth. Tips for School Age Children
Children with special needs may have difficulty with specific aspects of brushing their teeth. Here are some further considerations for tooth brushing!
Fine Motor Considerations
Tips to Help with Fine Motor Skills
Gross Motor Considerations
Tips to Help with Gross Motor Skills
Sensory Considerations Touch/Proprioception:
Smell
Vestibular
Auditory
Oral/Taste
Tips to Help With Sensory Processing Skills Your child may benefit from an oral desensitization program as part of a sensory diet. This might involve increasing deep pressure to the jaw, lips, cheeks, tongue and mouth. Bundy, Lane and Murray (2002) recommend providing infants and young children with deep pressure to the roof of the mouth or gums with the therapist's fingers or other soft rounded object (eg. Nuk toothbrush). They also suggest that older children and adults may be taught to provide deep pressure to their own mouths using a variety of oral motor toys (eg. using whistle, biting on knotted rubber tubing, blowing on a rubber strip). The Paediatric Occupational Therapy Department from Abertawe Bro Morgannwg University Health Board (2014) describe a protocol of oral desensitisation. This includes the following progressive steps:
You may also like to try...
Attention and Behavior Considerations
Tips to Help with Attention and Behaviour skills

Additional Considerations
Tips to Help with these additional considerations
Do your kids like brushing their teeth? Have you downloaded your FREE tips sheet, checklist and reward chart? 
Task Analysis - Independent Bathing in Children | Your Therapy Source
Tips and Tricks for Teaching Hand Washing with Kids | Growing Hands-On Kids I can brush my teeth! Tips for Tooth Brushing and Oral Care! | Your Kids OT Screen Free Quiet Time When Daytime Naps are History | Kids Play Space Tips to Help Kids Learn How to Blow Their Nose | Sugar Aunts Tips to Help Kids Who Hate Haircuts | Mama OT Sensory Friendly Tips for Kids Who Have Trouble Sleeping | The Inspired Treehouse Your Child With Special Needs: How to Conquer Showering Independently | Miss Jaime OT Adolescent Hygiene Challenges | Therapy Fun Zone
Disclosure: The information on this site is general in nature. The activities are safe for most children, however,
you should consult an Occupational Therapist or health professional to address specific movement, sensory or other medical conditions. This article does not contain any affiliate links.
References:
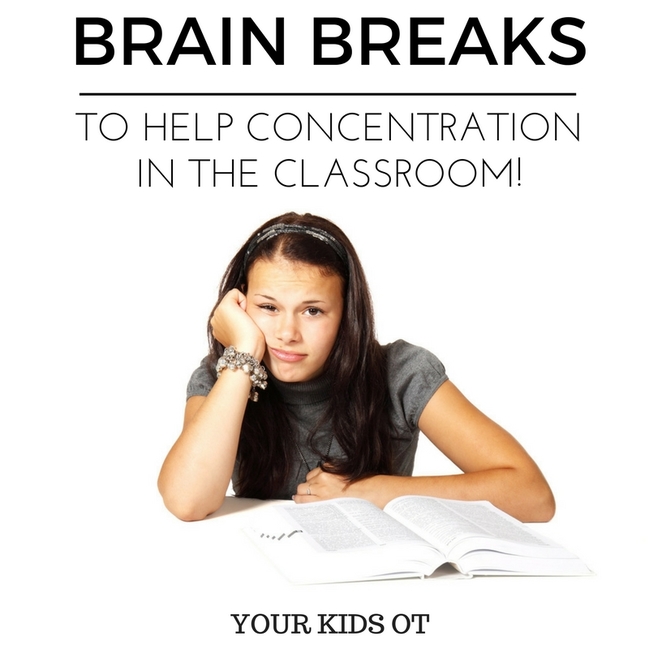
WHAT ARE BRAIN BREAKS?
A brain break is a short 2-3 minute break from formal instructional teaching in the classroom. It may incorporate body movements such as dance, stretching, strength and coordination. The purpose is to get the attention of the class as a whole and activate their bodies ready for learning. Brain breaks may be used to help alert kids; wake them up from sluggish behaviour or lack of concentration. Brain breaks may also be used to calm kids down when necessary; relax them from over-excitement. WHAT IS THE "THINKING" BEHIND BRAIN BREAKS? The term "brain breaks" is derived from "brain-based" education. You may have heard of terms such as "using both sides of the brain" or "engaging the brain" in learning. Jensen (2008) talks about brain based teaching as ESP - the active ENGAGEMENT (E) of purposeful STRATEGIES (S) based on PRINCIPLES (P) derived from neuroscience. He challenges teachers to consider how brains learn best. The "Whole Brain Teaching Method" is also becoming increasingly popular in classrooms as teachers promote learning through visual, auditory, kineasthetic and cooperative learning techniques Fishel (2011). Occupational therapists have used sensory integration principles in assisting children in the classroom who have difficulty paying attention and concentrating. We recommend movement breaks or "vestibular activities" to help organise the nervous system. Depending on the activities vestibular sensation can help the nervous system to stay organized and balanced; alerting with quick head movements or calming with slow head movements (Yack, Aquilla and Sutton, 2015) . We also look at a child's proprioceptive system; the unconconscious awareness of body position located in muscles, tendons, ligaments and joints. Activities that require muscles to stretch and work hard can provide proprioceptive sensations that can also help the brain to regulate arousal states (Yack, Aquilla and Sutton, 2015). Brain breaks are strategies that combine these neuroscientific principles, engaging children in the classroom so that they are ready to learn! Brain breaks are suitable for average developing children in a mainstream classroom as well as for children with special needs. They are also suitable for kids of all ages (and even adult learners)! BRAIN BREAKS - What teachers "think"! In speaking with different teachers, they love having a variety of brain breaks and movement break suggestions in their repertoire. Kids love them in the classroom. A teacher (thanks Chauntal!) I spoke to in researching this article said "Sometimes I find they need to get rid of energy so we dance or do kinaesthetic learning games such as star jumps while we spell or clapping games while we count in patterns. If we are concentrating on a writing task we might do strength core exercise such as planks, chair dips or yoga poses. When we need to calm down we do brain gym - like rolling shoulders in different directions or different coordination games". 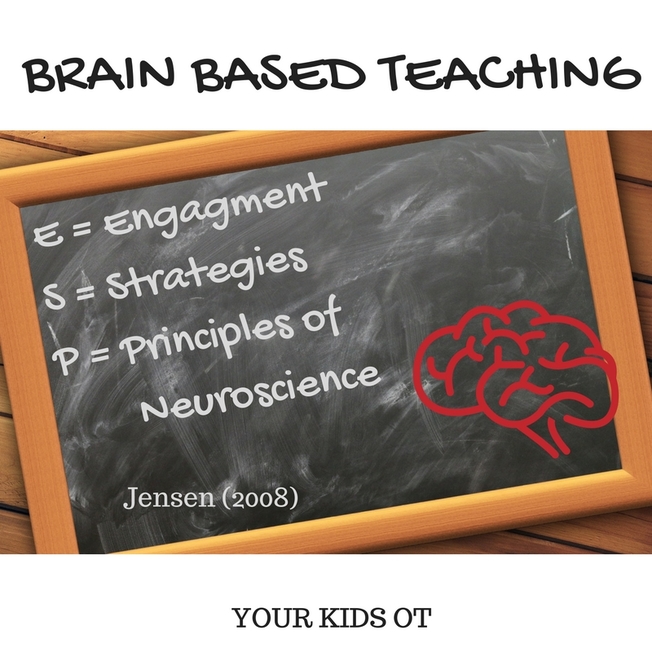
BRAIN BREAKS FOR THE CLASSROOM!
LOW TECH
WITH TECHNOLOGY Teachers who have access to smartboards, love using these boards to help incorporate movement into the classroom. There are many options available on You Tube.
Do you use brain breaks to help kids to concentrate in the classroom? What are your favourite brain breaks? 
This post is part of “Functional Skills for Kids: 12 month series by Paediatric Occupational and Physical Therapists”. You can read all of the childhood functions HERE. Read all Your Kids OT’s monthly posts HERE.
Find more information about “School Day Functions”, stop by to see what other Occupational and Physical Therapists participating in the “Functional Skills for Kids series” have written:
Fine Motor Skills Needed at School and Classroom Activities | Sugar Aunts
How Do Gross Motor Skills Affect Academics? | Your Therapy Source 65 Helpful Strategies for Students with Sensory Challenges | Mama OT Brain Breaks to Help Concentration in the Classroom | Your Kids OT Things You can do at Home to Help Your Child in School | Therapy Fun Zone Tips for Following Directions in the Classroom and Home | Growing Hands-On Kids Positioning In The Classroom |Miss Jaime OT 10 Transition Strategies for Kids: Preventing Tantrums | The Inspired Treehouse The Case for More Play in the School Setting | Kids Play Space
References:
|
AuthorHi, I'm Cindy and I am an Occupational Therapist. I enjoy working creatively with children to see them reach their potential. Read more about me here. 
SEARCH THIS SITE

Archives
June 2024
Categories
All
Popular Posts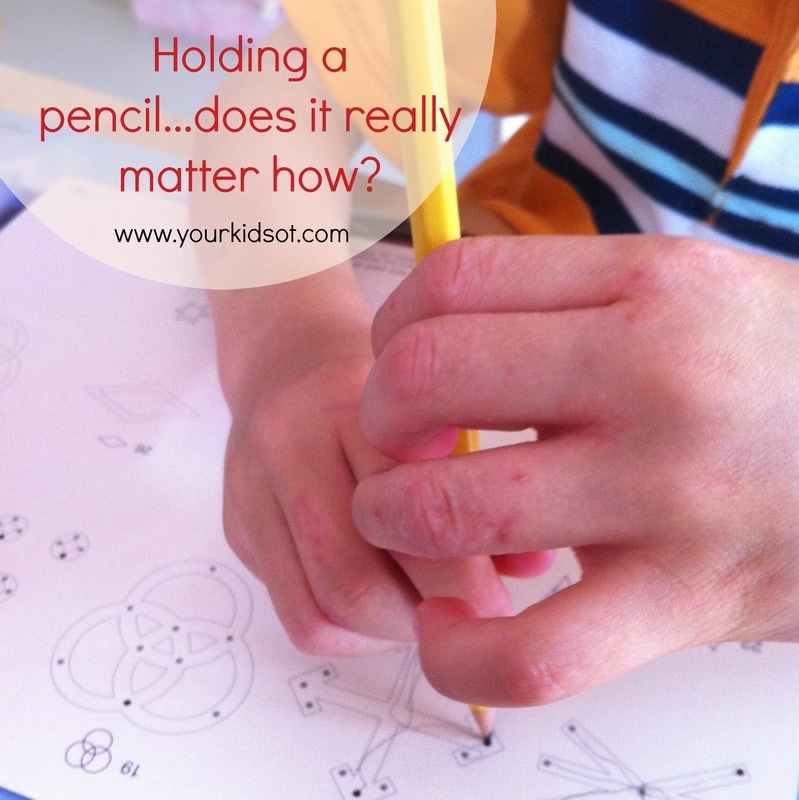

 |


 RSS Feed
)
)
)
)
)
Join the YKOT e-newsletter!
Subscribe to get our latest content by email and receive
the SHAPE ROADS PRINTABLE NOW!

Success! Now check your email to confirm your subscription and receive your free printable!
Join our Mailing List!
Subscribe to get our latest content by email and receive
the SHAPE ROADS PRINTABLE NOW as a thankyou!
Success! Now check your email to confirm your subscription and receive your free printable!
Disclaimer: The information on this site is general in nature and should be used for educational and entertainment purposes. The activities are safe for most children, however, you should consult an Occupational Therapist or health professional to address specific movement, sensory or other medical conditions. This blog does not replace formal therapeutic professional advice given by a health professional or medical practitioner. Reviews and endorsements of products will only be made based on my expertise and personal opinion; and deemed worthy of such endorsement. The opinions shared in sponsored content will always be my own and not that of the advertising company or brand. Content, advertising space or posts will be clearly identified if paid, affiliated or sponsored. Affiliate links may be found throughout this website in advertising. This means that if you follow through with a purchase from these links, Your Kids OT will receive a percentage of the sale. Your Kids OT undertakes to meet the requirements of the "Social Media Policy" as published by Australian Health Practitioner Regulation Agency (AHPRA). Further information about this policy can be found here.
Find meFollow me |

|
About me
AuthorHi, I'm Cindy and I am an Occupational Therapist. I enjoy working creatively with children to see them reach their potential. Read more about me here. 
|
Copyright © 2017 Your Kid OT