
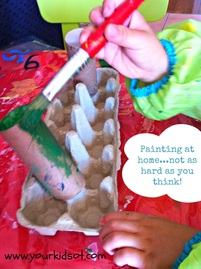
 Congratulations for getting past the title...are you someone who says "I leave painting for preschool!" or "I don't let my child paint at home"? There is nothing wrong with this. I don't think that I ever painted at home as a young child... However, painting can be great fun and a way for your child to express themselves. Some of the concerns that parents have are "my child is impulsive", "my child has poor attention", "my child will paint a few scribbles and then has had enough", "there is so much effort in setting up and clearing away", "my child doesn't like it".... Any of these ring true for you? Painting at home does not need to be a daunting thing with young kids. The key is preparation and organisation (from the grown up). It may be "saved up" a rainy day activity or for the school holidays when there is less rushing around. Here is a simple painting project for toddlers and preschoolers with a few tips to make it successful for you and your child.
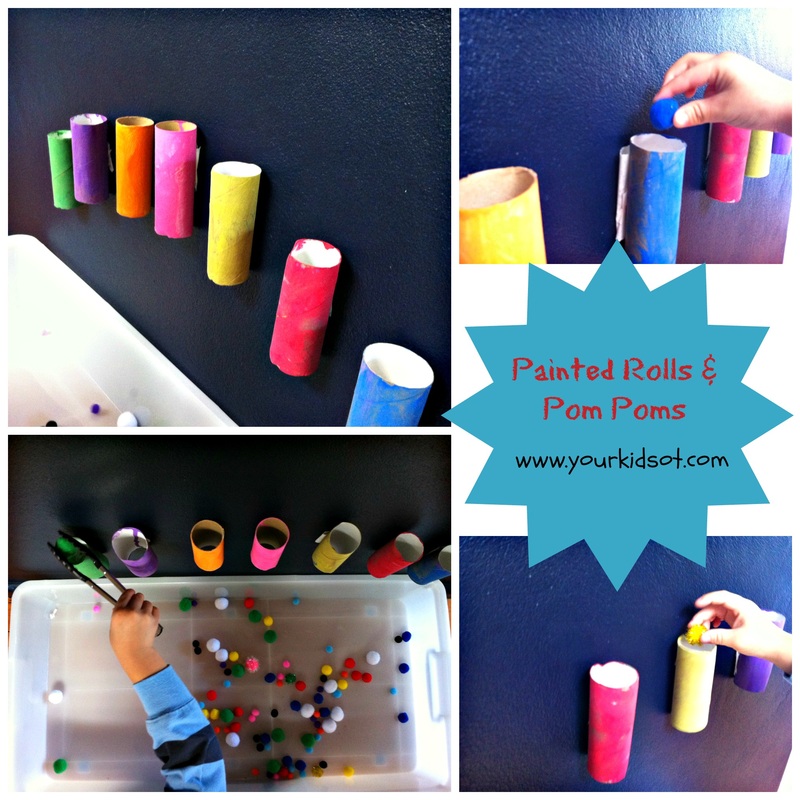
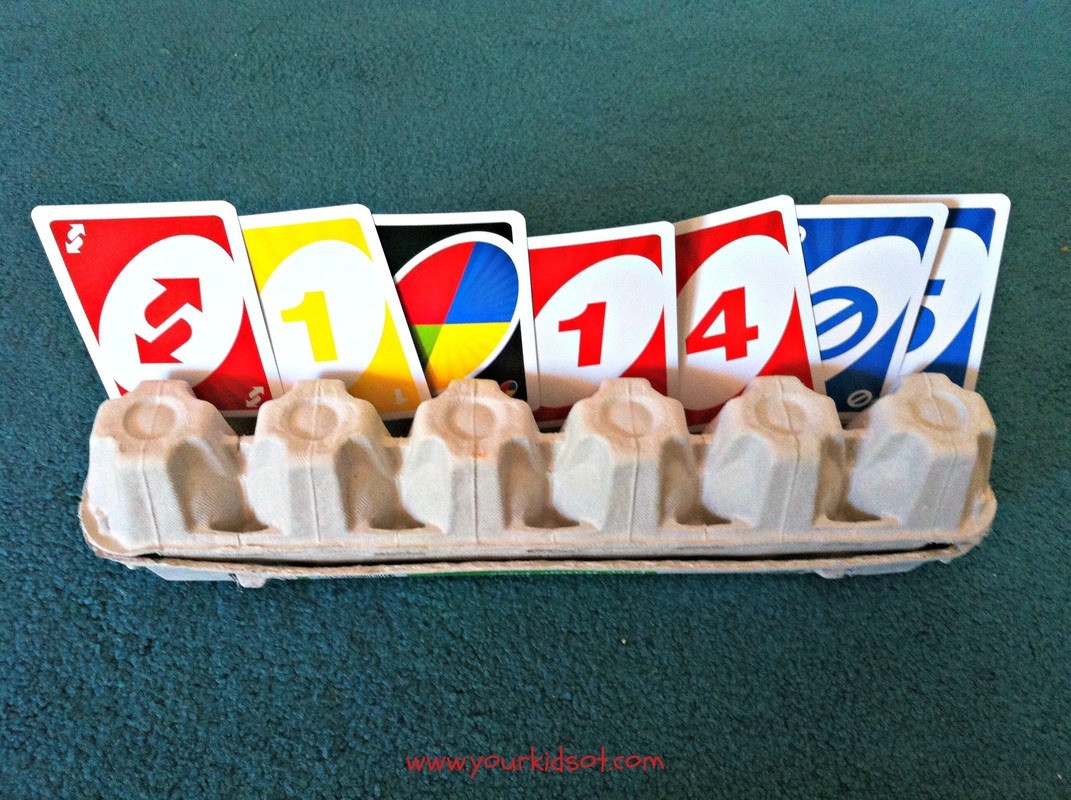
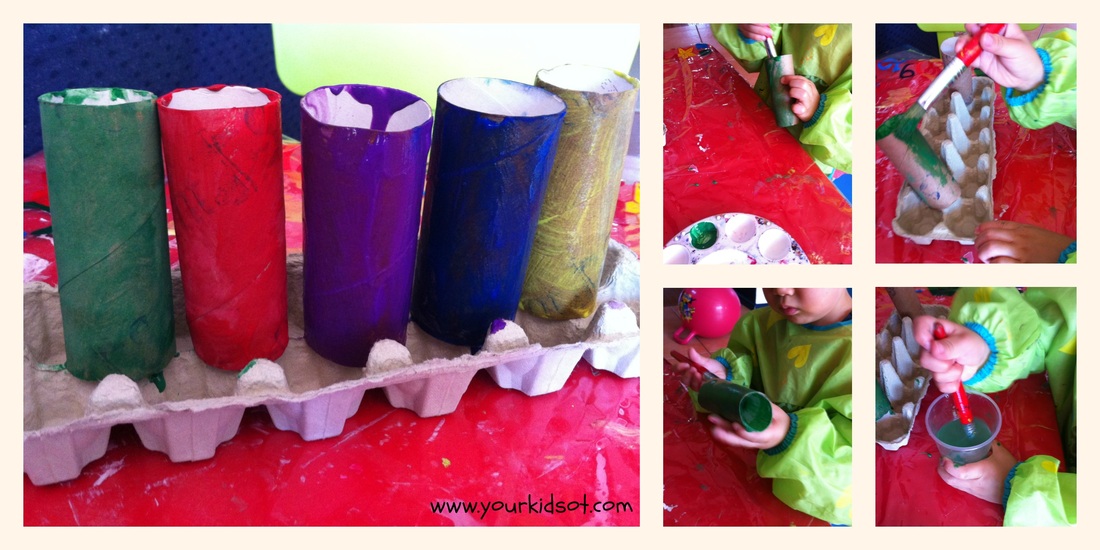 #Otlifehack: using egg cartons to support painting. Presenting one colour and one cardboard roll at a time reduces impulsive behaviour. It helps a child with poor attention skills to focus on the one activity. It also helps to provide a clear "finish" point when the roll is covered in paint. The egg carton provides some stability during painting and reduces the amount of "touching" for those with tactile defensive reactions to paint.
So hands up if you shudder at the thought of painting with your kids? I hope these simple tips make it a less daunting activity to consider. It may not be an every day activity for your household but it is possible! Let me know if you step out of your comfort zone for this one.... If you enjoyed this article you may also like...
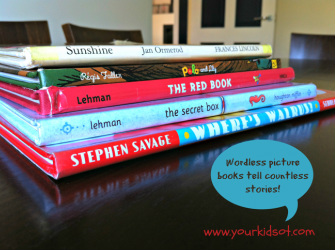
 Winter is the perfect time to curl up with a good book under a blanket with a cup of hot chocolate close by. Have you tried any of the books that I have recommended this year? Here are the links to Wordless Picture Books and "Spying" books that I have written about. Let me know if you have found them in your library or read them recently.
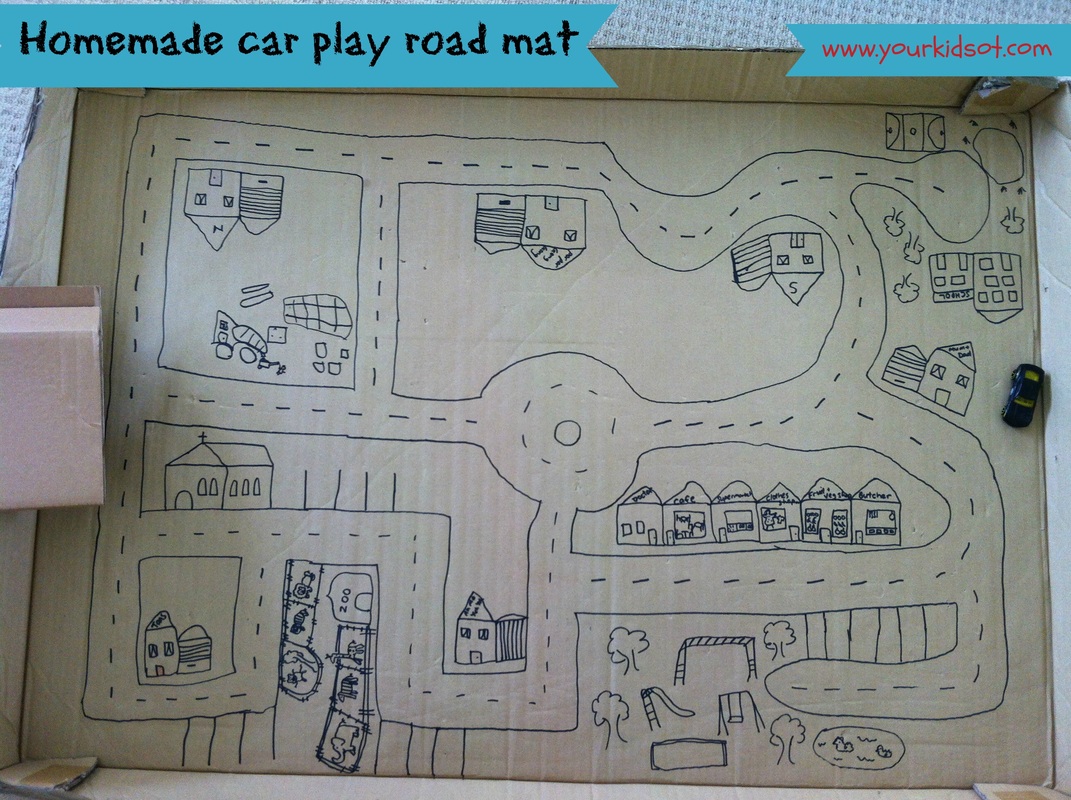
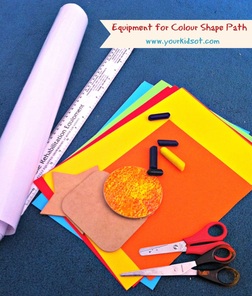
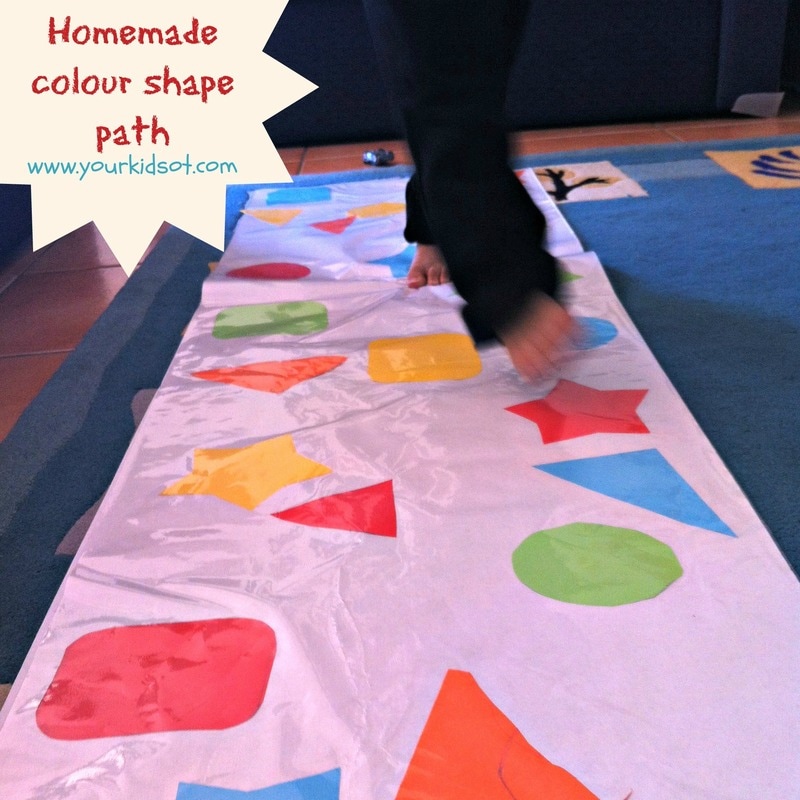 Fun with colours and shapes! Using both hands together can be tricky for some kids! Bilateral coordination is so important in helping children to establish a dominant hand and in working on more complicated skills as your child develops. This simple homemade path of coloured shapes is a great activity for your toddler or preschooler. They can help you to make it {using bilateral coordination of their hands and fine motor skills} and then use it to identify shapes and colours {using their gross motor skills and learning concepts}.
What do you need to do?
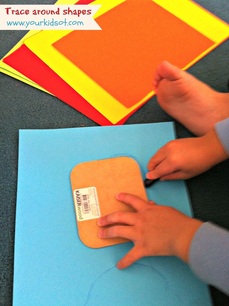
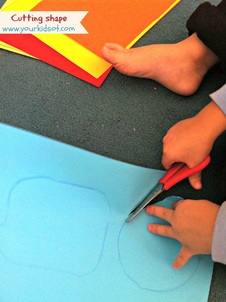
Tracing and cutting are both activities that encourage bilateral coordination of hands. One hand (usually the non-dominant) needs to stabilise the paper and the other hand (usually the dominant) needs to use the implement (ie. crayon or scissors). Your preschooler may need help to trace around the shapes without moving the crayon to the other hand. They may need help stabilising the shape they are holding so it doesn't move whilst it is being traced. Your preschooler will need time to practise and become confident with manipulating the paper to turn as they cut around the shape. They may require some assistance to turn the paper and encouragement to stay on the line during cutting. 3. Lay out your contact paper. Peel back the paper (I did half at a time) and stick down the shapes varying the colours and shapes along the path. 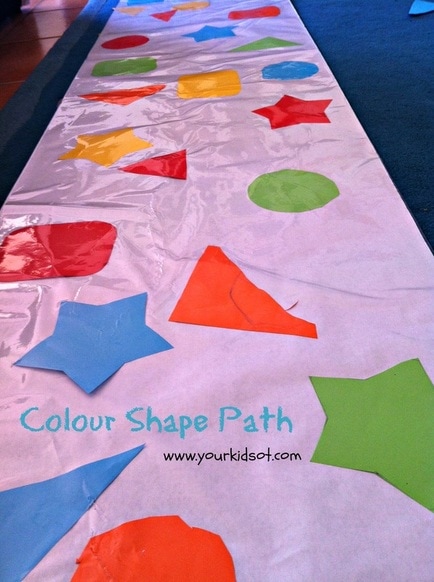 How do you use this? This path may be used with an individual child or several children together in a setting. It would work really well in a family day care setting where there are several children in a small group. Great for turn taking, waiting and other social skills. There are many ways to encourage your child with the concepts of shapes and colours. Depending on the chosen activity, it may also promote bilateral coordination of the legs (used for walking, jumping, hopping) and eye/hand coordination.
Although the weather is cooling down here, my northern hemisphere readers might want to get out some water bombs and throw them at the appropriate shapes or colours! 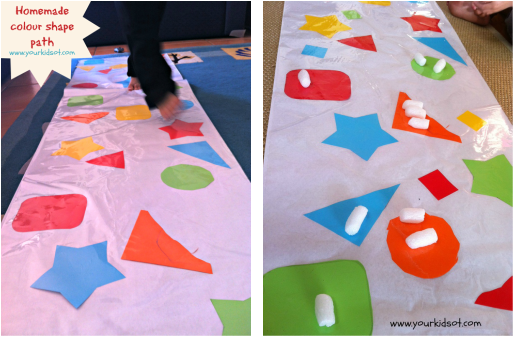 Try making this colour shape path with your toddler or preschooler. They will love to see that their tracing and cutting is put to use and can be "played" with. Let me know if you try it out! 
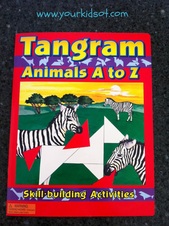
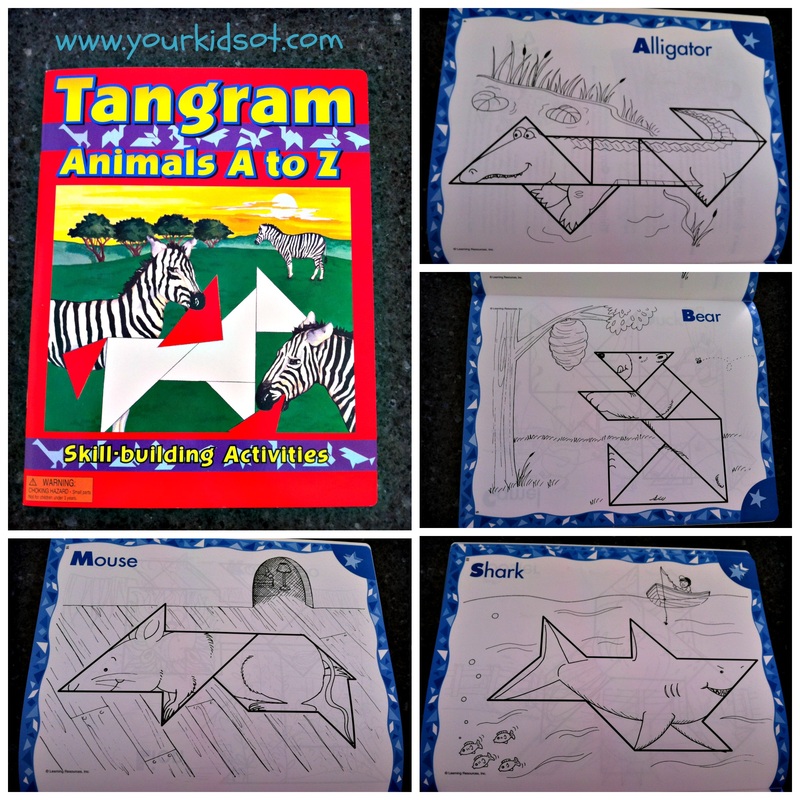
This is a great introduction to Tangrams for children. Mr 3 is able to match most of the first 10 shapes. Miss 7 can do most of the book independently. We can keep coming back to the book and Tangrams. I have used ordinary Tangram sets with school-aged kids I see for Occupational Therapy. Most Tangram sets come with pictures that can be built with Tangram shapes. Tangrams are helpful for encouraging the development of visual perceptual skills, especially * figure ground (the ability to see an object or form when presented in a complex background with a lot of visual information at one time), * visual discrimination (is the foundation for where an object or shape is classified according to colour, form, pattern, size or position) and * position in space (relates to understanding directional language concepts, such as in/out, up/down, in front of/behind/between, left/right, when relating to objects or shapes such as letters). Read more about visual perceptual skills here.
Note: I have not received any renumeration for this post, however this post does include affiliate links.
Writer's Hat was created by Linda Amos, a teacher and Assistant Principal from Melbourne, Australia. Ms Amos created Writer's Hat to inspire creative writing, oral literacy and imaginative thinking. It was designed with classroom teachers in mind, however is easily used by therapists and families as well. Writer's Hat is a simple app that consists of a word generator for categories - Who, What, Where and When. Students are encouraged to use the words generated for creative writing. Students who have difficulty with handwriting may also use the app to tell the story (with no writing component). Students may also use the words generated to type out a story on the ipad or desktop computer. 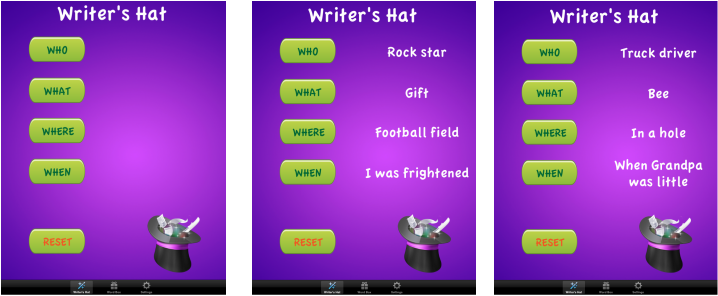 Writer's Hat is an ideas generator to inspire creative writing, oral literacy and imaginative thinking. The app also includes a second page called the "Word Box". This is a word generator for nouns, verbs, adjectives and adverbs. This can be used in the same way as the "Writer's Hat" page.  Word Box generates words for creative writing, oral literacy and imaginative writing. Writer's Hat and Word Box come with an extensive list of words for each category, however you may personalise this by editing the word lists. You could add the names of students and family members. You may edit the spelling of words (which may be different when not in an Australian context). I enjoy using this app with kids in therapy. It is a useful tool to have working with kids who get stuck with ideas and don't know where to start with their creative writing. Kids like the "random" nature of words mysteriously appearing on the screen. You could use this app within a family context to see if you can create a story together. Let me know if your kids enjoy this app or if you find it useful in your context.
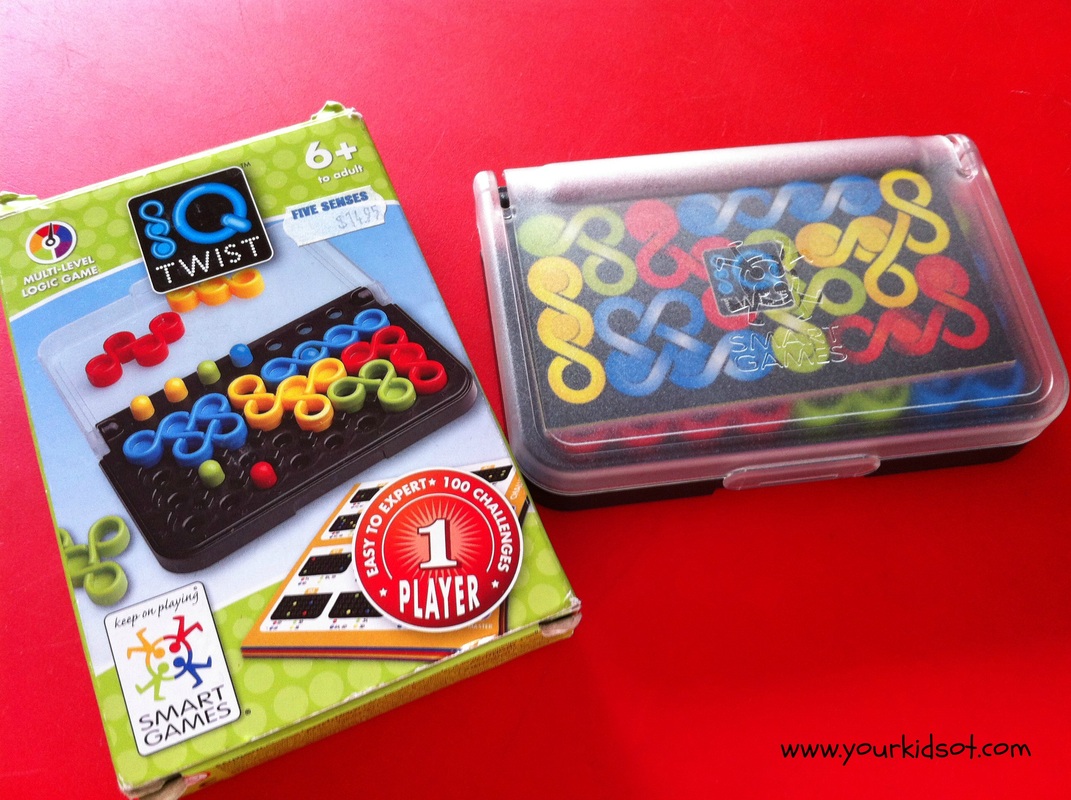
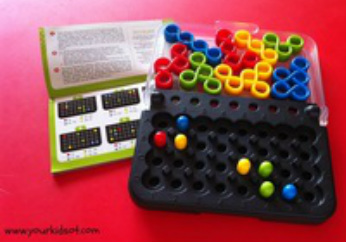
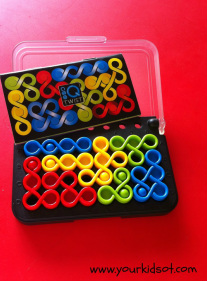
"IQ Twist" is single player game of logical thinking and problem solving. Our family is going overseas soon so we are starting to think about what to pack! Miss 7 brought "IQ Twist" with her on holiday last year and enjoyed challenging herself with this game on the plane. It comes in a neat hinged box which keeps all the pieces together for travelling.
The game consists of 7 coloured pegs and 8 twisted puzzle pieces. The twisted pieces are different shapes and have some parts with holes and others which don't. To play, you choose a challenge from the booklet which gives you a picture to guide placement of the coloured pegs. Matching the coloured pegs to the board in the correct places involves good visual perceptual skills. The pegs are small; encouraging a good pincer grasp and open web space when manipulating them. The aim of the game is to fit all the twisted puzzle pieces back into the board whilst matching the colours appropriately. This challenge will require skills in visual discrimination and position in space. It will also require good problem solving skills and some perseverance!
Designed for kids 6 years old to adults, "IQ Twist" is a fantastic little game; perfect for those who love a challenge. It is available from various stores for A$15.00 approx. See Kidstuff, Five Senses Education or Amazon.
Note: I have not received any remuneration for this post and the opinions expressed are my own. Your Kids OT is an affiliate partner with Amazon therefore purchasing from Amazon will support this website.
Uno is the game of choice in our household at the moment. Miss 7 and Mr 3 like playing it over and over. Mr 3 worked out pretty quickly to say "uno" when he has one card left. It is teaching him about colours, numbers, turn taking and waiting. Little hands have trouble holding cards. We road-tested a few options below. Some were inspired by pinterest and others by what we had around the house. Miss 7's favourite card holder was the "cardboard brick" that has a slit that easily held her cards. Mr 3 preferred the bridge from his train track set. They both had difficulty managing the peg as they had to lay down the cards to add and take away cards. We found the egg carton with slits made down the middle worked well. The lego holder also worked well, however Miss 7 commented that others could see her cards easily. The shoebox worked on the floor as the cards tended to lean forward. 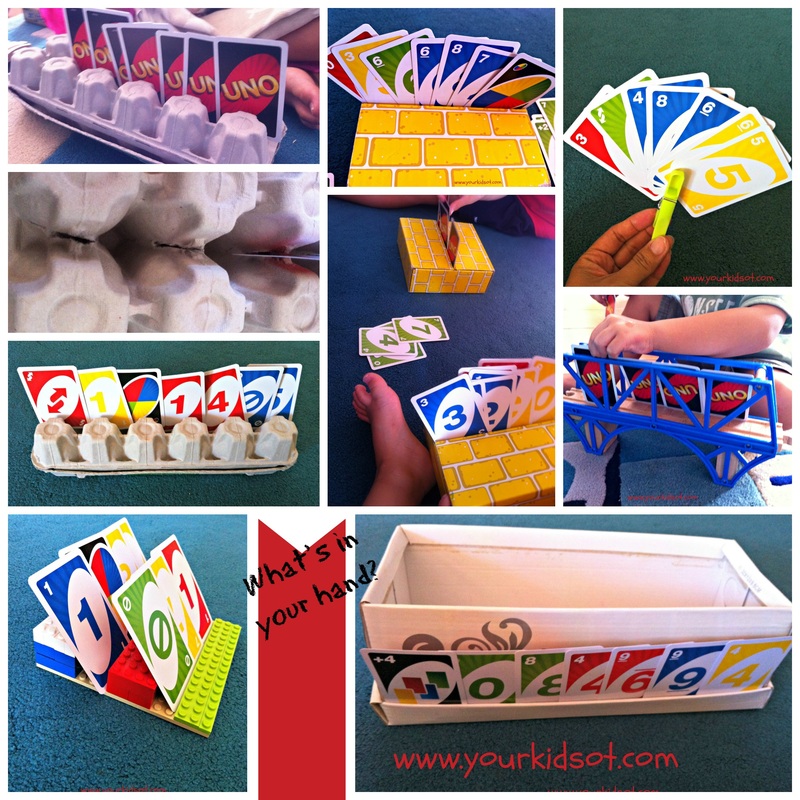 In a therapy situation, card holders would work well with children who are impaired on one side and need a support for their cards. Do your kids enjoy card games? Do they have difficulty holding their cards in their hands? Have you tried any of these card holders or have you got one of your own?
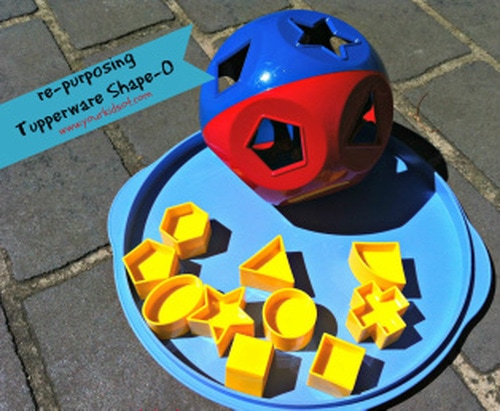
"Tupperware Shape-O" a classic toy.
The "Tupperware Shape-O" is a classic toy that brings nostalgic memories for some (including me) of their early childhood. We have a Tupperware "Shape-O" that has been a little ignored and forgotten in our household as the kids are getting older. I thought it was time to bring back the "Shape-O" and re-purpose it for now.
The "Tupperware Shape-O" includes 10 shapes which are numbered 1 to 10. There is the ball itself with holes for posting the shapes. Here is a round up of ways you can use your "Shape-O". Learning shapes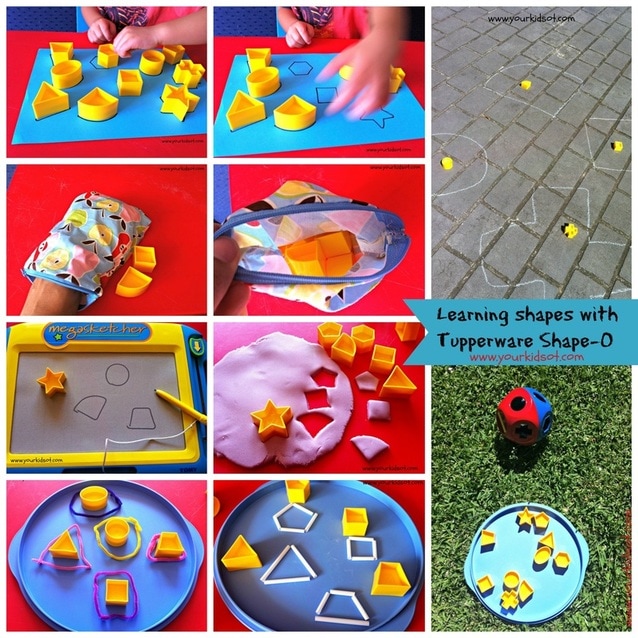
1. Trace the shapes onto paper to get an outline. Ask your child to match the shape to the outline. A great way to encourage visual discrimination.
2. Place the shapes into a bag. Ask your child to put their hand in the bag and feel a shape. Ask them to identify the shape. This ability to perceive and recognise an object using tactile cues without visual and auditory information is called stereognosis. 3. Draw or trace shapes on a doodle board, whiteboard or paper. 4. Use shapes as cutters with playdough. 5. Form shapes using pipe cleaners. 6. Form shapes using straws. 7. Draw shape outlines with chalk on the ground outside. Place the shapes in a bag. When the shape is selected, child runs (or hops/skips/jumps/pushes on the scooter board) to the correct shape. This activity incorporates gross motor skills with learning shapes. There is an element of visual perceptual skill development "form constancy and position in space skills". 8. Throw the "Shape-O" ball onto the lawn. Ask your child to identify the shape, run back to the shapes, select the correct one and post it into the hole. Again incorporating gross motor skills with learning shapes. Learning numbers and counting!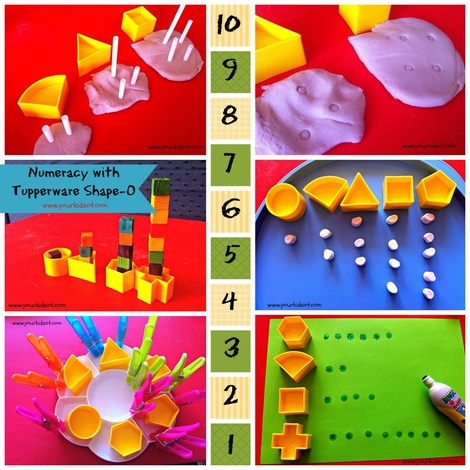
1. Line up your "Shape-O" shapes according to the number printed on the shape. Place the correct number of short straws into playdough sections. Count the straws. Remove the straws and count the holes.
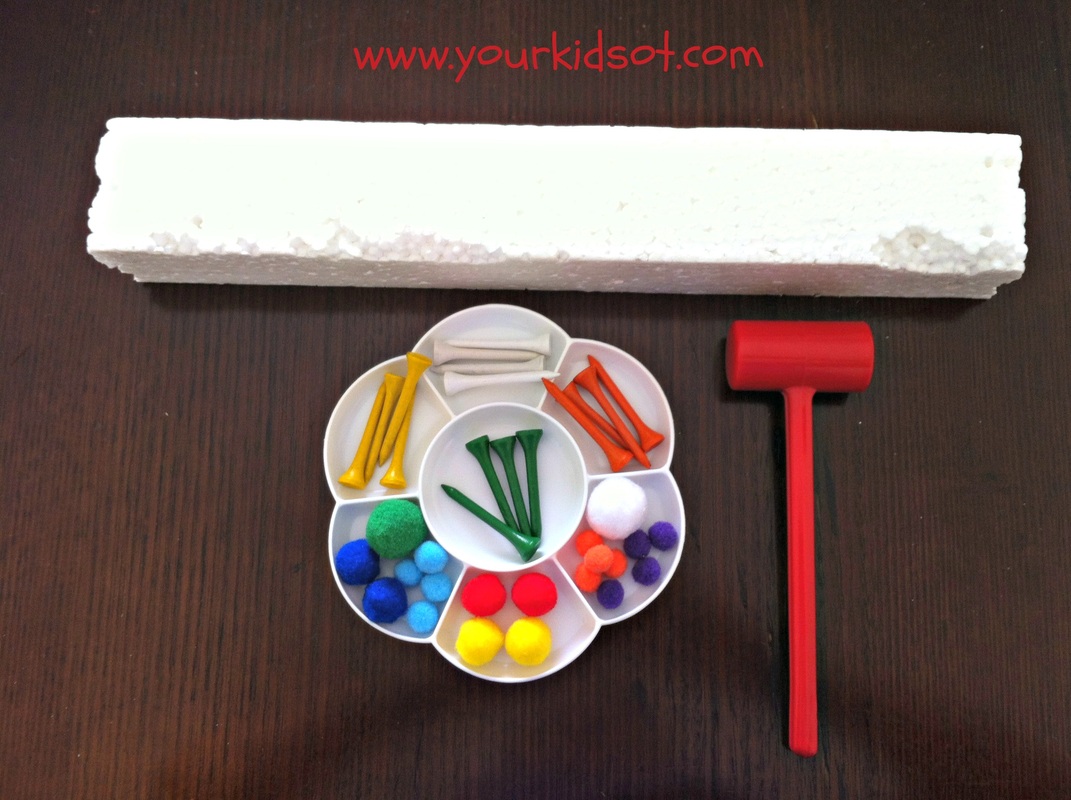
2. Stack small blocks inside the "Shape-O" shapes according to the numbers inside. 3. Use small objects (eg. marshmallows, sultanas, beads) to count out the numbers inside the shapes. 4. Place the shapes inside a paint palette. Peg the correct number of pegs to the paint palette section corresponding to the number inside the shape. 5. Use a bingo paint marker to count out the numbers in each shape. For babies...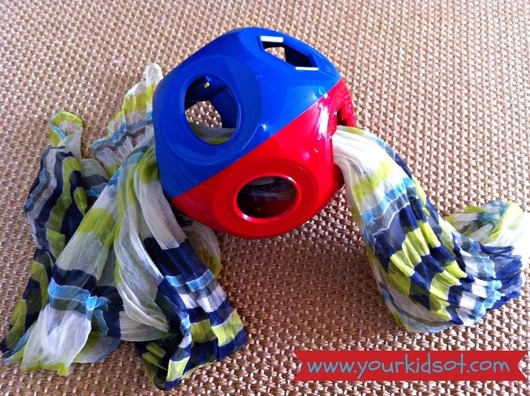
Babies will love to pull the scarf from the "Shape-O" ball. They can watch the colours of the scarf and problem solve to get the scarf out. Older babies may like to poke the scarf into the holes. {Supervise your babies as any cord may be a choking hazard).
Crawlers will love to go after the rattling ball with the shapes inside. They can push the ball to their grown up or around the room.
Do you have a "Tupperware Shape-O"? Have your children played with it recently? Let me know if I've given you some ideas to take it out of storage and back into the rotation of toys. Have fun!
Note: I have not received any renumeration for this post from Tupperware.
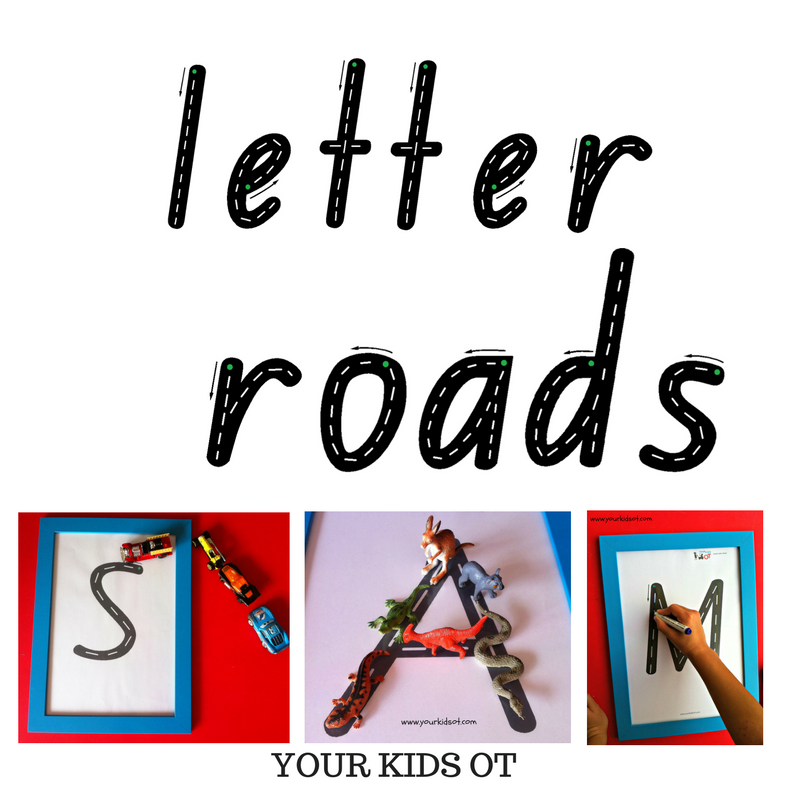
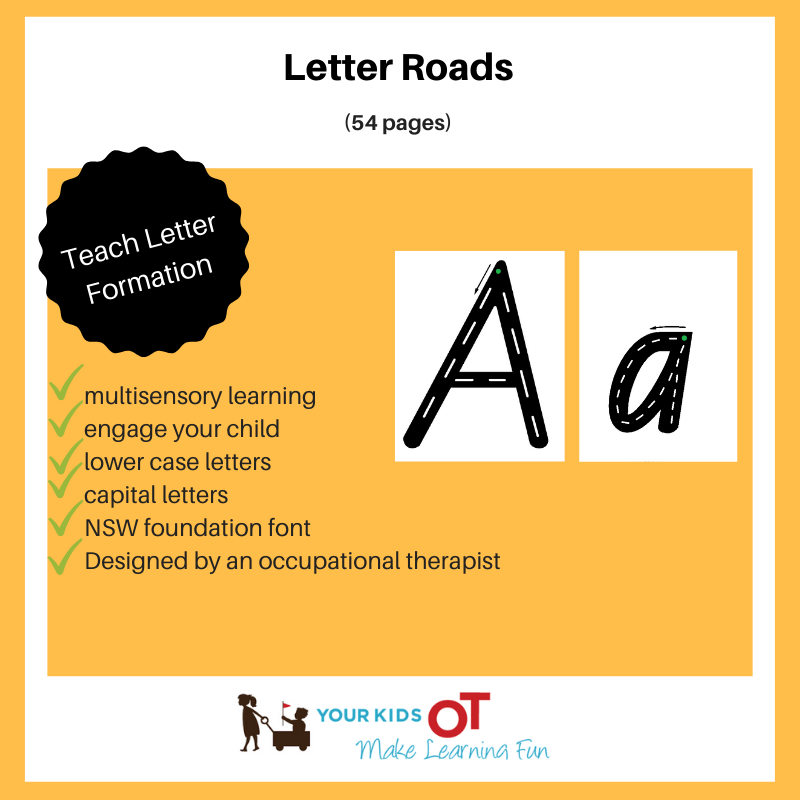
"Letter roads" is a fun engaging way to encourage letter identification, familiarization and formation! Each letter of the alphabet is a road with a black background and white road lines. The letters were created in NSW Foundation font. There is a green starting dot and an arrow to indicate initial direction for correct letter formation.
Whilst becoming familiar with the alphabet, your child can also work on fine motor skills such as a pincer grasp or tripod grasp. They can also use their favourite toys to help form the letters. Here are a few suggestions for how to use Letter Roads... 1. Encourage your child to identify the starting point for each letter by finding the green dot. 2. If your child is unfamiliar with letter formation, you may demonstrate the correction directionality. Some children will require hand over hand assistance to obtain correct directionality. 3. You may introduce one letter at a time or a group of letters according to the current goals for your child (eg. letter of the week, a child’s name, line letters, tall letters). Refer to previous blog about Letter Families. 4. Use your finger to draw along each letter road. 5. Use a car or vehicle to drive along each letter road. 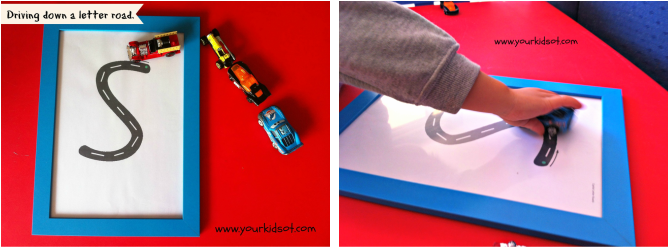
Use a car to drive down the Letter Road.
6. Use figurines or plastic animals to walk along the letter road.
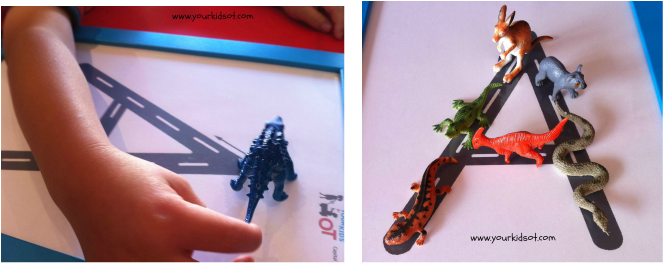
Dinosaurs on a letter road parade.
7. Paint along the letter road using a paintbrush and shaving cream.
8. Roll out playdough to place along the letter road. 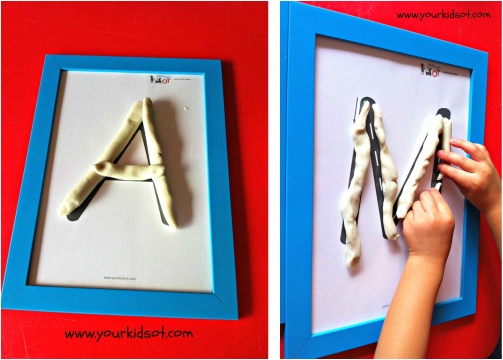
Playdough letter roads.
9. Roll a marble or small ball along each letter road.
10. Pour rice over the sheet and clear the letter road with a finger or paintbrush. 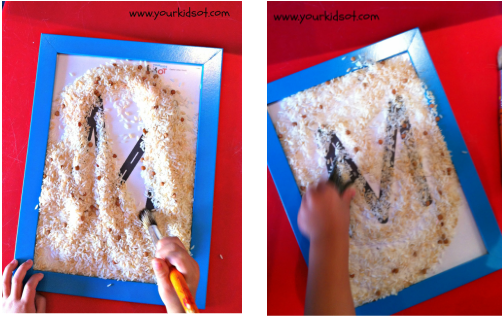
Brushing rice away from letter roads.
11. Write the letter using a dry-erase marker. Use different colours and make a rainbow road. Write the letter next to the example.
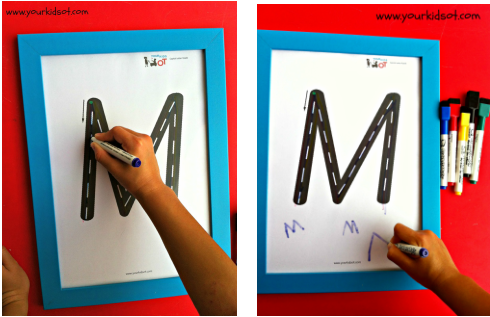
Writing using a dry-erase marker and letter roads.
Laminate your letter roads for durability, place them in a zip lock back, place them in a plastic sleeve or even place them into a plastic frame. This is a fantastic resource for your child to learn letters and practise writing them. It is also a great addition to the therapist's tool kit as you can vary the activity and grade it with various children.
Purchase your own set of letter roads today at theYour Kids OT shop.
Cindy is a registered occupational therapist practising in Sydney, Australia. She has two growing children who are a constant source of inspiration and learning. Cindy loves working creatively to help children to reach their potential, finding opportunities in everyday living and making learning fun. She is also addicted to making printables (even when they take a long time to complete). Cindy is the author of the Occupational Therapy website and blog Your Kids OT and Sensory Diet Activity Guidebook (ebook).
Cindy is a member of the Functional Skills for Kids Therapy Team. They have together published THE HANDWRITING BOOK, THE SCISSORS SKILLS BOOK and THE TOILETING BOOK. The information on this site is general in nature. The activities are safe for most children, however, you should consult an Occupational Therapist or health professional to address specific movement, sensory or other medical conditions. Affiliate links are used throughout this website to promote products I love and recommend. I receive a commission if any purchases are made through these links. Please see my disclosure policy for more details. Your Kids OT blog - https://www.yourkidsot.com/blog Your Kids OT shop- https://www.yourkidsot.com/store/c1/Featured_Products.html Your Kids OT Teachers Pay Teachers - www.teacherspayteachers.com/Store/Your-Kids-Ot Your Kids OT Facebook Page - https://www.facebook.com/yourkidsot/ Your Kids OT Instagram - https://www.instagram.com/yourkidsot Your Kids OT Pinterest - http://www.pinterest.com/yourkidsot Your Kids OT Amazon store - https://www.amazon.com/shop/yourkidsot
Watch Letter Roads on You-Tube: https://youtu.be/mTmKkj_HeAg
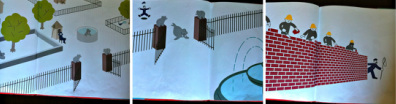
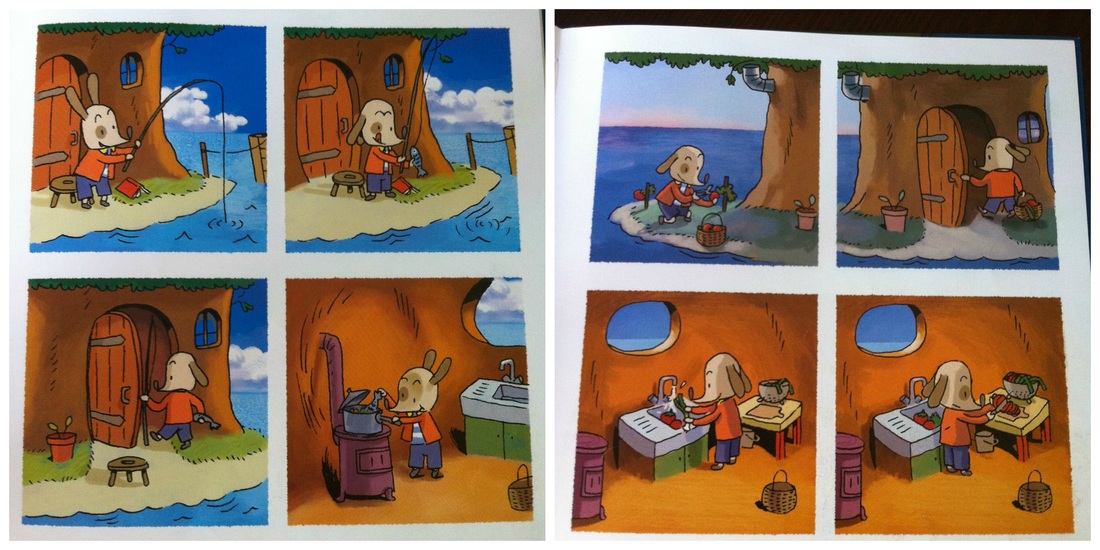
I have listed a few ways that wordless books can be used at home, in school and therapy sessions. You may focus on different goals depending on your child's age and current difficulties. You may also work through a progression over different "sessions" at the pace suitable for your child. For example, If you have a school-age child who has difficulty with handwriting and putting thoughts on paper; you may choose to focus on your child describing and telling with the wordless books without a pencil/paper component. If you have at toddler, you may spend many times facilitating the story for your child when one day they decide to "read" the book for themselves.
Have you "read" wordless picture books with your children? Have you used them as a therapist? What's your favourite wordless picture book?  |
AuthorHi, I'm Cindy and I am an Occupational Therapist. I enjoy working creatively with children to see them reach their potential. Read more about me here. 
SEARCH THIS SITE

Archives
June 2024
Categories
All
Popular Posts

 |


 RSS Feed
Join the YKOT e-newsletter!
Subscribe to get our latest content by email and receive
the SHAPE ROADS PRINTABLE NOW!

Success! Now check your email to confirm your subscription and receive your free printable!
Join our Mailing List!
Subscribe to get our latest content by email and receive
the SHAPE ROADS PRINTABLE NOW as a thankyou!
Success! Now check your email to confirm your subscription and receive your free printable!
Disclaimer: The information on this site is general in nature and should be used for educational and entertainment purposes. The activities are safe for most children, however, you should consult an Occupational Therapist or health professional to address specific movement, sensory or other medical conditions. This blog does not replace formal therapeutic professional advice given by a health professional or medical practitioner. Reviews and endorsements of products will only be made based on my expertise and personal opinion; and deemed worthy of such endorsement. The opinions shared in sponsored content will always be my own and not that of the advertising company or brand. Content, advertising space or posts will be clearly identified if paid, affiliated or sponsored. Affiliate links may be found throughout this website in advertising. This means that if you follow through with a purchase from these links, Your Kids OT will receive a percentage of the sale. Your Kids OT undertakes to meet the requirements of the "Social Media Policy" as published by Australian Health Practitioner Regulation Agency (AHPRA). Further information about this policy can be found here.
Find meFollow me |

|
About me
AuthorHi, I'm Cindy and I am an Occupational Therapist. I enjoy working creatively with children to see them reach their potential. Read more about me here. 
|
Copyright © 2017 Your Kid OT