|
I love this time of the year.! The end of the school year is fast approaching, the anticipation of Christmas is exhilarating and summer holidays at the beach tantalizingly close!
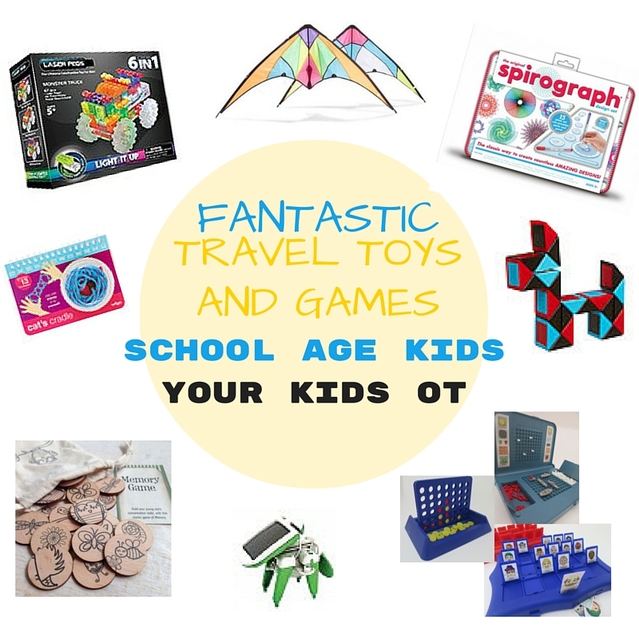
Here is a round up of my favourite travel toys and games! Of course, me being me these games make learning fun and your child may even work on their play skills, fine motor skills, social skills, visual perceptual or motor planning skills whilst they play! They would be excellent presents or stocking stuffers for Christmas too! Note: Stores listed below are Australian. International readers may wish to try their local toy stores or larger toy distributors such as Amazon for similar products.
FOR TODDLERS AND PRESCHOOLERS!
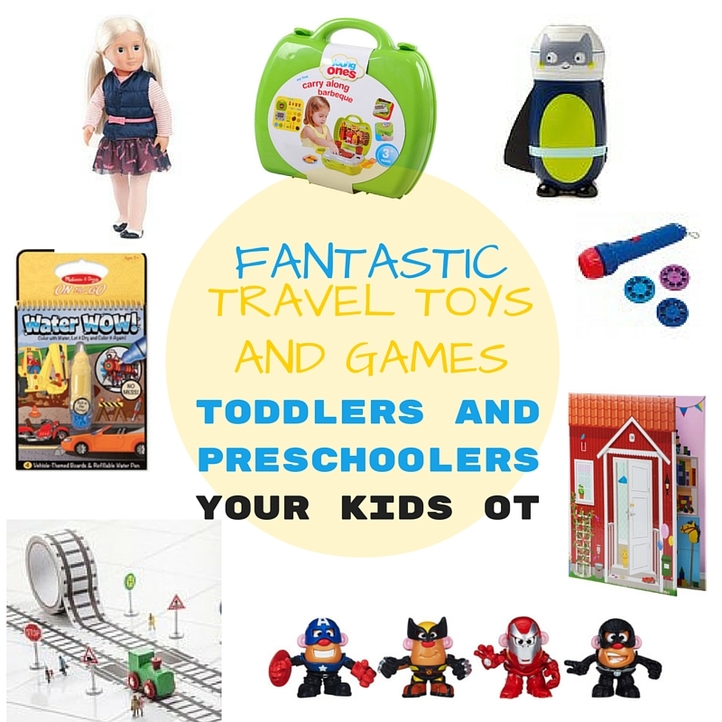
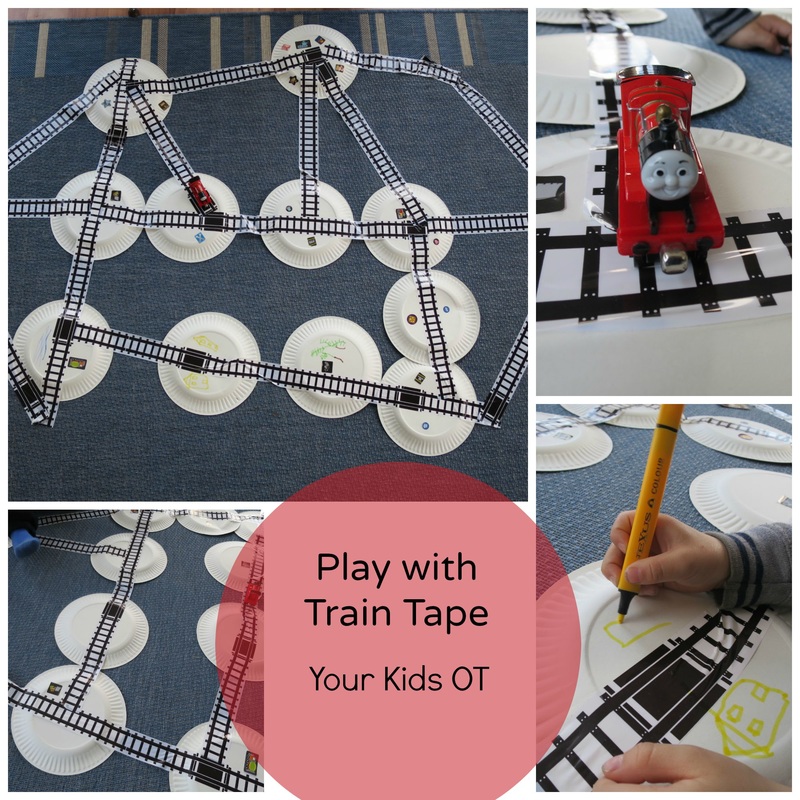
1. Train Tape - A roll of tape with train tracks available from Finlee and ME comes with one small train. Such a simple idea that your train-crazy kids will love. It certainly beats bringing heaps of wooden or plastic track with you. The tape can be stuck onto carpet or floorboards and removed when you finish your holiday. Best to do a test first especially if you are at a holiday house. To make it last a bit longer, you could tape it down onto large cardboard sheets and fold it up. We combined the train tape with paper plates and Mr 5 used his own trains. He also decorated the paper plates as "stations" with houses and stickers. A fabulous way to encourage imaginary play whilst on holiday!
2.Water Painting Books - You can find these any chain stores such as Big W, Target and Kmart. We love these Melissa and Doug "On the Go" series books available from Kids Stuff. Just fill the "pencil" with water and "colour in" the page. The picture then turns to a colour print.
3. Kids Animial Torch - These hand push torches by Typo are so cute! Kids love playing with "light" so why not encourage their hand strength "squeezing" these torches at the same time! 4. Young Ones Carry Along BBQ and Beauty Salon - Cute carry along "suitcases" available from Target Australia. Bring your imaginary play on holidays with these all-in-one sets. I love how the suitcase itself forms part of the play either as a BBQ or Beauty Salon and all the pieces fit back into the suitcase. 5. Torch Projector Space - Insert the provided discs to project a picture of space (nebulae and galaxies). Available from theAustralian Geographic Shop, this torch may foster imagination for budding astronauts as well as encourage some fine motor manipulation. 6. Playskool Potato Head Marvel Mashable Heroes - These mini "Mr Potato Heads" have superhero outfits to create Captain America, Spider-Man, Wolverine and Iron Man. They are fantastic for keeping hands busy with pushing and pulling whilst imaginary play with the superhero characters is great too! These toys are available from a range of toy shops, including Toys R Us. These are popular with "big" kids too! 7. Our Generation Doll - These 45 cm dolls have soft bodies and are very cuddly. Perfect to bring on a road trip or even a plane ride to keep your child company. They are very natural looking dolls with age-appropriate proportions. There are a range of accessories available to change outfits or for further pretend play. These dolls are available from Kmart and David Jones. This doll is also suitable for older kids looking for an alternative to a "baby" doll. 8. Spexa: Doll's House Book - This "doll's house" unfolds into four different room scenes ready for your child to add their own doll or puppet to play. Available from IKEA Australia it is portable and easy to fold back. Great for imaginary play as well as visual scanning and visual figure ground skills as your child looks at the details of their "house".
FOR SCHOOL AGE CHILDREN
1. Travel size Connect Four, Battleship, Guess Who and Hangman by Blue Opal Australia- I purchased these games at a local toy shop and I use them a lot in my OT sessions! School age kids will love these travel size versions of their favourite games and they can inadvertently work on their pincer grip, visual perceptual and fine motor skills at the same time! 2. Snake Puzzle - A classic fidget toy with a wide range of colours from Smiggle. Hours of fun making new shapes and patterns, keeping hands and fingers busy with the manipulation. 3. Make a Match Memory Game - Woodland Friends Edition - This beautiful wooden memory game comes in a small drawstring bag. The pictures are black ink drawings and will prompt creative imaginary play as well as visual memory. It is available from Finlee and Me. 4. Laser Peg Light Up toys - These light up toys are available from a range of toy stores including Toys R Us. Each box comes with a number of different models which can be copied. Laser Pegs are also compatible with "other bricks" and has an added bonus of lighting up. Kids can work on their visual motor skills as well as their fine motor manipulation with this toy! 5. Spirograph - A classic arts and craft set that comes in a transportable tin. "Originally developed as a drafting tool by a mechanical engineer, the distinctive wheels and rings of Spirograph cleverly combine the principles of art and maths in a unique way that has inspired generations!" I remember loving this as a child and your child can spend hours making their own patterns and designs. Available from Kids Stuff. 6. Stunt Kite - Loved by kids of all ages, kites are the perfect thing to throw into the car for run at the beach or park. These stunt kites are available fromKmart and will get your kids moving! 7. Solar Power Kit - A variety of kits available from the Australian Geographic Store. Your child will love clipping the pieces together to form various models (ranging from 6-12 models depending on the kit). You don't need glue, paint, nails or batteries! Learn the principles of solar power whilst watching your model go. 8. Cat's Cradle - This version of the string game from Smiggle comes with a useful instruction booklet. Your child can work on their bilateral coordination as they use both hands together to manipulate the string. Are you travelling these holidays? What is your child's favourite travel toy or game?
Disclosure: Train Tape was gifted to me by Finlee and Me to provide a blog post for their site. I have not been paid any renumeration by any of the companies listed here. There are no affiliate links and I do not benefit financially by recommending these toys and games. All opinions expressed are based are my own and toys have been purchased from my own funds.
You may also like:
Toddlers are busy little people. They like exploring with their hands (and mouths). They love putting things in and taking them out of containers. They continue to explore different textures. They are starting to use both hands together and as they get older starting to choose one hand as the dominant "worker" hand and use their other hand as the "helper. They are starting to learn about colours, shapes and counting. They are learning about their own body parts and how to move them to perform certain actions.
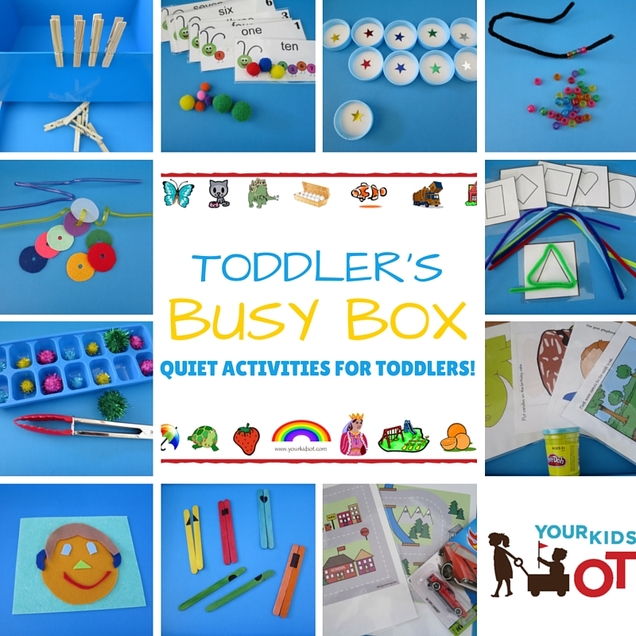
I would like to say recently, but it was actually some time ago I made some "toddler busy boxes" to give to friends who were expecting their second children. These were gifts to keep their "firstborns" busy with quiet interesting activities. These toddler activities were chosen so they can be done almost independent of mum (who may be busy with the newborn) and could be repeated over and over again. Depending on the age of your toddler and their exposure to similar activities, you may need to show them how to do these several times before they are independent. You may like to introduce one activity at a time rather than give your child the whole box of activities in one go. I placed each individual activity into a zip-lock plastic bag so all the pieces could be kept together. I then placed all the activities into a sturdy box with the child's name on top. 10 Great Toddler Busy Box Activities! 1. Felt face - I cut out a square as a background piece, a circle for the face and various interchangeable pieces for the facial features. Your toddler can make "faces" trying out different positions for various features. They may learn about their body parts and how to organise the felt face to match the spatial positions of their own face. As your toddler gets older they could try drawing a face using the felt face as a model. 2. Ice cube tray, tongs and pom poms - Your toddler places a pom pom into each hole in the ice cube tray. They may also use the tongs to pick up and release pom poms. They may develop hand strength and learn colours from this activity. 3. Crazy straw and felt circles - I cut out a series of felt circles and made a hole in each circle. Your toddler may thread the circles onto the crazy straw one at a time so that it goes for a "ride". They may place all the circles onto one straw to see how many fit. They may learn about colours and use both hands collaboratively. 4. Pegs - Your toddler may place the pegs onto the side of the box. You could change this over time by adding colours or letters to the pegs which may be matched to a corresponding card. They may develop hand strength and start using both hands together. 5. Caterpillar counting pages and pom poms - I downloaded these counting pages from Powerful Mothering and laminated them. Your toddler may match the pom poms with the caterpillar body. As they get older they may be able to match the corresponding coloured pom poms to the pictures and count them. 6. Milk Bottle Lids and star stickers - I placed some star stickers onto 10 milk bottle lids. Your toddler may match the stars with the same colours. They may like to stack the lids and knock them over. As your toddler gets older you may use the lids as a memory game placing them all face down and trying to find the matching pair turning over two at a time. 7. Pipecleaner and small beads - Knot one end of the pipe cleaner with a bead so that their is a "stop" end. Your toddler may begin to thread beads onto the pipecleaner. This activity may require supervision so that beads are not placed into the toddler's mouth and swallowed. 8. Shapes and pipecleaners - I provided laminated pictures of shapes and pipecleaners. Older toddlers will be able to manipulate the pipecleaners to the shapes. You may also provide a dry-erase marker for your toddler to trace or colour in the shapes. 9. Playdough and playdough mats - I provided a new tub of playdough and laminated playdough mats from Planet of the Apels. Your toddler may add their playdough to the mats to complete the pictures. You may find more ideas to do with playdough here! 10. Car and Road maps - I provided a new "Matchbox" car and laminated road maps from the DIY Mommy. Toddlers will love driving their car around these roads and race track. 11. Paddlepop stick shapes - Draw a shape across two paddlepop sticks which are the same colour. Your toddler can match the shapes and colours together. The paddlepop sticks could also be used with the playdough.
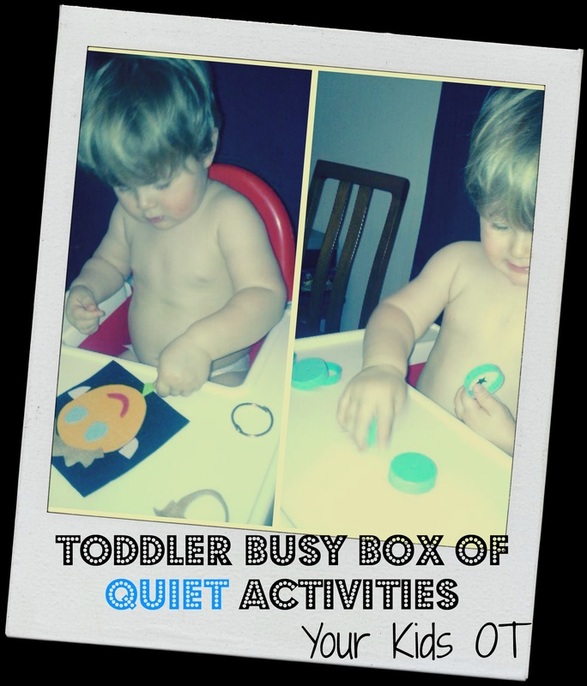
It was lovely to be sent photos of these busy boxes in action! Isn't Mr E adorable?!
These activities would also be great for an OT to have in his/her therapy bag to use with toddlers and preschoolers! Have you made your toddler a "busy box"? Have you made one as a gift?
You may also like:
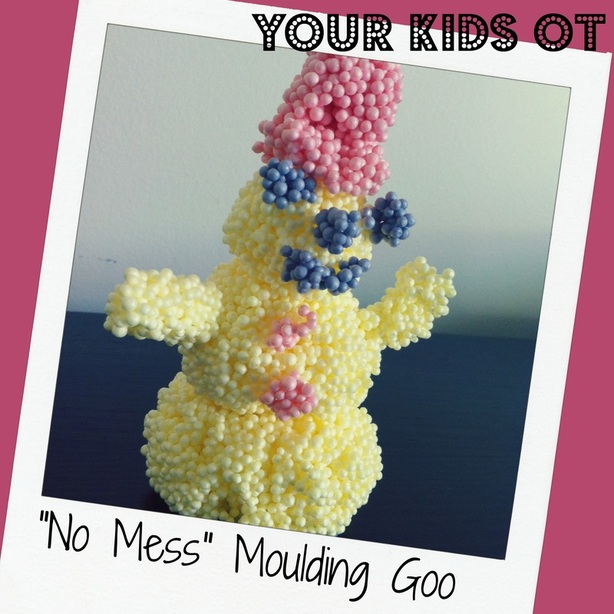
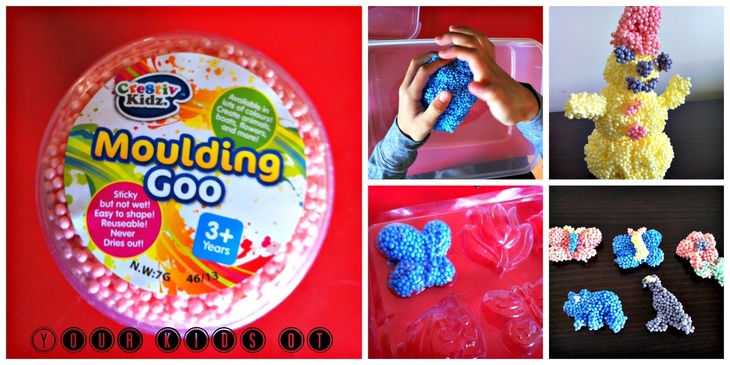
A "no-mess" moulding goo? We had to try this out!
I purchased these for $1 a tub from Kmart (price is now $1.50 Aust). It comes in a range of colours and is not suitable for children less that 3 years of age. Definitely a potential choking hazard! It says "sticky but not wet" on the label and it was. The moulding goo is made from little polystyrene balls that stick together. The first challenge is to get it out the plastic container as it is so sticky.
Once out of the container, you can shape the goo with your fingers and hands into basically whatever you want. You can roll it into balls or press it into a mould.
Mr 5 found it a challenge to think of ideas for moulding and wasn't very fond of the "stickiness" of the balls. Miss 9 enjoyed pressing the goo into shape moulds and mixing the colours to come up with a creation. Separating the colours out again was pretty impossible so if you want separate colours don't mix them in the first place! Suitable for children 3 years and older, this activity should be supervised with preschoolers as it should not be consumed! Three year olds will be able to manipulate and shape this "goo" without leaving a mess on your table or floor. It also never dries out so if it is not packed away straight after use it will be fine to use again and again. OTs may find this a great alternative to take along to therapy sessions as an alternative sensory experience. It can be used to encourage exploratory play as well as an opportunity to develop fine motor skills. A cheap alternative sensory experience. Have your kids tried it?
Note: I have received no remuneration for this post and all comments made are my own.
Also linking up with:
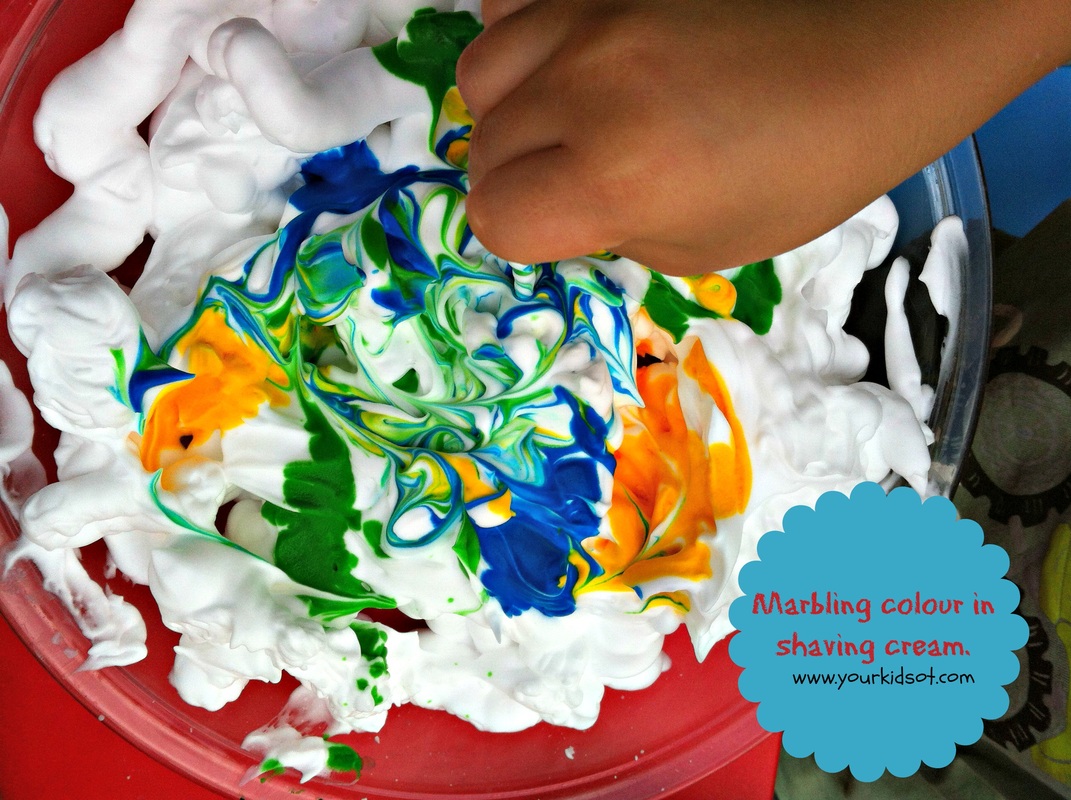
Looking for more sensory experiences? Try these...
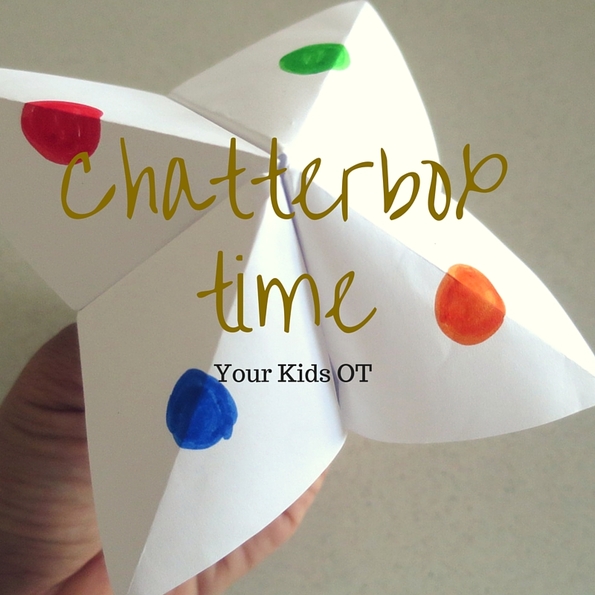
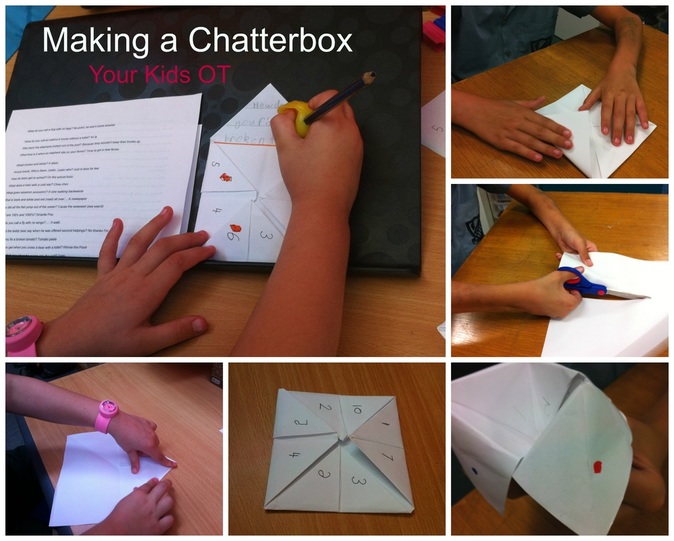
Chatterbox Time! Kids all love to make and play with chatterboxes! I remember making them when I was a child, did you? Last week, I made these with some of the kids I see for therapy and it was the perfect activity to work on a range of skills.
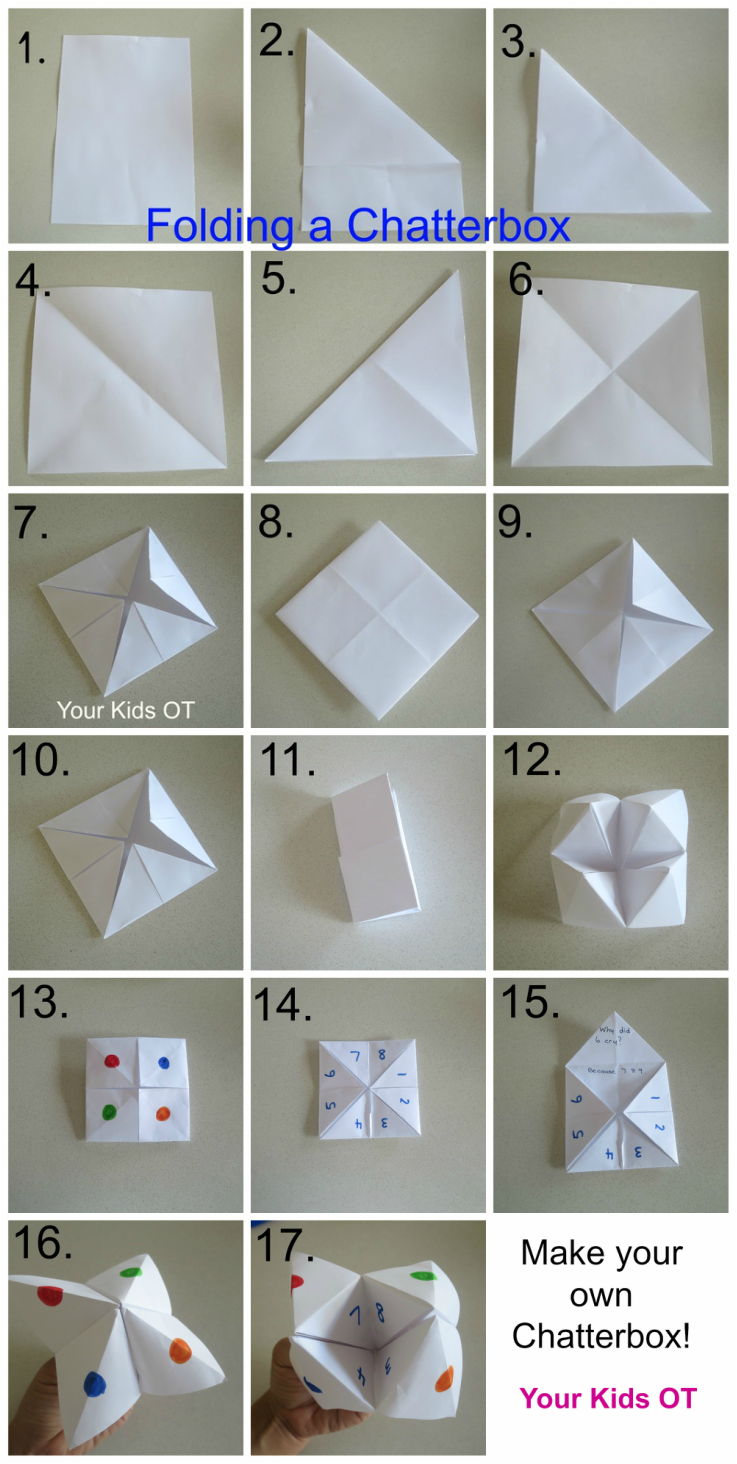
If you haven't made one for a while, this is how you fold your chatterbox. Start with an A4 size piece of paper and make sure you press down each fold neatly. The neater the folding the better the chatterbox will work in the end. 1. Start with an A4 piece of paper. (You could also start with a square piece of paper and skip to step 4.) 2. Fold down one corner so your triangle lines up with the side. 3. Cut off the section under the triangle. 4. Open out your triangle so you can see your square. 5. Fold down another corner creating a triangle. 6. Open out your square so you can see the two folded diagonal lines. 7. Bring each corner into the middle, pressing down on the fold. 8. Flip over your square. 9. Bring each new corner into the middle, pressing down on the fold. 10. Almost there! 11. Fold along the horizontal middle line, open and fold along the vertical middle line, open. (This will held with the movement of the chatterbox when playing.) 12. Put your fingers in the "open square" parts of each quarter. Your chatterbox is now ready to decorate! 13. Add a coloured dot to each square. (We also wrote the colour name for those kids who needed a reference to spell the colours when playing.) 14. Flip over your square and write a number in each triangle section. Try to have odd/even numbers to help later with playing. 15. Open out each double triangle to write a question/joke. Write the answer in the bottom half. (If your child has small legible writing you may be able to fit in a question/joke in each small triangle.) 16 and 17. Ready to play. Use your thumb and index fingers on both hands to open and close the chatterbox. We had a great time making these in OT last week. Here are some of the skills we worked on:
Whilst I had a double-sided page of jokes for the kid's to choose from, these were the clear favourites!
Have you made a chatterbox recently? What's your favourite kids joke?
You may also like...
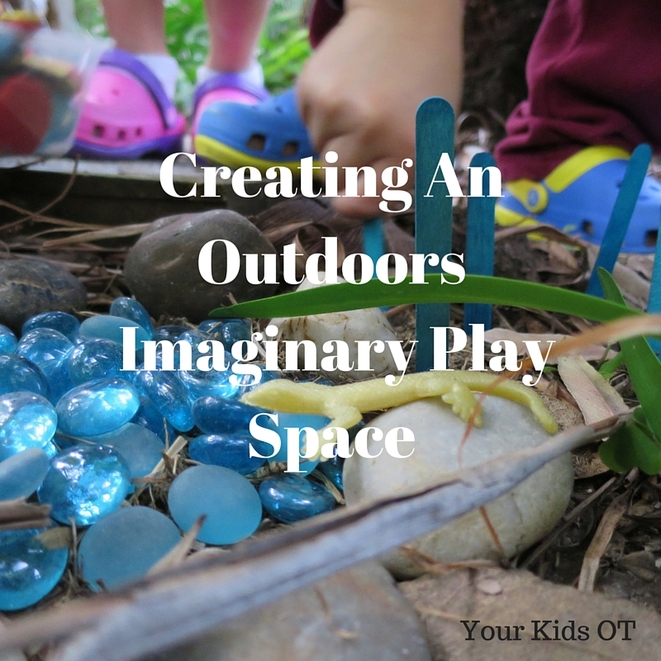
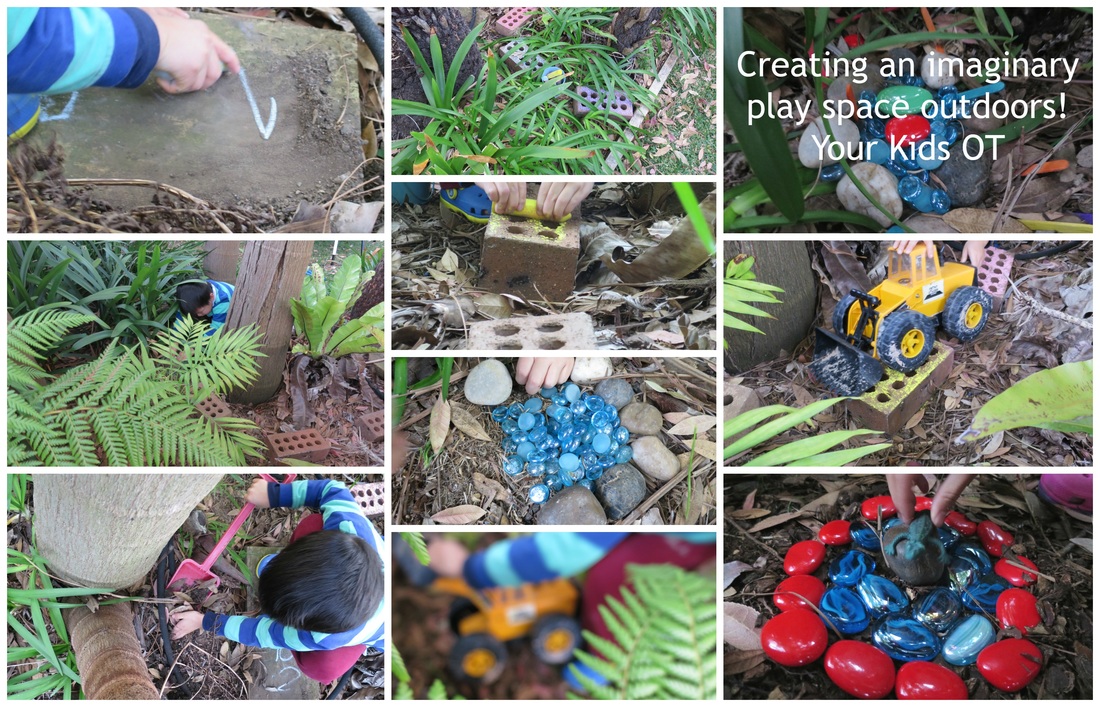
Spring just shouts "send the kids outside to play"! I am always looking for ways to foster imaginative pretend play so we created an imaginary play space in our backyard with a few items we found around our house and yard.
Whilst there is a place for construction play (eg. blocks, lego, etc), fine motor activities (eg. craft, beads, eye droppers, etc), gross motor activities (eg. skipping, hopping, jumping, etc), sensory play (eg. playdough, slime, water beads), structured games (eg. uno, board games, etc) ... imaginary pretend play is important for a broad range of child development. "Pretend play is strongly linked to language, narrative language, abstract thought, problem solving, logical sequential thought, creation of stories, social competence with peers, understanding a social situation, integration of emotional, social and cognitive skills, and the ability to play with others in the role of a ‘player’." (Karen Stagnitti- Children need to play!) In my words, pretend play is important for school readiness with the development of skills for talking, listening, writing, reading as well as interaction with adults and other children. It provides a safe environment to explore and experiment with ideas and opinions.
Mr 5 and Miss almost-9 years helped me to create the imaginary play space. We used a section of the garden that is usually not "explored". I placed bricks as stepping stones around the trees and plants, then handed over to the kids to create the space with coloured stones (leftover from this project), chalk, craft sticks and stretchy lizards. Mr 5 also used his digger and spade to do some rearranging of the dirt and leaves.
Once the space was "created", Mr 5 and Miss almost-9 years set about playing in the space. The stretchy lizards became the characters living in their new "homes". There were lots of adventures over several days as they explored, found food, visited each other, played in their ponds, etc. Lizards may not be popular with your kids...you could create homes for fairies, elves, dragons, dinosaurs, snakes or whatever may interest your child. If you don't have a patch of garden you could create a play space using a tray, a large plastic box, an old tyre, some empty garden pots or some old kitchen pans. When Miss almost-9 yrs was younger we created a fairy garden in a tray, birds nests and "soups" collecting things around the garden to make these creations. Sometimes kids need just a little prompting to foster their imagination and play! Do your kids like imaginary play? Have you created imaginary play spaces outdoors?
Apologies to slow replies to emails and comments. I'm going on vacation tomorrow for two weeks! I will pop up on FB now and again (because I can't help myself)!
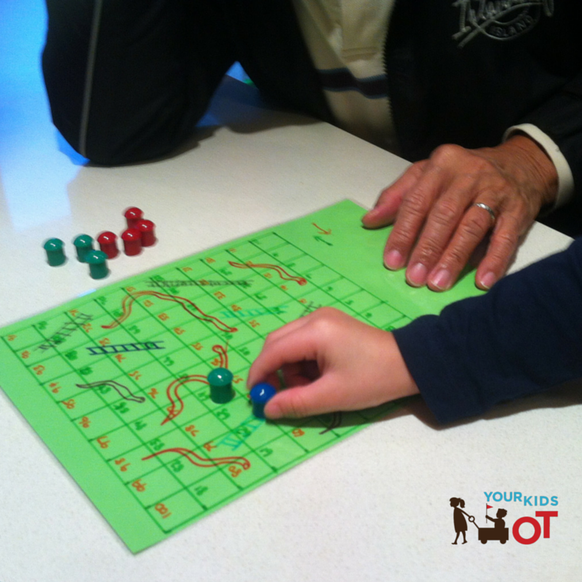
Mr 5 has been addicted to "Snakes and Ladders" for the last 6 months. He loves the counting, the turn taking, the thrill of climbing up the ladders, seeing others slide down the snakes and most importantly "winning"! There has been lots of discussion that it is ok to lose and even good sportsmanship to congratulate the winner. Most of the time he gets it, however, he does have a knack for winning!
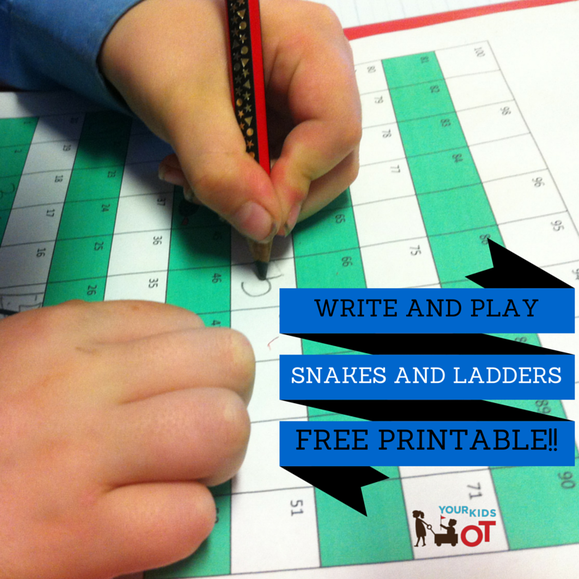
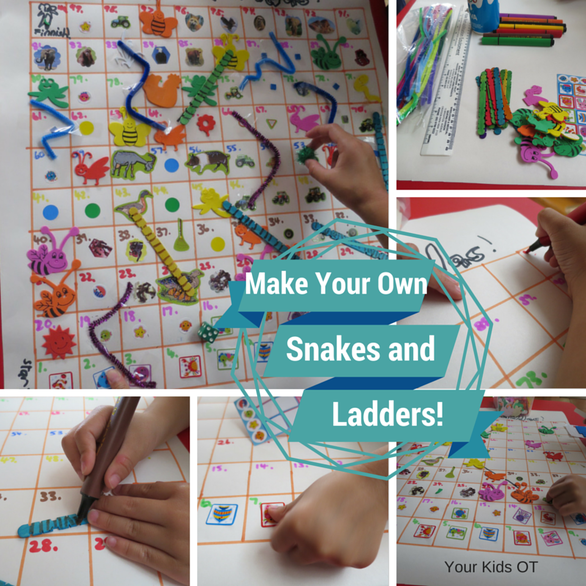
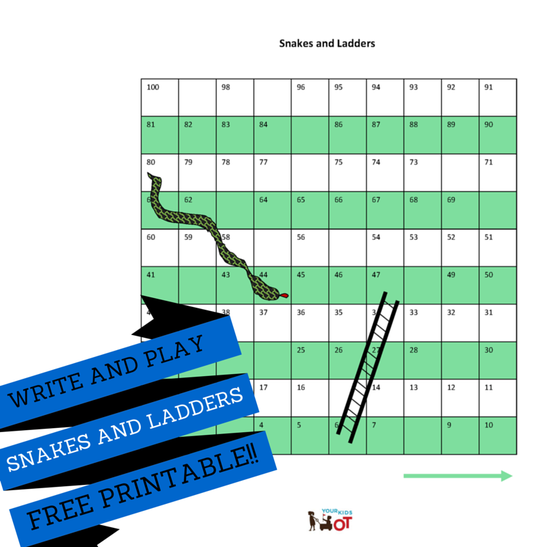
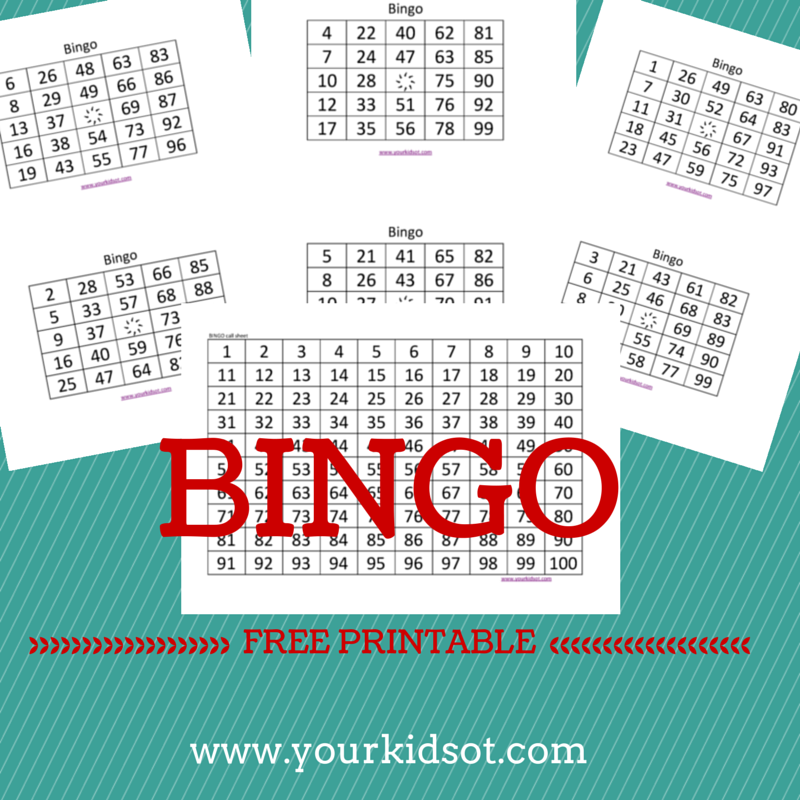
We have made our own homemade board in a previous school holidays...drawing up 100 squares and using up old stickers to "decorate" the board, glueing on paddlepop sticks and pipecleaners to act as the snakes and ladders. Mr 5 also helped to draw on the paddlepop sticks to make them more like "ladders". There are so many opportunities for fine motor manipulation, pencil control, writing, pincer grip and bilateral coordination if you make your own board. The kids will love to create and will be more inclined to play their OWN board! Whilst it is not possible to make such a "detailed" game board in a therapy session, I have made a FREE printable that I use with the kids I see for OT. I encourage writing numbers to fill in the missing ones from the printable as well as drawing some additional snakes and ladders. I love to incorporate play into therapy sessions and there is much more motivation to write numbers on a game (which they can take home) than just writing them without a reason. Download your FREE PRINTABLE Snakes and Ladders HERE! Here is why I love "Snakes and Ladders": * Number recognition and writing - In creating the game ... number writing and pencil grasp may be practised. In playing the game... there are opportunities for number recognition and naming , sequencing numbers and counting out spaces to move. * Fine motor skills - I use small objects such as pom poms, blocks or checkers as our game pieces. Picking up the pieces often requires a pincer grasp. Controlled release is also needed to place the pieces on the correct square. If your child is practising separating the two sides of their hand, then you could get them to hold the dice under their 4th and 5th fingers as they move their marker. A dice is usually used in play and this is great for encouraging the palmar arches of the hand as the dice is shaken prior to rolling. * Visual scanning and tracking - Keeping track of your own game piece and opponents as they move up, around or down the game board. * Social Skills - When playing the game, children need to take turns and wait. They also learn how to "win" and "lose". This may a good opportunity to practise emotional regulation skills if a child has difficulty "losing". * End point - The game is finished when someone reaches 100 on the game board. Having an end point is important for kids who benefit from clear boundaries and structured play. * Children and adults of all ages can play this together. * It's fun and unpredictable! Mr 5 recently taught his grandfather how to play "Snakes and Ladders". I was surprised that he had never played before. It was certainly a heart melting moment for me! Do your kids love "Snakes and Ladders"? Have you downloaded your FREE PRINTABLE GAME BOARD?
You may also like:
School holidays!!! Yay! I don't know about you and your kids, but we have been looking forward to having a break from the school routine!
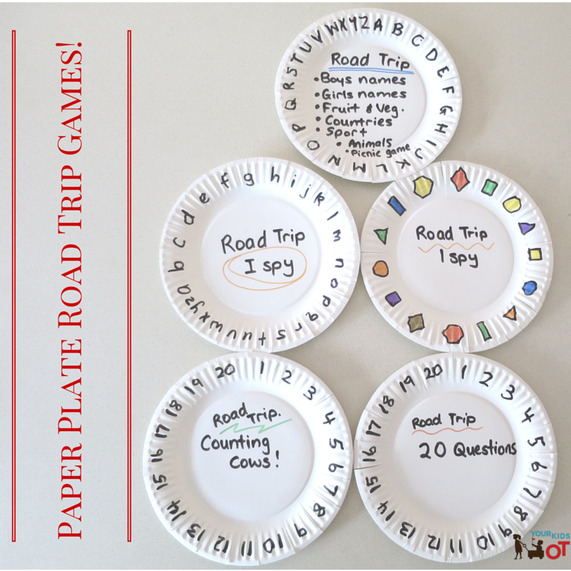
We are also looking forward to a short farm stay. My kids, especially Miss 8 loves animals and the thought of continuous access to farm animals has been anticipated for months now. Whilst the drive is relatively short, both Miss 8 and Mr 5 are prone to car sickness so this rules out books and screen use in the car. We love listening to audio books, although we probably could recite most of the ones we currently have! I've collated some great road trip games and turned them into "Paper Plate Road Trip Games"! Just get a handful of paper plates, a large marker and a pair of scissors. You will be ready to hit the road in just a few minutes!
Paper Plate Road Trip Games!
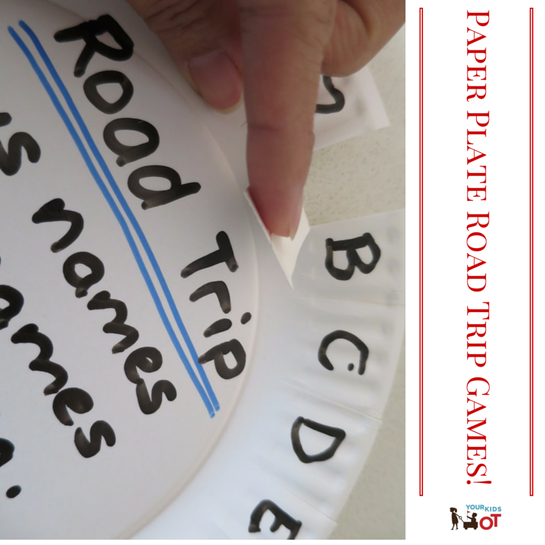
1. ABC name them - Write the alphabet around the plate. Pick a category (our categories include boys names, girls names, fruit & veg, countries, sport, animals, picnic game). You could also include other categories such as things you find in the kitchen, school, bathroom, musical instruments, etc. Take turns (you could even pass the plate to everyone except the driver) to work through the alphabet to name something in the category. For example: boys names are Adrian, Bob, Cameron, etc. The "picnic game" has a slight variation where you need to remember what the previous person said... "I went on a picnic and brought apples." Then the next person says "I went on a picnic and brought apples and bananas". 2. Road Trip I spy - Write the alphabet around the plate. This could be played individually with one person finding things they see which begin with each letter of the alphabet or with everyone in the car taking turns. A variation of this game could be to find words in road signs which begin with each letter of the alphabet. 3. Shape and Colour I spy - Draw shapes and colour them in around the plate. For younger kids, they may find it easier to spy things of a certain colour or shape or both. May be played individually or with everyone in the car. 4. Counting Cows (and other items) - Write numbers 1-20 around the plate. Name something that needs to be spotted (eg. cows, red cars, planes, construction sites, etc). This could be played individually or with everyone in the car. To add some competition, make multiple plates for each player and race to see who can count them fastest. 5. 20 Questions - Write numbers 1-20 around the plate. One person picks a person, place or thing (ie. a noun). The others in the car have 20 questions that may be asked (with the answer being yes or no) to guess the correct noun.
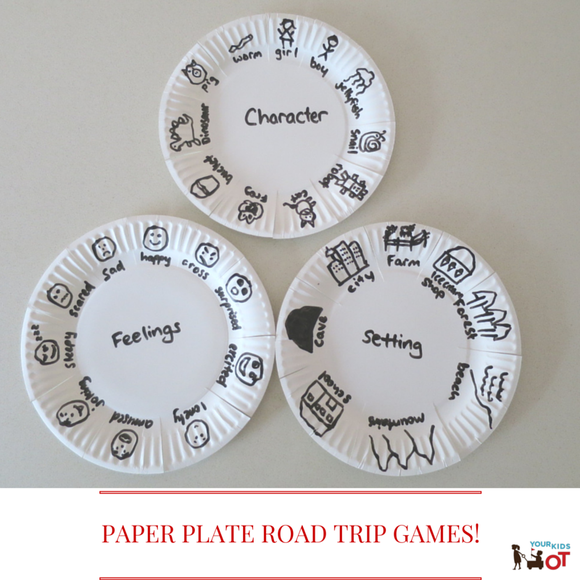
6. Story Telling - This game requires three plates which include a range of "characters", "settings" and "feelings". This may be played individually or with everyone in the car. Choose a one thing from each plate to tell a story. The story could end with one selection from each plate or may continue to involve each option being built into the story progressively. Variations for older kids could include a theme (eg. tragedy, love story, suspense, epic, comedy, lost, etc).
With each paper plate, place a cut between each option available (eg. between each letter of the alphabet). This enables you to "fold down" an option once it has been played.
These paper plate games will appeal to a wide range of ages whilst working on numeracy and literacy skills in a fun way! What a great way to involve adults and kids working together. When kids get stuck, they may learn from the adults modelling answers. Special memories of family times may be built on road trips! These paper plate games are perfect for a road trip and yet there is no reason these games could not be played at home or when out at a park. The paper plates act as prompts for play which are "open-ended". Each time you play, you will probably have different responses. How interesting to see how your kids responses change as they grow older! These paper plate games are transportable and you could even leave them in the car for the next road trip. For children with special needs, these paper plates will be great visual prompts for providing some structure to car games. There is a beginning and end point when each option is selected. They may also keep track of what is next in the game. Have you got a road trip planned these school holidays? What are your favourite road trip games? I would love to hear from you if you try these paper plate games with your family! Safe travels,
You may also like...
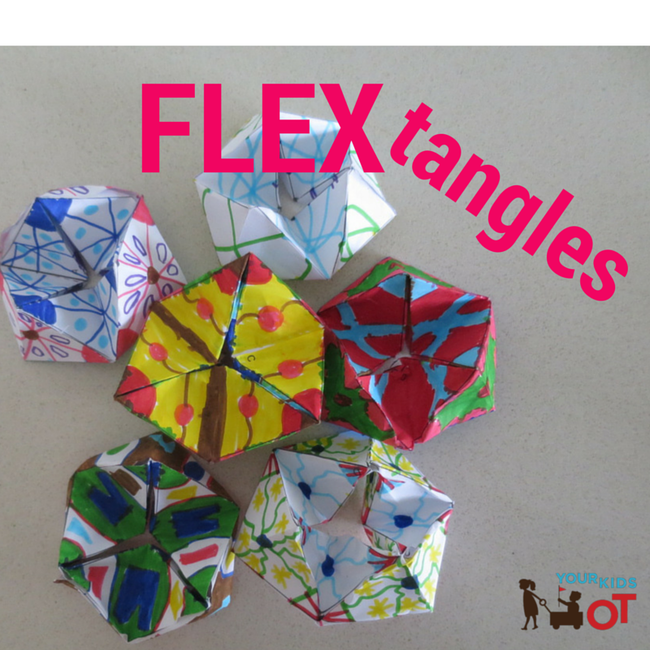
Facebook followers of YKOT will have seen that I recently shared a video about making "Flextangles" by Babble Dabble Do. You can find the video below. It is pretty amazing!
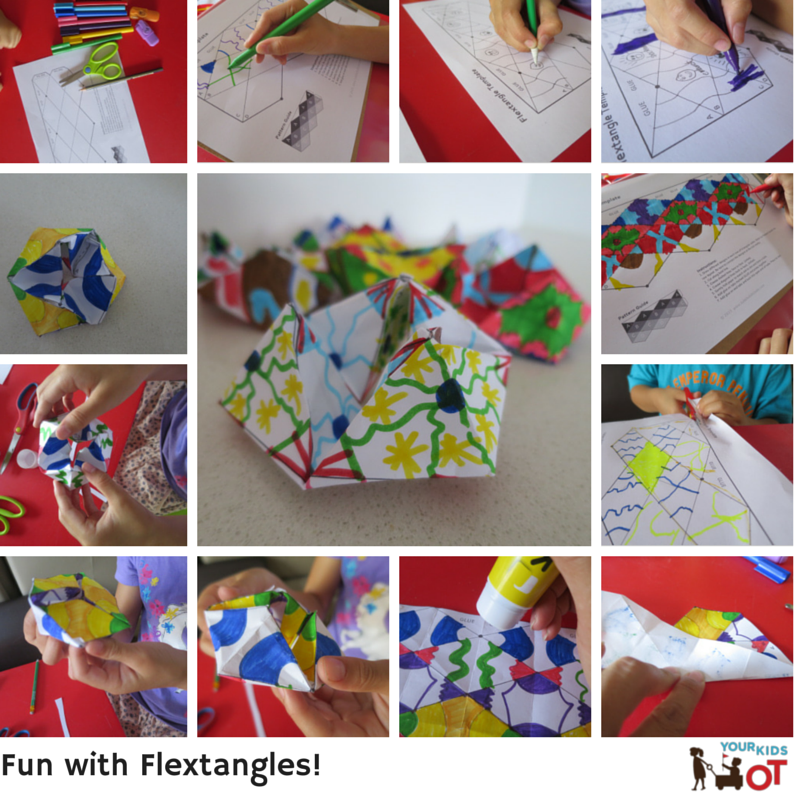
My kids and I were inspired to give it try. The template can be found on Babble Dabble Do and whilst we took a couple of attempts to master the folding, we got it! Miss 8 became transfixed and we printed out multiple templates to decorate. Show your reluctant colourer the video of Flextangles in action and they will want to make their own too. The video convinced Mr 4 to put texta to paper and he was also happy to cut out the template. What you will need. 1. Print the template found at Babble Dabble Do. 2. Textas 3. Scissors 4. Glue (or sticky tape) What you need to do. 1. Connect the marks on the template with whatever designs you like. Colour in between these lines. 2. Cut out the template along the bold lines. 3. Crease all the lines. {Note: to ensure it worked for us we did every line back and forwards so that it had "give"} 4. Gently fold the paper into a tube and glue the tabs as marked. {Note: I bent the tube into shape as I was going so that the flex shape took form as I we glued and connected.} 5. Gently glue the end tabs into place so that the tube is connected. Allow to dry. You may need to read the instructions and watch the video a few times...but it does work! The folding and glueing parts are best done by an adult or older child but once it is dry, hand back your child's creation so that can turn it in and out over and over again. Remember, if you are watching this video via your emailled copy of this blog, click on the title of the blog so that it opens in a webpage to view the video. This is a great school holiday project, especially with the on again off again wet weather we have been having. Let me know if you {I mean your kids} give this a go!
You may also like...
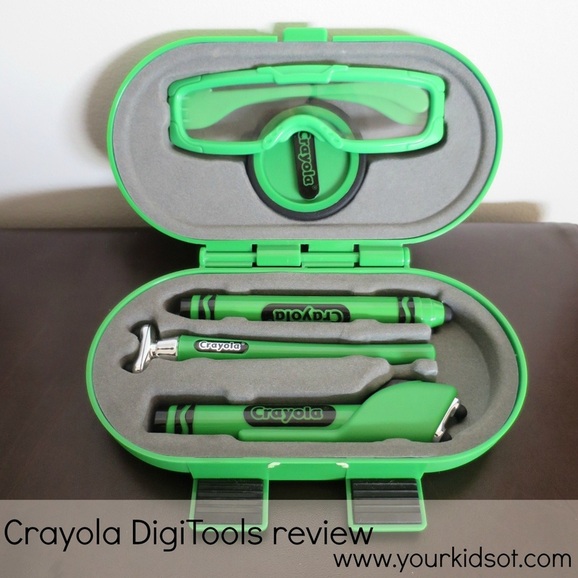
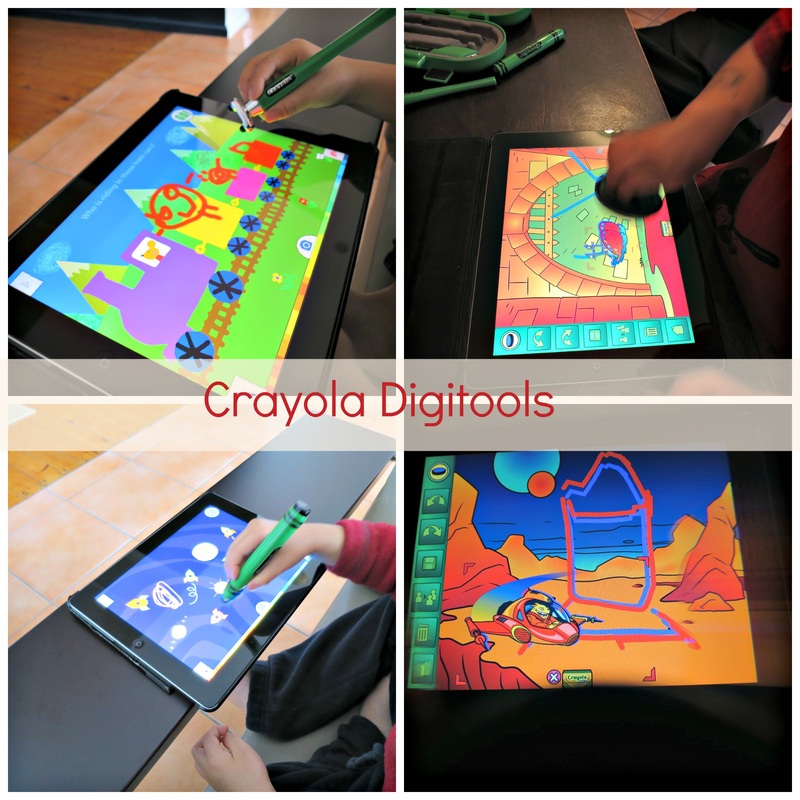
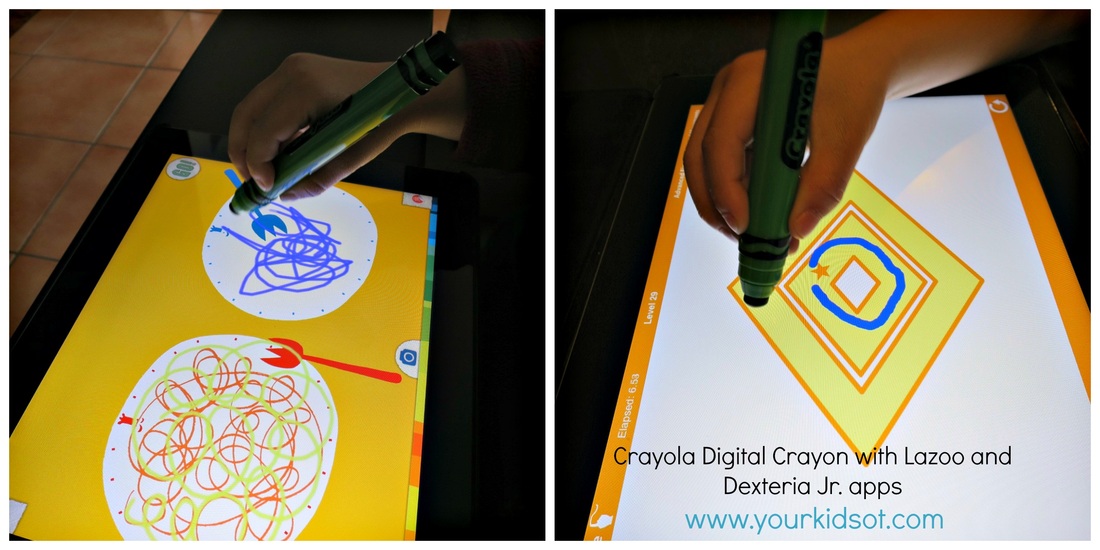
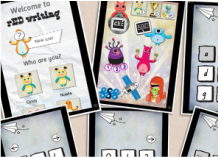
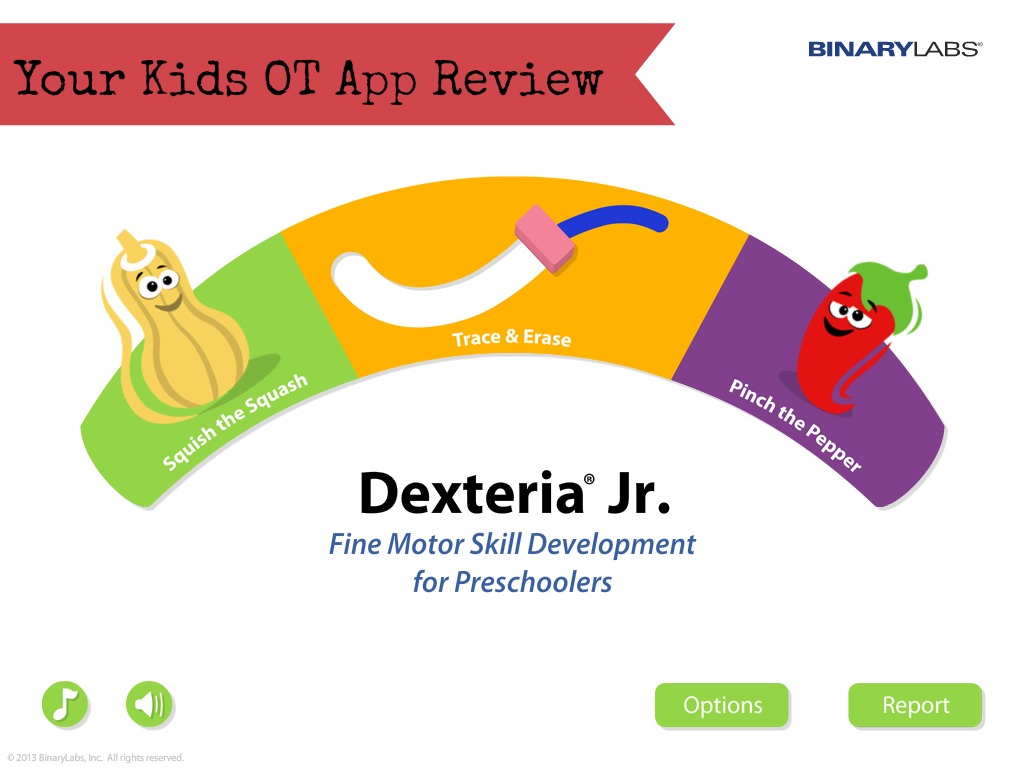
The Crayola DigiTools Deluxe pack contains a digital crayon, digital airbrush, digital 3-D stylus, digital stamper and 3-D glasses! These tools come in a neat clip-on carrying case, perfect to transport these tools. Well why get one stylus when you can get a whole pack? You can use the Crayola Digitools with free apps designed by Crayola... ie. Crayola Effects App, 3-D App and Airbrush App. These apps are free to download from the itunes store. Whilst Crayola recommend the use of these three apps with these DigiTools, there are a number of other apps created by Griffin Technology where these tools can also be used such as "Crayola Paint and Create" and "Crayola Color Studio HD". Most of these apps are unfortunately unavailable on Android, however please check as the developers are constantly working on this. The "Digitools Paint Pack App" is available for both Android and ipad. The 3-D stylus and 3-D glasses are fantastic for motivation. The digital stamper is suitable for toddlers and produces lots of pictures quickly. The digital crayon is the most versatile of the pack and can be used for a number of drawing applications. It is easy to hold and has a large soft point for easy drawing and colouring. Most of the apps recommended by Crayola enable use of multiple tools within the same app. We have also used the digital crayon with non-Crayola apps such as Lazoo Squiggles, Dexteria Jr andrED writing. It is a great stylus to use with toddlers, preschoolers and young school aged children. You can purchase Crayola Digitools from a number of retailers. I purchased our set from Ezibuy (known for ladies fashion although they have a home and gift section). If you are not in Australia, you may purchase this from Amazon (click on the image below for the link). This set of digital tools will be popular in any household and is a great asset to a therapist's toolkit! Have you used a stylus with ipad apps? I have not received any remuneration for this article. All comments and opinions are my own and I purchased this set. I do not have an affiliate link with Ezibuy at the present time. I do have an affiliate link with Amazon. You may also like these articles...
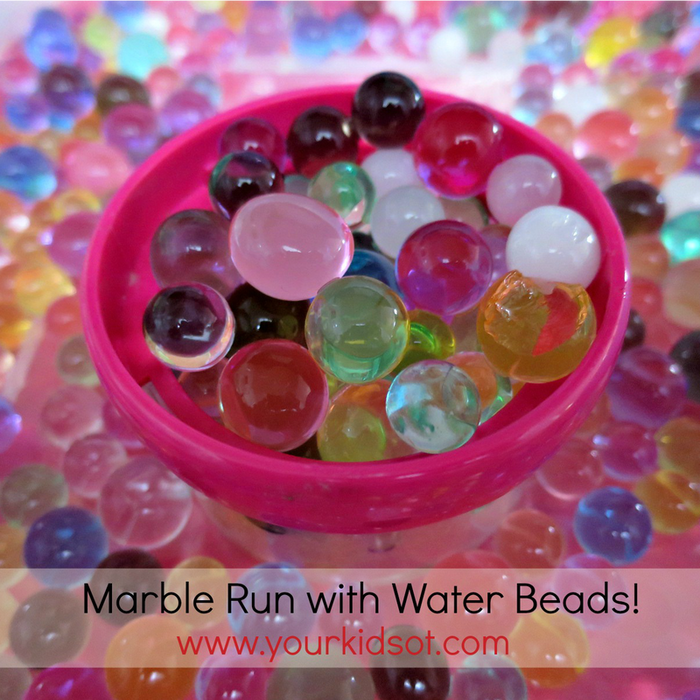
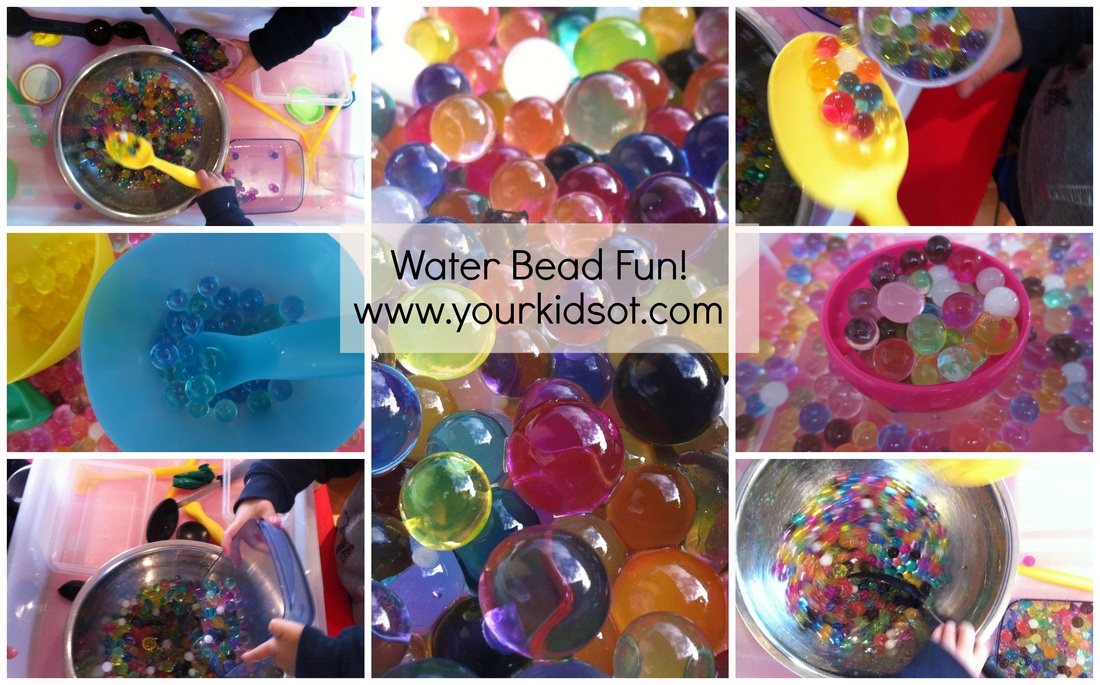
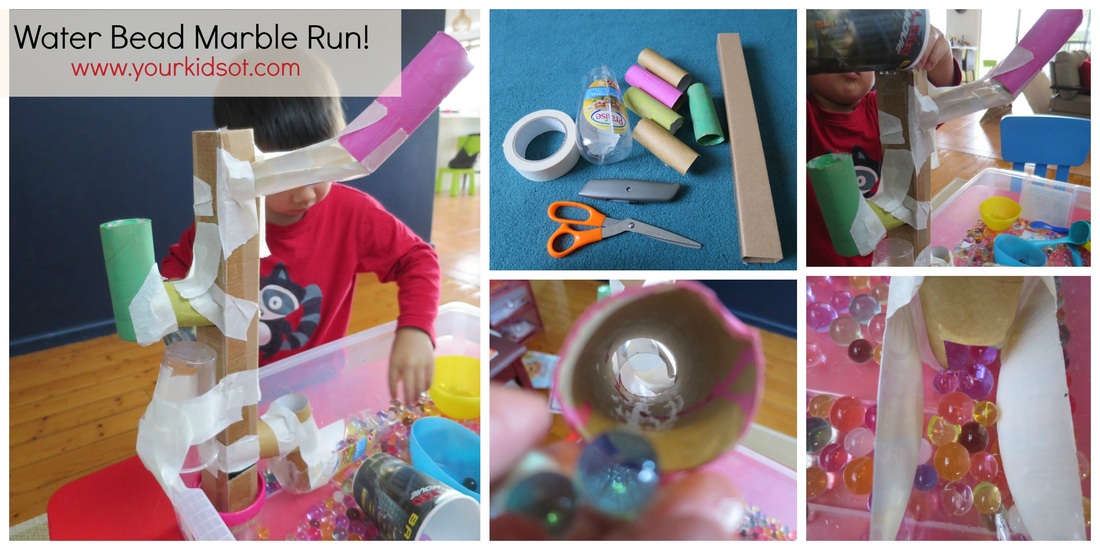
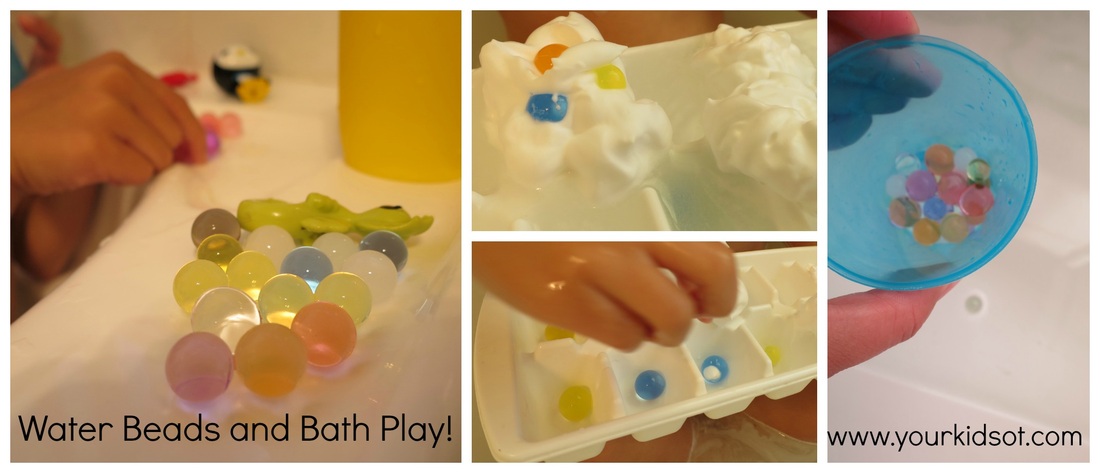
Water beads or water marbles are these amazing little super-absorbent polymers. They have traditionally been used by florists in flower arranging but in the last few years "water beads" have become THE must-have material for sensory play. Edible water beads (aka tapioca pearls) have also surfaced as the new "must-have". If you haven't seen these water beads before. Here is a collage of how they work. Place the beads (which are super tiny) into a large bowl or container. Add 6 cups of water and watch them grow for 6 hours. Drain away any excess water. You can play with them before that time but they will continue to grow if more water is added. They grow to 150 times their original size. Amazing for kids of all ages to watch (not for the whole 6 hours). The water beads become firm balls which are bouncy and slippery. You can also allow the beads to dry out and re-use them by adding water to the beads again. There are plenty of activities you can do with water beads. The water beads are great in a large tray or container as a sensory material. Kids will love scooping, pouring, sorting, mixing and stirring. We have also built a simple marble run for water bead races using household rolls, plastic containers and lots of masking tape! Despite how "homemade" it looks, both Mr 4 and Miss almost-8 enjoy racing the beads and watching them go from top to bottom. The water beads have also found themselves in bath play where they are like treasure to be sought and scooped. Combined with some shaving cream and ice-cream creations were made. Have your kids played with water beads? What do they enjoy doing with them? These water beads were given to our family as a gift and were originally purchased from an Australian Company (Nic-Nac). This is not a sponsored post and I have not received remuneration for the comments made here. You may also like more sensory play... |
AuthorHi, I'm Cindy and I am an Occupational Therapist. I enjoy working creatively with children to see them reach their potential. Read more about me here. SEARCH THIS SITE
Archives
April 2024
Categories
All
Popular Posts |
Join the YKOT e-newsletter!
Subscribe to get our latest content by email and receive
the SHAPE ROADS PRINTABLE NOW!

Success! Now check your email to confirm your subscription and receive your free printable!
Join our Mailing List!
Subscribe to get our latest content by email and receive
the SHAPE ROADS PRINTABLE NOW as a thankyou!

Success! Now check your email to confirm your subscription and receive your free printable!
Disclaimer: The information on this site is general in nature and should be used for educational and entertainment purposes. The activities are safe for most children, however, you should consult an Occupational Therapist or health professional to address specific movement, sensory or other medical conditions. This blog does not replace formal therapeutic professional advice given by a health professional or medical practitioner. Reviews and endorsements of products will only be made based on my expertise and personal opinion; and deemed worthy of such endorsement. The opinions shared in sponsored content will always be my own and not that of the advertising company or brand. Content, advertising space or posts will be clearly identified if paid, affiliated or sponsored. Affiliate links may be found throughout this website in advertising. This means that if you follow through with a purchase from these links, Your Kids OT will receive a percentage of the sale. Your Kids OT undertakes to meet the requirements of the "Social Media Policy" as published by Australian Health Practitioner Regulation Agency (AHPRA). Further information about this policy can be found here.
Find meFollow me |
About me
AuthorHi, I'm Cindy and I am an Occupational Therapist. I enjoy working creatively with children to see them reach their potential. Read more about me here. |
Copyright © 2017 Your Kid OT






 RSS Feed
