Your Kids OT
  • HOME
    • Telehealth OT >
      • Wheel Decide
    • Articles >
      • Activities of Daily Living
      • Technology for OT
      • Bilateral Coordination
      • Cognition and Concepts
      • Executive Functioning
      • Fine Motor Skills
      • Gross Motor Skills
      • Handwriting and Writing
      • Homemade >
        • Arts and Craft
        • Kids in the Kitchen
        • Christmas
      • Play
      • Sensory Modulation Skills
      • Social Emotional Learning and Regulation
      • Visual Perceptual Skills
    • YKOT You-Tube Library
    • Direct Therapy Services
  • Blog
  • Shop
  • About
    • Contact >
      • Contact
      • eNewsletter Subscription

School Holiday Ideas #4

6/7/2014

 
Picture
School holidays are a great time for kids to get into the kitchen.  They can measure things, pour, stir, melt, shake, sift .... and eat!!  Here are two simple recipes that I have written about previously that will get your kids into the kitchen (click on the photo or title).  I would love to see any photos of your kids in the kitchen or their kitchen creations!  Send me a photo.
Picture
Banana Sour Cream Muffins
Picture
Chocolate Fudge
Picture
P.S. I have been asking my FB followers to send in photos of their babies doing tummy time this week. I have loved seeing all the gorgeous babies.  Remember tummy time can be on the floor, on a gym ball, on your arm, on your chest, on your shoulder....If you would like to contribute a "tummy time" photo please email your photo to cindy@yourkidot.com

Thanks for your support of Your Kids OT! I really appreciate it!

Recipe: Spiced Freckle Slice

10/6/2014

 
Ginger, nutmeg, cinnamon ... I love the smell and taste of these spices although I've only acquired this taste as I've matured {ahem - got older}.  My kids on the other hand love these flavours already!

This beautiful slice has all these lovely spices with a little freckle treat on top which is extra appeal to those kids.  The recipe was originally given to me by a friend and I've tweaked it a little to simplify it.

You will find the complete visual photo sequence recipe in the Your Kids OT shop and a summary below.  Do take some time to preview the full recipe as well as others I have produced - the layout is especially designed for kids and people with disabilities - {and I spend a long time putting them together}!
Picture

Ingredients

125 g butter (softened to room temperature)
½ cup brown sugar
2 cups plain flour
½ teaspoon ground ginger
½ teaspoon cinnamon
½ teaspoon nutmeg
1 cup golden syrup
24 freckles

Picture

Equipment needed

Stand mixer (or hand beaters)
Microwave safe jug
Lined baking tin (30 x 20 cm)
Measuring cups
Mixing spoon
Foil
Picture

Method
1.   Preheat the oven to 180°C (350°F).
2.  Cream (beat) the butter and sugar until light and fluffy.  Add the flour.
3.  Add the ginger, nutmeg and cinnamon.  Mix together.
4.  Place the golden syrup in the microwave and heat for 1 minute.
5.  With the beaters mixing slowly, add the warmed golden syrup until dough forms a ball.
6.  Press mixture into a lined baking tin.
7.  Press 24 freckles into the wet mixture and bake for 45 minutes.  Cover with foil if needed.
8.  Allow to cool in the tin and then slice with one freckle in each piece. Enjoy!!
Picture

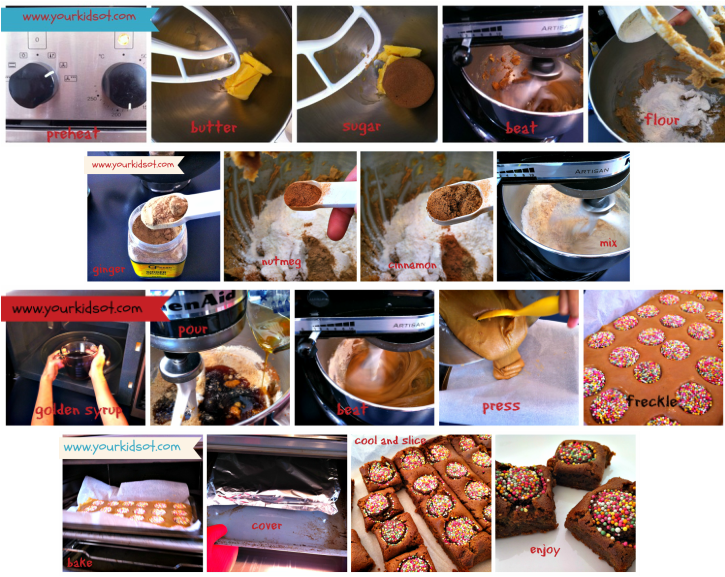
Adult supervision may be (most probably) required with use of the mixer, microwave and oven. Additional help will be needed to monitor the bake and adding the foil during the cooking time if the slice browns too quickly.  It will be worth it!  It is delicious.  Try it today.  Happy Baking!
Picture
You may also like:
  • Read about Your Kids OT:Kids in the Kitchen.
  • Basic Bread recipe
  • Chocolate Fudge recipe

Recipe: Chocolate Fudge

18/5/2014

 
Just in case you didn't have enough chocolate over Easter...a microwave chocolate fudge recipe for a delicious treat.   Four ingredients, melt and refrigerate.  Easy. 

Older children can help with measuring out the butter, vanilla extract and chocolate.  They can also use the can opener or ring pull to open the tin of condensed milk. 

Younger children will enjoy pouring, stirring and taste testing!

The step by step photographs found in the full recipe are ideal for children who can read or for high school children with a moderate intellectual delay.  You can purchase the recipe from the Your Kids OT shop.

Here is an abbreviated version of the recipe.
Picture
Recipe: Chocolate Fudge at www.yourkidsot.com

Picture
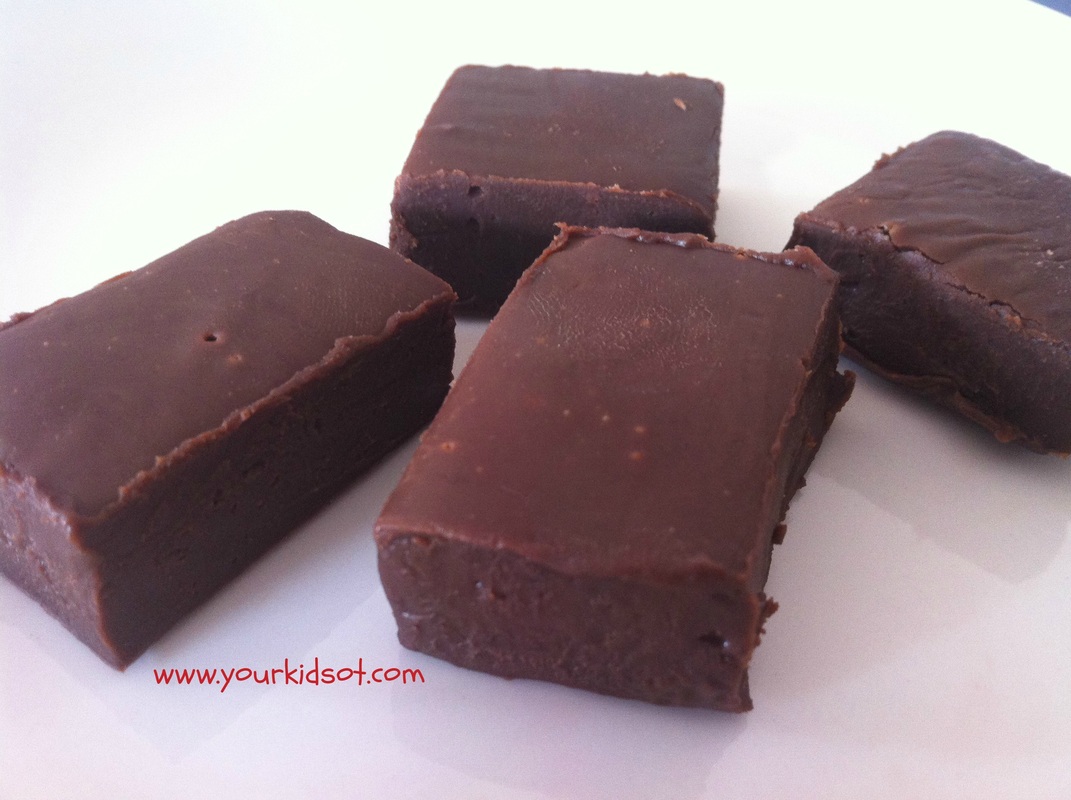
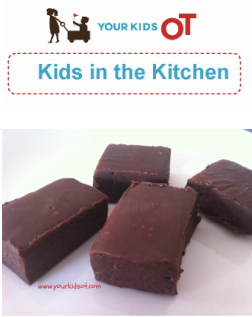
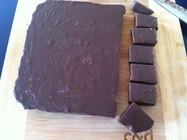
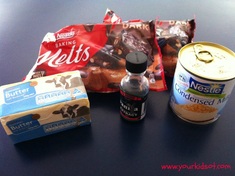
Ingredients
50g butter           
1 tin condensed milk
500g dark chocolate 
Vanilla extract

Picture
Equipment needed
Knife                   
Kitchen scales
Spatula
Can opener
Microwave safe bowl
Foil lined tray (approx 20cm square)


Method
1. Place the butter, condensed milk and dark chocolate in a bowl.
Picture
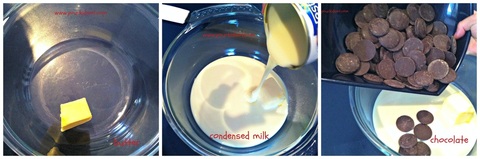
2. Heat in the microwave on high for 1 minute.  Remove from the microwave and stir.
3. Heat in the microwave for 30 seconds..
Picture
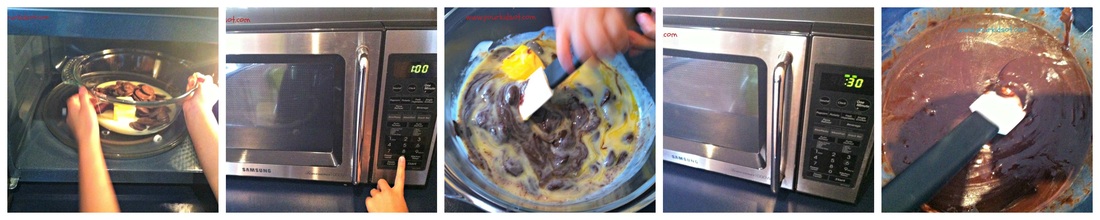
4. Add a few drops of vanilla extract to the mixture..
5. Stir and pour the mixture into the foil lined tray.
6. Place in the fridge and allow it to set for 1 hour.
7. Cut and serve.
Picture
Picture
Message to adults...
·  Microwave temperatures may vary.  This recipe was tested on a microwave with 1000 Watts.
·  Be careful not to burn the mixture by overheating it.
·  Adult supervision may be required when measuring ingredients, removing hot mixture from the microwave and pouring. 


This chocolate fudge is perfect for a cake stall or to give as a lovely home-made gift.  You can also try adding flavours according to your taste.  Enjoy!
Picture
Picture
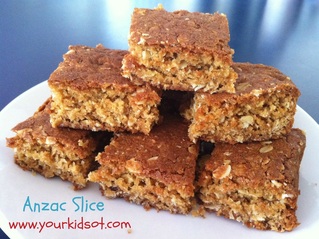
Note: For new followers to Your Kids OT, you may have missed the post about why I have a "Kids in the Kitchen" section on this blog and website.  Here is a summary from the original post below.

Anzac Day Recipe: Anzac Slice

24/4/2014

 
ANZAC stands for Australian and New Zealand Army Corps.  The soldiers in those forces quickly became known as Anzacs, and the pride they took in that name endures to this day.  ANZAC Day – 25 April – is probably Australia's most important national occasion.  It marks the anniversary of the first major military action fought by Australian and New Zealand forces during the First World War when the landed at Gallipoli, Turkey.

Anzac biscuits (or bikkies) have been associated with Anzac day as it is claimed the biscuits were sent by wives to soldiers because the ingredients do not spoil easily and the biscuits kept well during naval transportation.  We love Anzac bikkies!
Picture
Image used with permission from www.cookerandlooker.com

Anzac Slice is made from similar ingredients to Anzac biscuits (rolled oats, flour, sugar, butter, coconut and golden syrup) and was named for that reason.  This recipe is easy for children to complete with each dry ingredient being a 1 cup measure.  Find the complete recipe for Anzac Slice at the Your Kids OT Shop.  The recipe contains a visual photo sequence for each step as well as a photograph attached for the ingredients and equipment needed.   

Here is a summary version of the recipe.
Picture
Picture

Ingredients
125 g butter
1 cup self-raising flour
1 cup coconut
1 cup rolled oats
1 cup brown sugar
1 egg
1 Tablespoon golden syrup

Picture
Equipment needed
Mixing bowl
Spoon
Knife
Measuring cup
Measuring spoons
Microwave safe bowl
Baking tin (27.5cm x 17.5 cm approx).
Baking paper
Picture

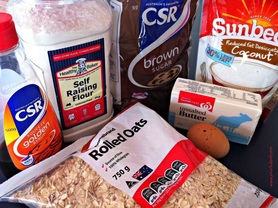
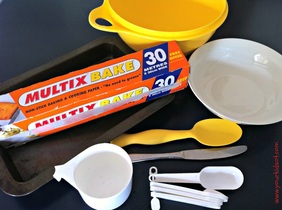
Method
1. Preheat the oven at 180°C (350°F).
2. Place butter in a microwave safe bowl.  Place the bowl in the microwave and heat for 1 minute.
Remove and set aside.
3. In the mixing bowl, pour flour, coconut, oats and brown sugar.
Picture
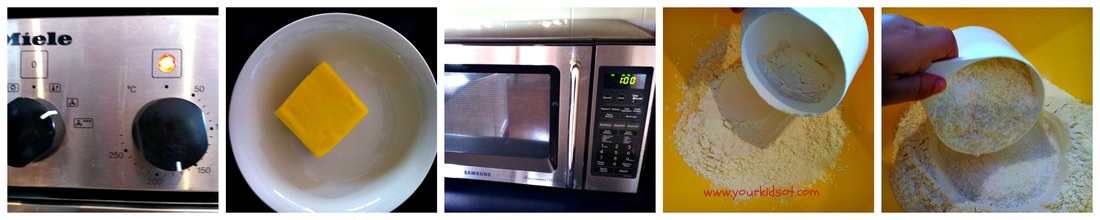
4. Add the melted butter, egg and golden sryup.

Picture
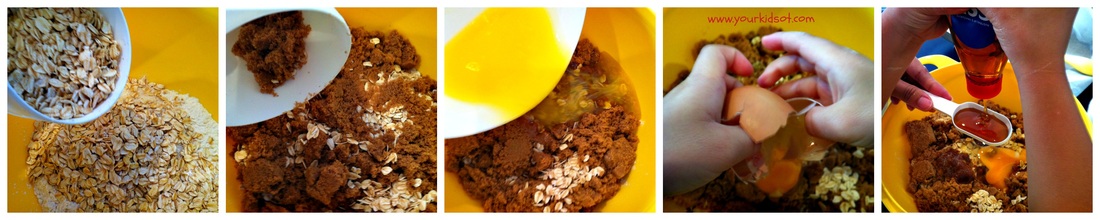
5. Stir with a spoon.
6. Line the baking tin with baking paper.  Pour the mixture in the baking tin.
7. Place in the oven and bake for 30 minutes.
8. Remove and cool.  Slice into squares and serve.
Picture
This slice is enjoyed all year round at our house (as are ANZAC biscuits).  It is our "go to" slice and is perfect for school lunch boxes or to share with others.  Try it today!  Happy baking and "lest we forget" this Anzac Day.  
Picture
Picture
Photograph found at www.morguefile.com

Recipe: Banana Sour Cream Muffins

23/3/2014

 
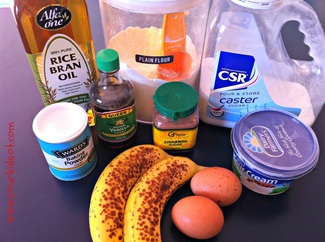
Banana sour cream muffins are a quick yummy snack, perfect for the school lunch box or afternoon tea. The sour cream keeps the muffin moist and the cinnamon sugar on top adds a special touch of yum!

As with all the recipes on Your Kids OT, you can purchase and download a full copy of the recipe with individual photos for each step of the recipe from the shop.  

This is so useful when encouraging your child to be independent when completing recipe steps.   My Miss 7 completed this recipe independently with only a little help taking the muffin tray in and out of the oven and making sure the mixture was stirred enough.  She felt so "grown up" being able to take out the correct ingredients, all of the equipment needed and then to bake "on her own".  The visual photo sequence allowed her to keep track of the step she was up to and what came next.

Alternatively, your preschool or childcare group may make this together for a shared cooking experience.  I watched nervously when Mr 3 scooped the mixture into the patty pans and was surprised at how little mess there was!

The visual photo sequence is helpful when working with children and adults who may have an cognitive delay or developmental disability.

Picture
Picture
Banana Sour Cream Muffin from Your Kids OT shop.
Do your kids like helping in the kitchen?

Picture
Ingredients
2 ripe bananas
2 eggs
250 ml sour cream
1/2 tsp vanilla extract
1/3 cup oil
2 cups plain flour
1/2 cup caster sugar
2 tsp baking powder
Cinnamon sugar

Picture
Equipment needed
Whisk
Mixing bowl
Spoon
Sifter
Muffin tray
Measuring cups
Measuring spoons
Patty pans (cupcake liners)


Method
1.         Preheat the oven to 180°C (350°F).
2.         Peel and mash the banana in the mixing bowl. Add 2 eggs, sour cream, vanilla and oil.
3.         Whisk these ingredients together until well combined.
4.         Add the sugar. Sift in the flour and baking powder. Stir mixture gently with spoon.
5.         Line muffin tray with patty pans.  Spoon mixture into patty pans.
6.         Sprinkle cinnamon sugar on each muffin.
7.         Bake in the oven for 15 minutes.

Picture
Picture
Picture
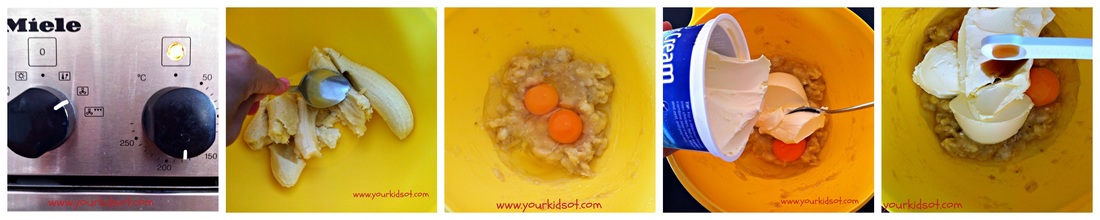
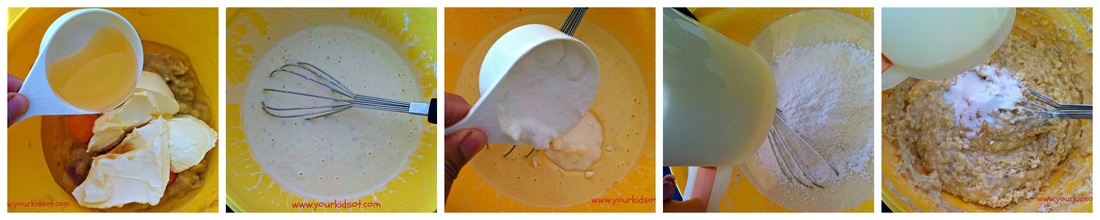
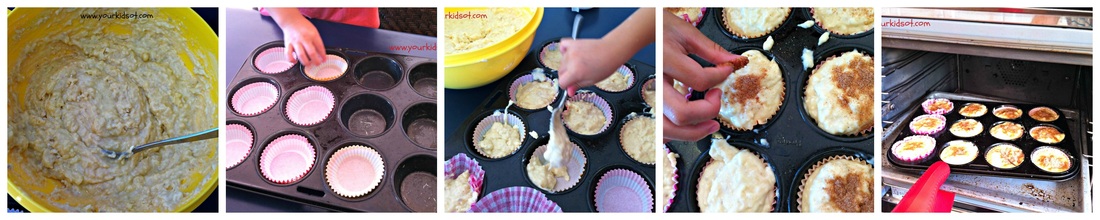
You could adapt this recipe with different flavours (white chocolate and raspberry, blueberry, choc chip, apple and cinnamon). What is your favourite muffin flavour?  Happy Baking!
Picture

Recipe: Basic Bread

2/3/2014

 
I love the smell of freshly baked bread. Hmmmm....yum! We have had a cold and wet weekend in Sydney.  Perfect baking weather.  This is a bread recipe given to me from a lovely friend I went to school with.  

It is a really robust recipe and is all done in one bowl. Whether you use your hands or use a dough mixer is up to you.  You can choose this depending on the way your child {or you} manages the sensation on their hands. Most importantly, it is simple and easy recipe for children to follow.  

There is a waiting time as you start the process the day before to allow time for the dough to prove (double in size).  However, this time is not exact and if you forget about it for 48 hours or so, the recipe will still work.

The recipe with full steps and photographs can be found at the Your Kids OT shop.  Did you miss the blog about encouraging Kids in the Kitchen? Read about it here.

Here is the basic bread recipe in an abbreviated form. 
Picture
Picture
Recipe: Basic Bread. Kids in the Kitchen.
Your Kids OT
Ingredients
4 cups strong flour (approx)
2 cups lukewarm water
1 ½ tsp salt
1 dry yeast sachet
Polenta (not essential)


Equipment needed
Mixing bowl
Foil
Flat-bladed knife  
Measuring cup
Measuring spoon
Plastic wrap
Mixer with dough hook (optional)
Baking tin
cooking oil spray 

Picture
Basic bread ingredients.
Picture
Basic bread equipment
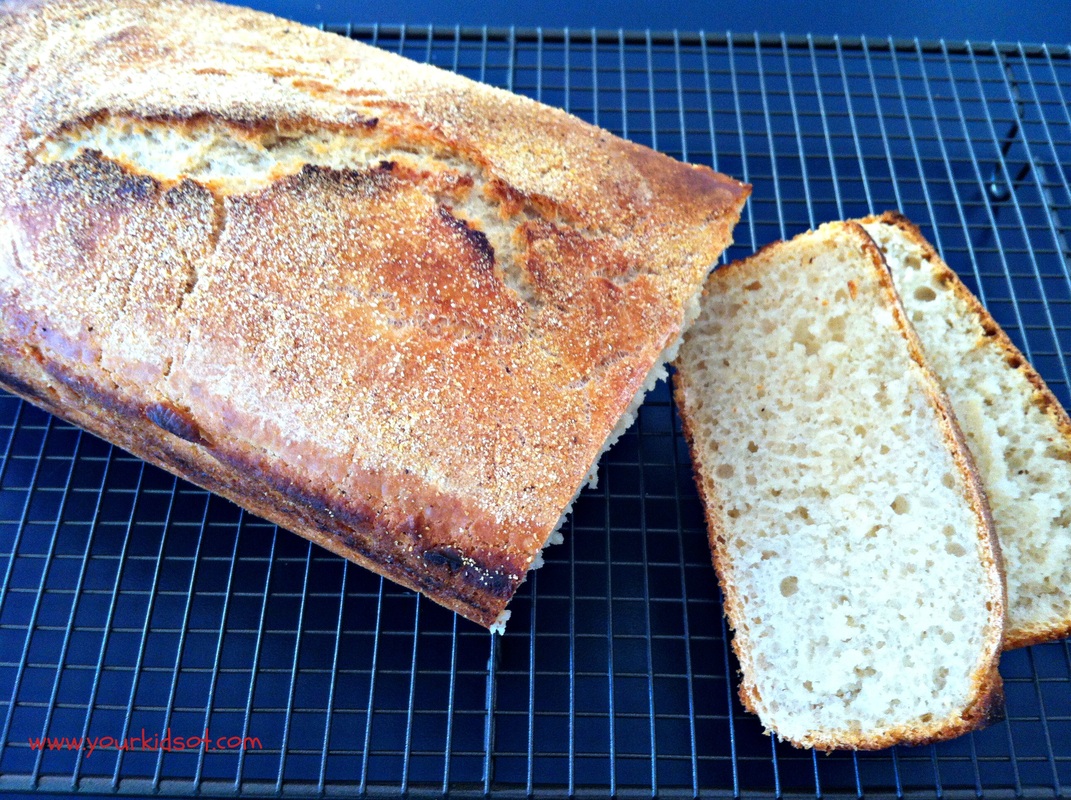
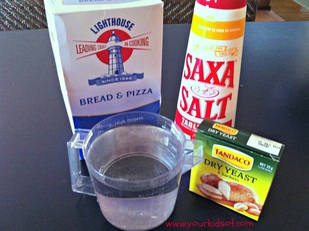
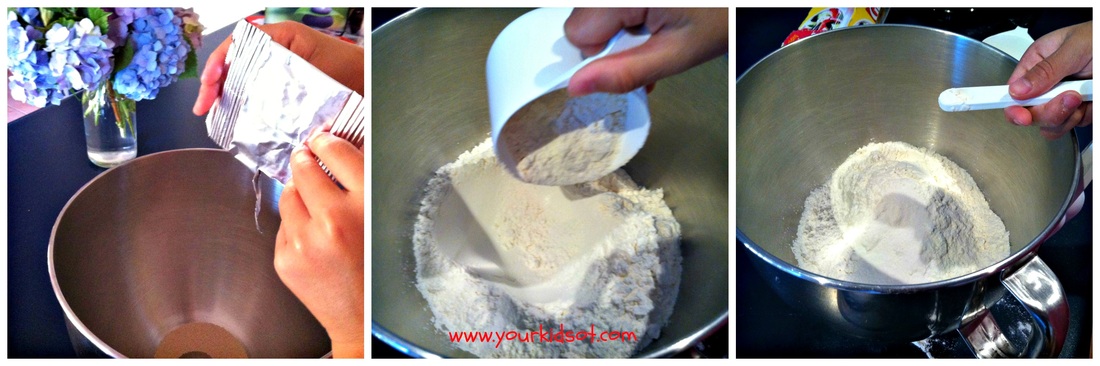
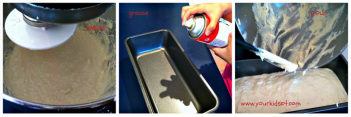
Method: Stage 1
1. Mix all flour, water, salt and yeast in a bowl using a flat-bladed knife.
2. Cover with plastic wrap and leave for 18 hours (overnight, however time is not critical).
Picture
Picture
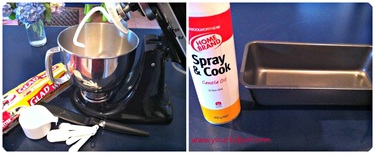
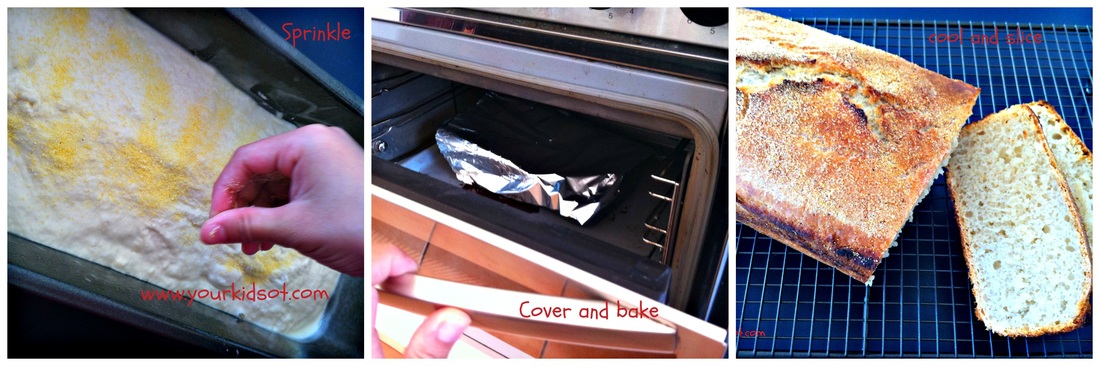
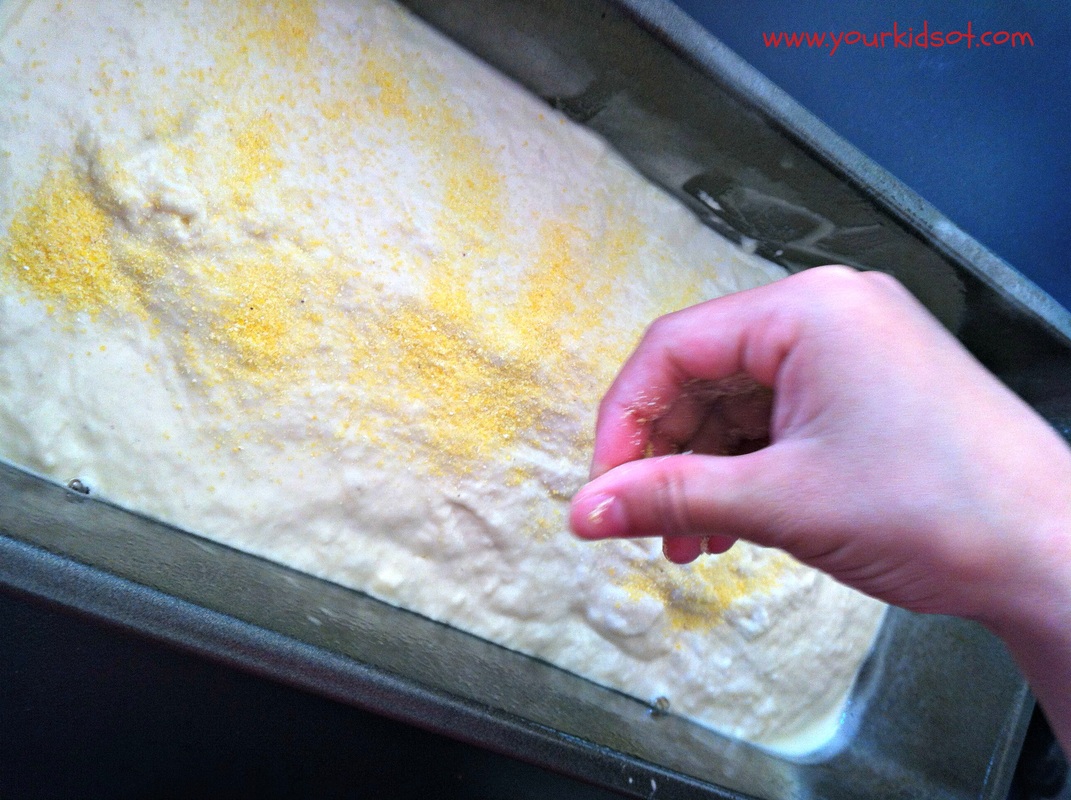
Stage 2
1. Preheat the oven to 250°C (or your highest setting). 
2. Use a mixer with dough hook (or hands) to knead the mixture.  Dough should be pourable consistency (ie. still quite wet).  Add more flour if necessary.
3. Grease the baking tin with cooking spray. Pour dough into the baking tin.  Sprinkle with extra flour or polenta (not essential).  
4. Cover baking tin with foil and bake for 40 mins, then remove foil and cook for another 5 mins.
5. Cool on a wire rack. When cool, transfer to a chopping board to slice and serve.
Picture
Picture
Message to adults...
· The mixture can be “knocked down” and kneaded by hand.  Dip your hands in cold water occasionally to help with handling the sticky mixture.  It is easier in a mixing bowl as it is very sticky.
· The dough may be placed on a greased oven tray as a free form loaf or shaped into smaller loaves. 
You may pre-heat the oven tray or baking tin, however, I have found the recipe to work without this step.
· Oven temperatures may vary so there may be a variation in cooking time.
· Adult supervision may be required when handling the baking tin and oven.

Happy baking!
Picture

Kids in the Kitchen and Valentine's Day Choc-Dipped Strawberries.

13/2/2014

 
You may have wondered why I have included a section for recipes on this website.  If you are expecting inspiration for a gourmet dinner party or fine dining experience, then you will be disappointed.  

The recipe section of this website aims to encourage kids into the kitchen to assist and perhaps manage some recipes independently. 

The benefits of encouraging kids in the kitchen are well documented, beginning with nutrition and meal preparation. Healthy eating and nutrition is an important issue we discuss as a society with the rise of childhood obesity.  Introducing kids to ingredients and how to use them is so important in helping them along the path of healthy eating.  

Meal preparation is a skill for life that should not be underestimated.  Here are more benefits...
Picture
Your Kids OT

Picture

Picture
Picture
Picture
From an OT's perspective, here are a few benefits of involving kids in the kitchen: -
 * Motor skills - Eye/hand coordination, pouring, cutting, bilateral coordination, finger isolation and manual dexterity.
* Concepts and Cognition - learning about measurements, size, colour, shape, temperature and time. Attention and concentration are also important skills that can be developed in the kitchen.
* Sensory skills - a variety of textures can be experienced in the kitchen when using your hands as well as in your mouth with tasting.
* Social skills - turn taking, waiting, cooperation, language development, sharing, time with other family members in a shared experience.
* Planning and organisation - planning and organisation of ingredients, equipment and time; sequencing the procedure, motor planning in relation to equipment and ingredients.
* Personal skills - self confidence, sense of achievement, sense of belonging to a family, independence and responsibility.

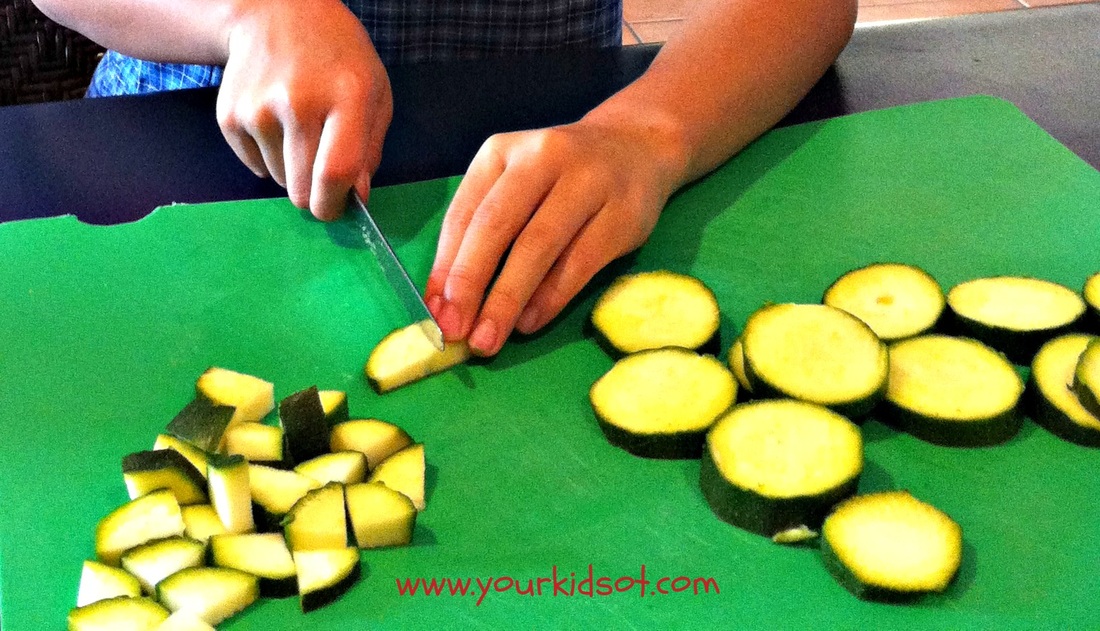
So now that you are convinced that your child can help in the kitchen, how can you make it happen?  
1. Consider your child's safety and use commonsense with knives, electrical appliances, stoves and ovens.  Adult supervision should always be available.
2. Consider suitable work surfaces and accessibility for your child (e.g.  Standing on a stool at a kitchen benchtop or sitting at a dining table.)
3. Expect mess!
4. Consider the number of children who are cooking and their various ages.  What can each child be involved with doing?
5. Choose easy recipes with quick results (eg. a dip or milkshake). 
6. Expect mess!
7. Expect short attention spans and taste testing {probably before the recipe is complete}.

So, what can they do? The following age guides are guides only.  As a child gains experience in the kitchen, they may be capable of more than the suggestions listed below. 

Age guide for Kids in the Kitchen...

2 year olds
* pouring, mixing, tearing, spreading, scooping
* using hands to squeeze, knead, push
* placing cupcake liners in tray
* helping to make choices (eg. flavours, colours)
* taste tester
* wiping the table
3 year olds
* managing fine motor tasks with smaller ingredients
* sorting, mixing, beating, scrubbing, tearing, dipping, spreading, shaking
* locating equipment in the kitchen
* picking herbs
* cracking an egg
* setting the table
* turning on some electrical appliances (eg. slow cooker, electric steamer and rice cooker, blender).
4 year olds
* spreading, sprinkling, scooping, mashing, whisking
* starting to use a butter knife to chop and dice
* helping to select recipes
Picture
5 year olds and up
* reading recipe: collecting ingredients and equipment needed
* measuring quantities
* setting timers
* using the microwave
* stirring a pot on the stove
* using oil sprays

Valentine's Day Choc-dipped strawberries.

A last minute romantic gesture or a pre-planned surprise.  Your loved ones will be none the wiser.  Choc-dipped strawberries look great and will be a hit for the sweet tooth.  

This is a quick and easy recipe for you to do with your children today.  Download it free from the Your Kids OT shop.  There are step by step instructions with photographs for each step.  

Happy Valentine's Day!
Picture
Picture
Your Kids OT

Recipe: Playdough

6/2/2014

 
Picture
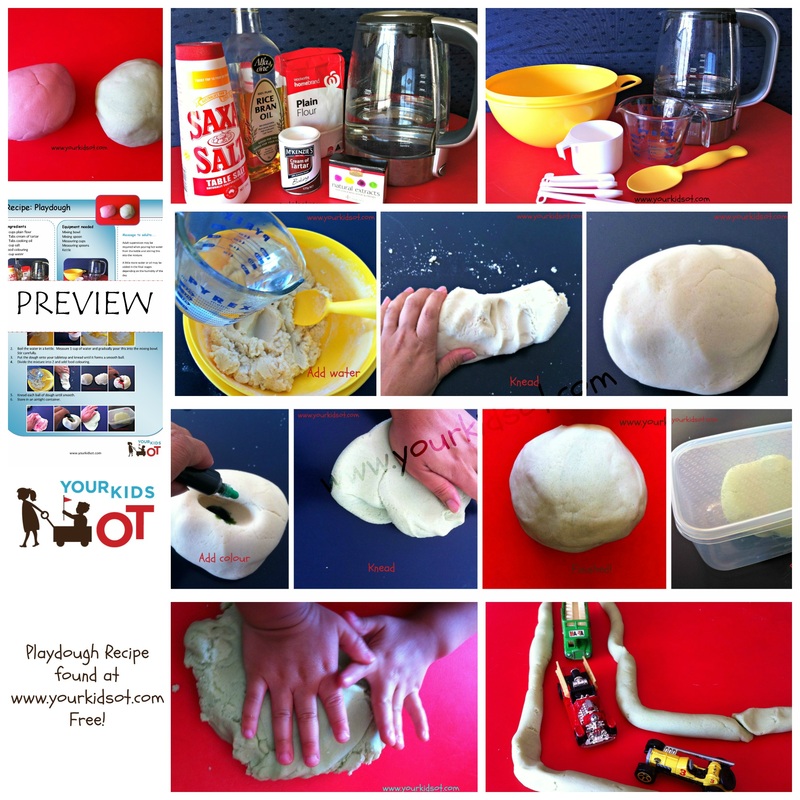
Who loves playdough?

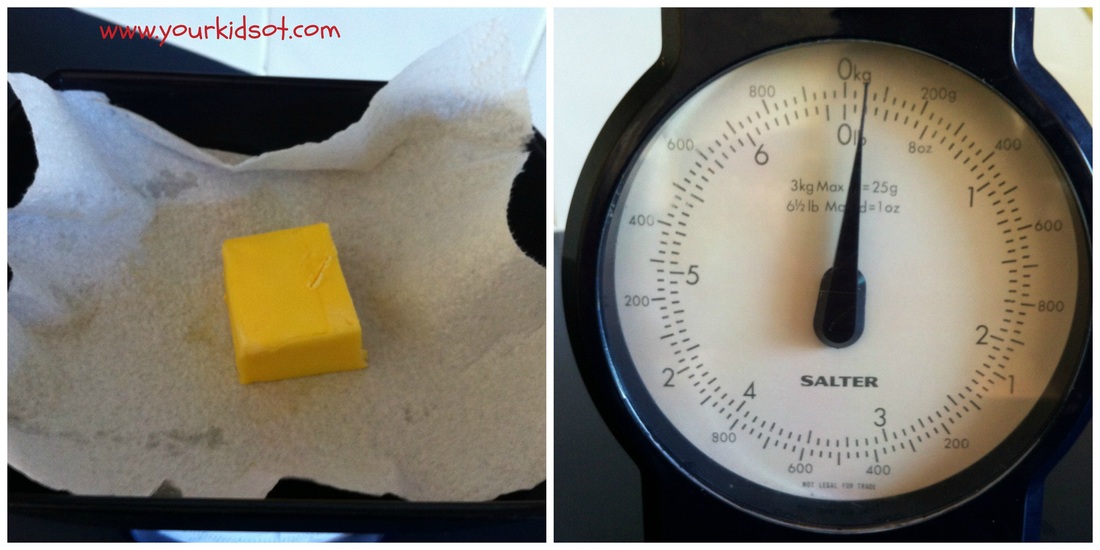
I make playdough using a very simple recipe. It is the boiling water method.  Have you tried it?  

Making playdough yourself allows you to make several colours at one time.  You can experiment with glitter or fragrances too.  

It lasts for a long time...months {even when not refrigerated}.  As the colours get mixed together {as the inevitably do with children} you may want to make a fresh batch.

In these photos I have used a natural food colouring to make the playdough so the colours are a little dull. Store bought food colouring will give you a vibrant colour.

Picture
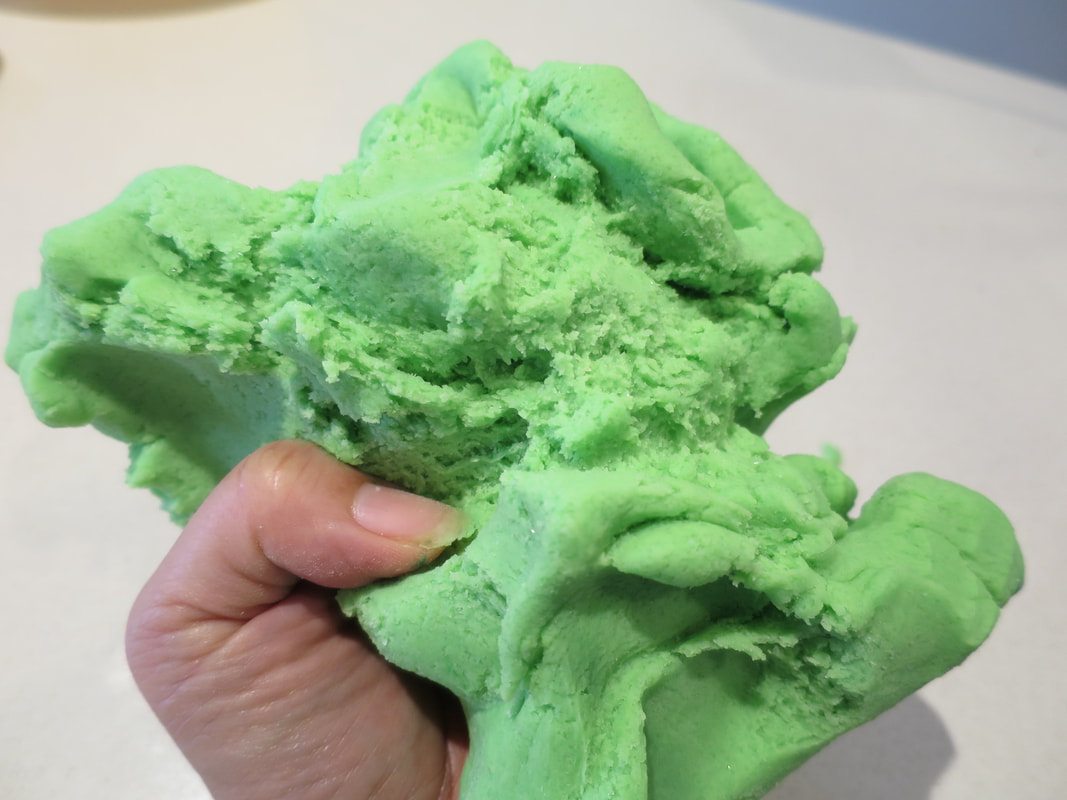
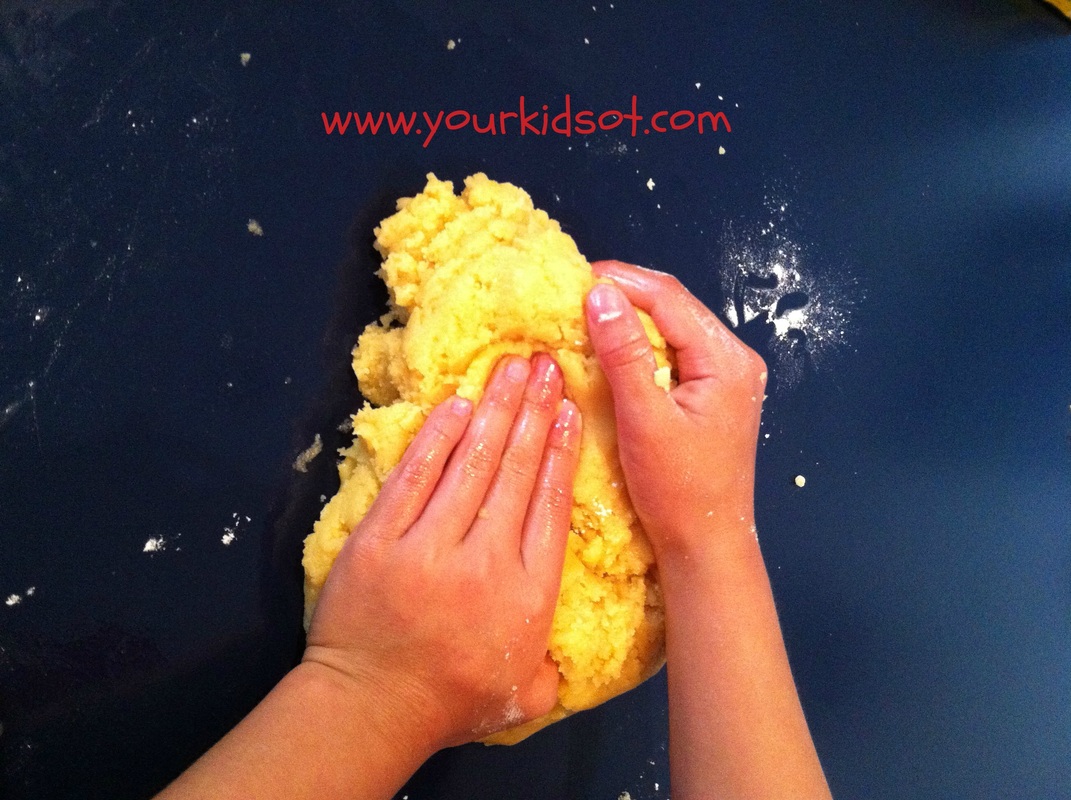
Making playdough is a great way to get the kids in the kitchen.  Children of all ages will love measuring, pouring, mixing and kneading.  Preparation is the key if you don't like mess in the kitchen or get stressed with your kids in the kitchen. 

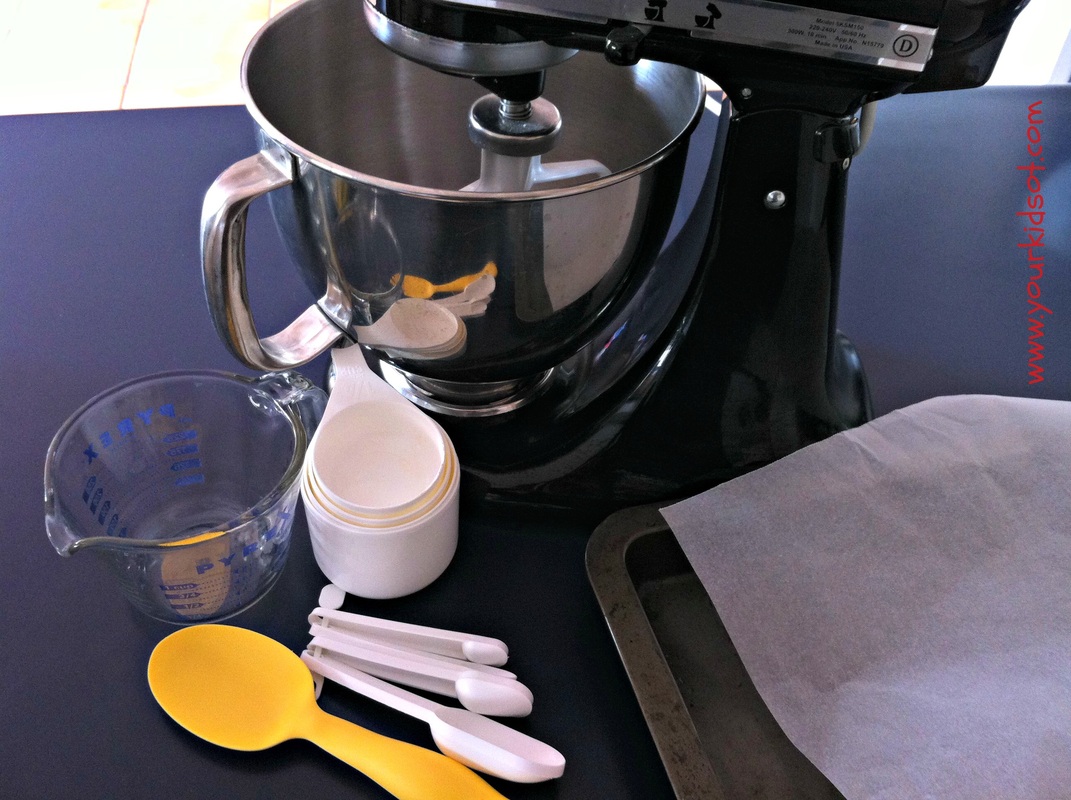
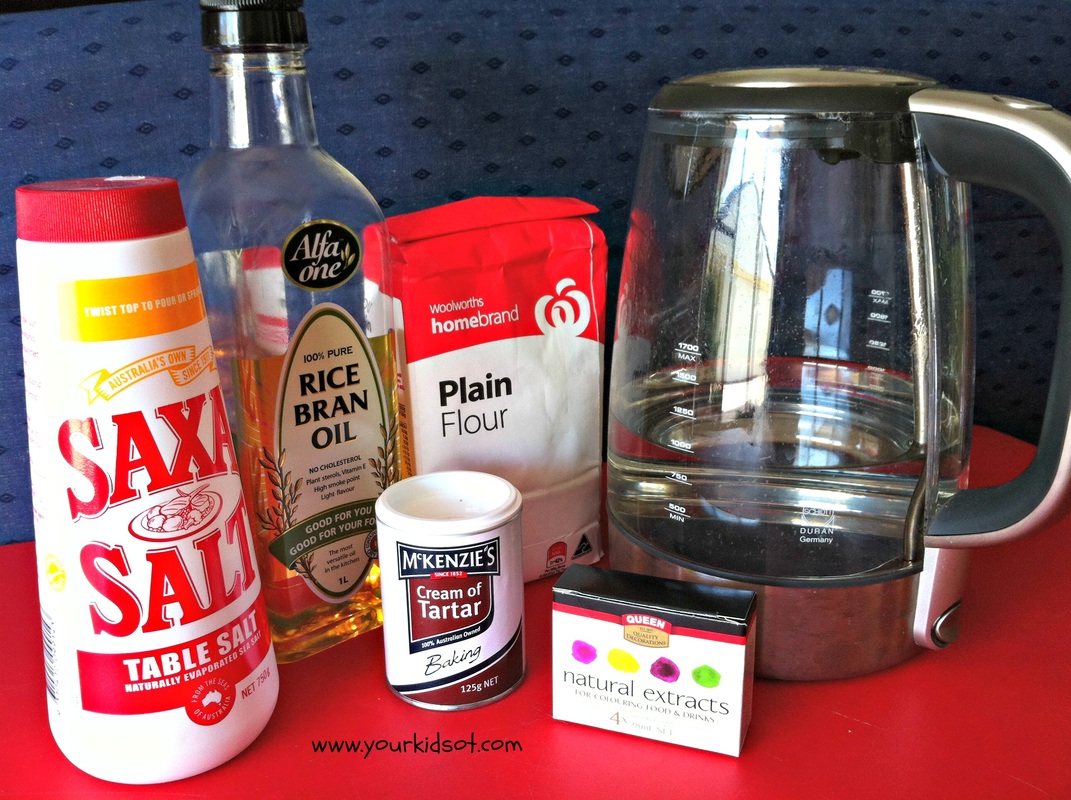
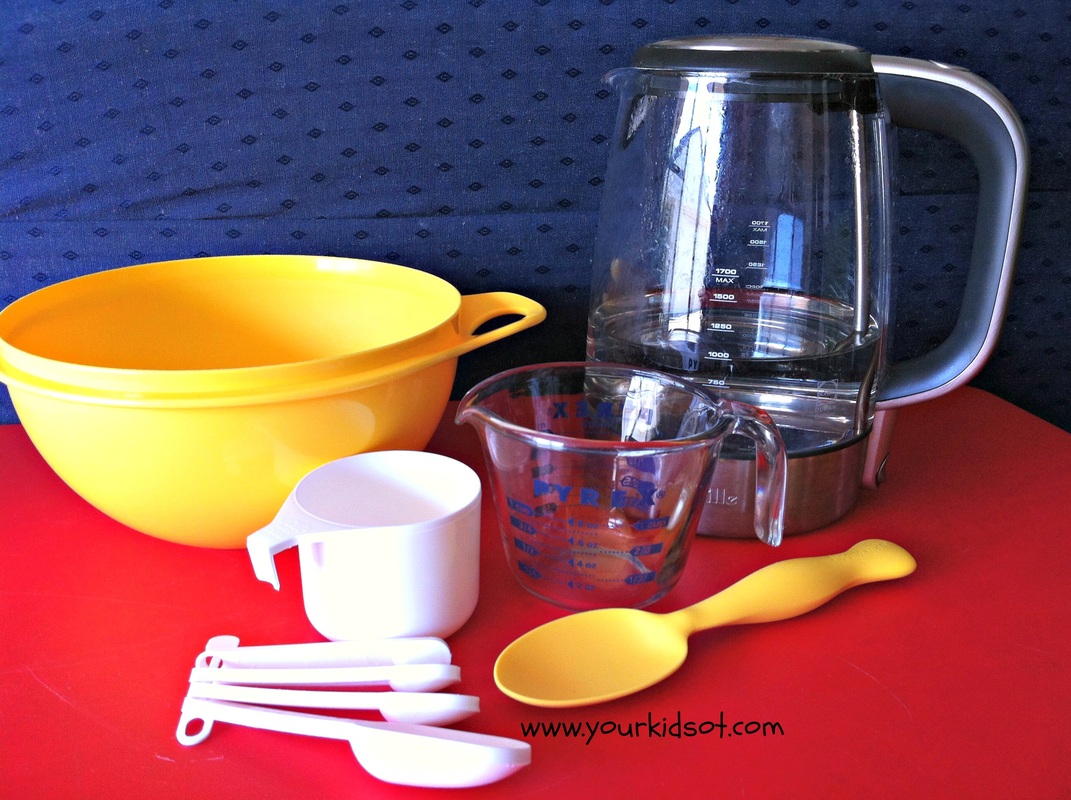
Older children may be able to assist with obtaining the equipment needed using the list or photograph provided.

Adult supervision is required when pouring the boiling water.  You may also like to add extra oil or water in the final stages depending on the humidity on the day of making it. 

Ingredients
2 cups plain flour
4 Tabs cream of tartar
2 Tabs cooking oil
1 cup salt
food colouring
1 cup hot water

Equipment needed
Mixing bowl                      
Mixing spoon
Measuring cups               
Measuring spoons
Kettle

Picture
Playdough Ingredients
Picture
Playdough equipment needed.
Method
1. Place the flour, cream of tartar, cooking oil and salt into the mixing bowl. Stir.
2. Boil the water in a kettle.  Measure 1 cup of water and gradually pour this into the mixing bowl.  Stir carefully.
4. Put the dough onto your tabletop and knead until it forms a smooth ball.
5. Divide the mixture into 2 and add food colouring.
6. Knead each ball of dough until smooth.
7. Store in an airtight container.


{Note: You can use one colour if that is preferred}.
Picture
Picture
Picture
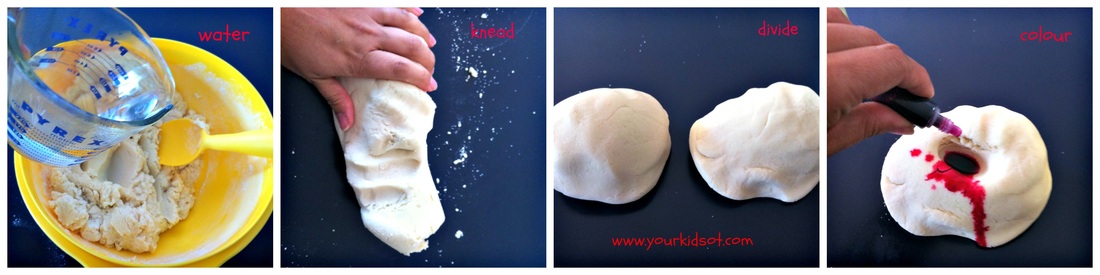
This recipe is available as a free instant pdf from the Your Kids OT Shop.  You will find a child friendly layout which will also be used for future recipes you will find at Your Kids OT.  The playdough recipe includes step by step instructions on a single A4 page version as well as a larger three A4 page version with larger photographs. 

Have you made playdough before? Make some this weekend!
Picture
Picture
Playdough recipe
Picture collage perfect to pin to your Pinterest board.
Your Kids OT
Picture
Forward>>

    Author

    Hi, I'm Cindy and I am an Occupational Therapist. I enjoy working creatively with children to see them reach their potential. Read more about me here.

    Picture
    Picture
    SEARCH THIS SITE

    RSS Feed

    Picture

    Archives

    October 2023
    September 2023
    August 2023
    July 2023
    May 2023
    March 2023
    February 2023
    January 2023
    December 2022
    November 2022
    September 2022
    August 2022
    April 2022
    March 2022
    February 2022
    January 2022
    December 2021
    November 2021
    October 2021
    September 2021
    August 2021
    July 2021
    June 2021
    May 2021
    April 2021
    March 2021
    February 2021
    January 2021
    December 2020
    November 2020
    October 2020
    September 2020
    August 2020
    July 2020
    June 2020
    May 2020
    April 2020
    March 2020
    January 2020
    December 2019
    November 2019
    October 2019
    August 2019
    June 2019
    April 2019
    March 2019
    February 2019
    January 2019
    December 2018
    November 2018
    October 2018
    September 2018
    August 2018
    April 2018
    March 2018
    February 2018
    January 2018
    December 2017
    November 2017
    October 2017
    September 2017
    August 2017
    July 2017
    June 2017
    May 2017
    April 2017
    March 2017
    February 2017
    January 2017
    December 2016
    November 2016
    September 2016
    August 2016
    July 2016
    June 2016
    May 2016
    April 2016
    March 2016
    February 2016
    January 2016
    December 2015
    November 2015
    October 2015
    September 2015
    August 2015
    July 2015
    June 2015
    May 2015
    April 2015
    March 2015
    February 2015
    January 2015
    December 2014
    November 2014
    October 2014
    September 2014
    August 2014
    July 2014
    June 2014
    May 2014
    April 2014
    March 2014
    February 2014
    January 2014

    Categories

    All
    Acessibility Notes
    Alphabet
    Ask An OT
    Bilateral-coordination
    Bilateral-coordination
    Christmas
    Concepts And Cognition
    Easter
    Evidence Based Practice
    Fine Motor
    Freebie
    Functional Skills For Kids
    Giveaway
    Gross Motor
    Guest Blogger
    Handwriting And Writing
    Homemade
    Interoception
    Kids In The Kitchen
    Lego-challengee27c5a2753
    Meme
    Organisation
    Other
    Ot Profession
    OT Resources
    Pencil Grasp
    Play
    Printable
    Regulation
    Reviews
    Rewards And Motivation
    School
    Scissor Skills
    Self Help Skills
    Sensory
    Social Skills
    Visual-perception
    Visual-perception
    Website Spotlight
    Welcome
    World Ot Day
    YKOT Shop
    Your Kids Therapy Ideas

    Popular Posts

    Picture
    Picture
    Picture

    Visit Your Kids OT's profile on Pinterest.

Join the YKOT e-newsletter!

Subscribe to get our latest content by email and receive

the SHAPE ROADS PRINTABLE NOW!

Success! Now check your email to confirm your subscription and receive your free printable!

There was an error submitting your subscription. Please try again.

We won't send you spam. Unsubscribe at any time. Powered by ConvertKit

Join our Mailing List!

Subscribe to get our latest content by email and receive

the SHAPE ROADS PRINTABLE NOW as a thankyou!

Success! Now check your email to confirm your subscription and receive your free printable!

There was an error submitting your subscription. Please try again.

We won't send you spam. Unsubscribe at any time. Powered by ConvertKit
Disclaimer: The information on this site is general in nature and should be used for educational  and entertainment purposes. The activities are safe for most children, however, you should consult an Occupational Therapist or health professional to address specific movement, sensory or other medical conditions.  This blog does not replace formal therapeutic professional advice given by a health professional or medical practitioner.  Reviews and endorsements of products will only be made based on my expertise and personal opinion; and deemed worthy of such endorsement. The opinions shared in sponsored content will always be my own and not that of the advertising company or brand. Content, advertising space or posts will be clearly identified if paid, affiliated or sponsored.  Affiliate links may  be found throughout this website in advertising. This means that if you follow through with a purchase from these links, Your Kids OT will receive a percentage of the sale. Your Kids OT undertakes to meet the requirements of the "Social Media Policy" as published by Australian Health Practitioner Regulation Agency (AHPRA).  Further information about this policy can be found here.

Find me


Follow me

Visit Your Kids OT's profile on Pinterest.
Picture

About me

Author

Hi, I'm Cindy and I am an Occupational Therapist. I enjoy working creatively with children to see them reach their potential. Read more about me here.

Picture
Copyright © 2017 Your Kid OT